Event creation and management in ShadowPOS offers tons of flexibility to keep track of all your store's fun customer-centric activities!
Visit Events > Events
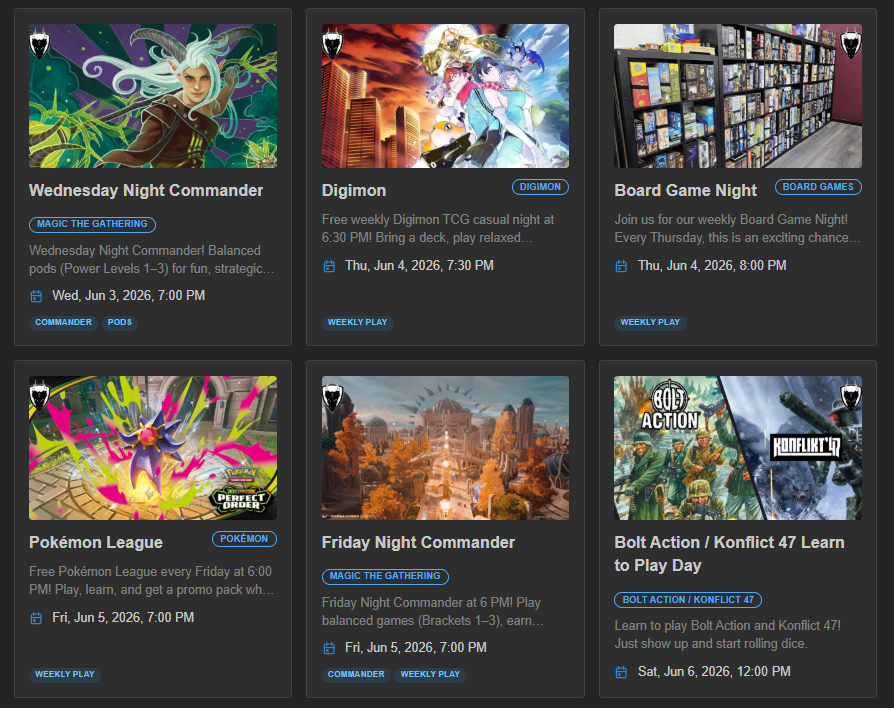
at a glance: Events page (HQ)
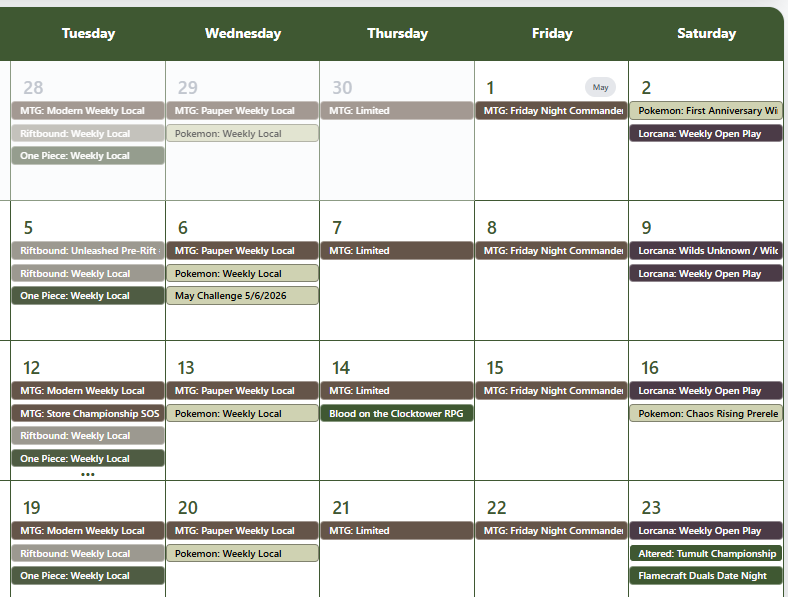
at a glance: Events Calendar (webstore)
Creating / modifying an event
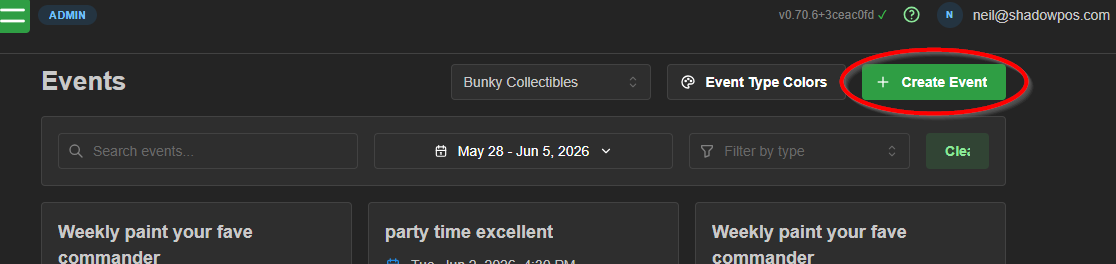
Choose an existing event to modify or click +Create Event
We'll cover these four sections:
- Section 1: Description and Details
- Section 2: Images and Pricing & Registration
- Section 3: Venue and Additional Details
Section 4: Additional Information (optional required customer info)
Fill out all information pertaining to your event in the new Create Event page.
Section 1: Description and Details
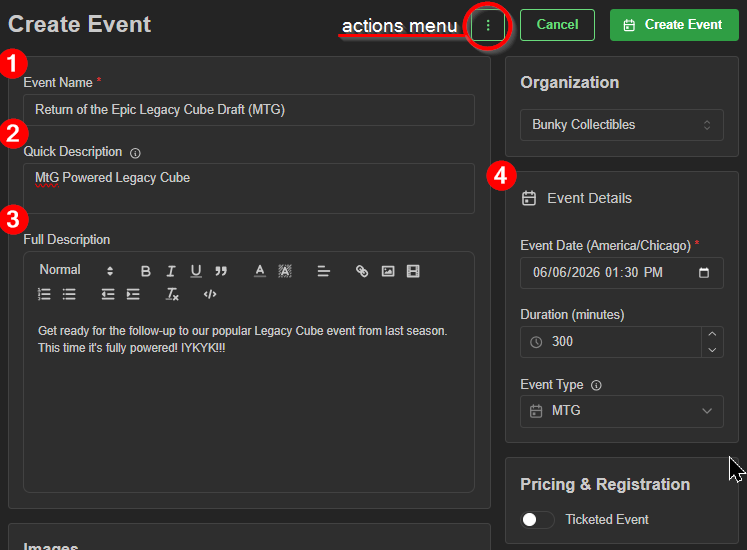
- Event Name
- Quick Description is displayed on the event calendar as a preview text
- Full Description is displayed when an event page is visited directly
- Event Details
-Event Date: the beginning date/time of the event.
-Duration: how long the event lasts in minutes
-Event Type: appears as a filter option on your website's event calendar; helps customers find specific types of events
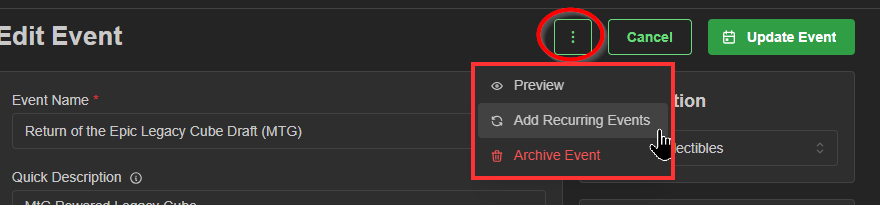
Notice the Actions Menu above. This is where you'll find extra options such as the ability to recur the event:
Section 2: Images and Pricing & Registration
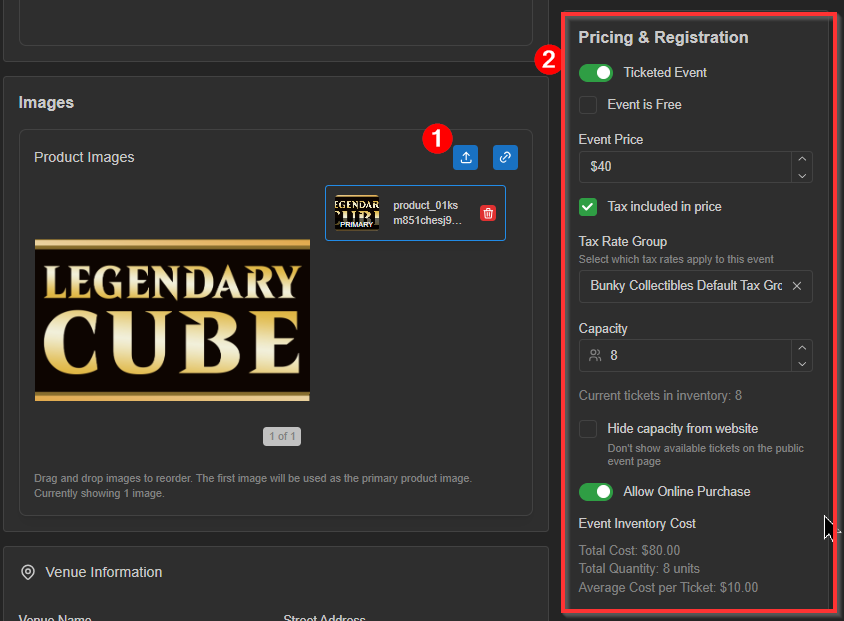
- Images: Upload one or multiple related event images.
Fun fact: .gifs are also compatible! - Pricing and Registration
Ticketed Event (toggle): When toggled on you're given additional fields
Event Price: The price of one customer's admission
Tax Included in Price (checkbox): When checked, your event price is lowered so that when applicable tax is attached, the total a customer pays equals the event price entered above.
Tax Rate Group: Your store's default tax group is selected automatically.
Capacity: Sets the inventory of the event item to the quantity entered
Hide capacity from website: Won't show available tickets on the public events page
Associate Event Cost (checkbox): This establishes the COGS of the event item.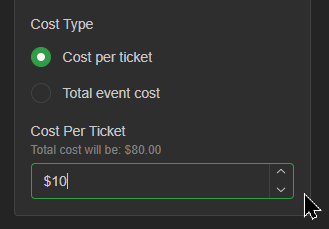 Choose whether you're tracking per ticket unit, or entering the total cost.
Caution: Once you create/save this event, you can't modify the event cost portion of this section again.
Section 3: Venue and Additional Details
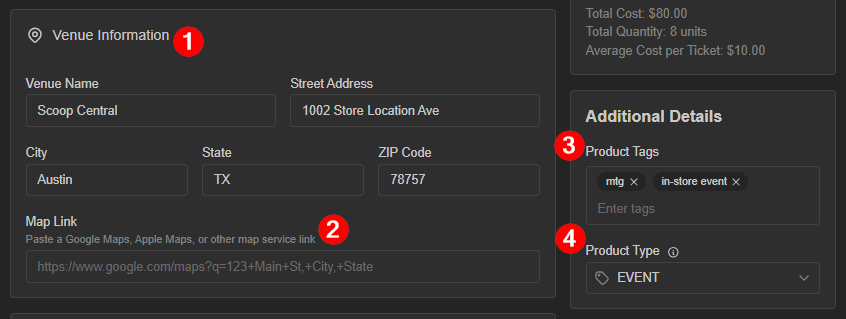
- Venue Information fields: Sometimes it won't be at your store!
- Map Link: For best mobile views of Google or Apple maps, use addresses that begin with 'https://maps.app.goo' or 'https://maps.apple/'
- Product Tags: Helps with searching in the POS and webstore. Useful when the title doesn't contain all the keywords needed for finding quickly.
- Product Type: Helps organize and categorize for better searching and filtering
Section 4: Optional Additional Information (info from customer)
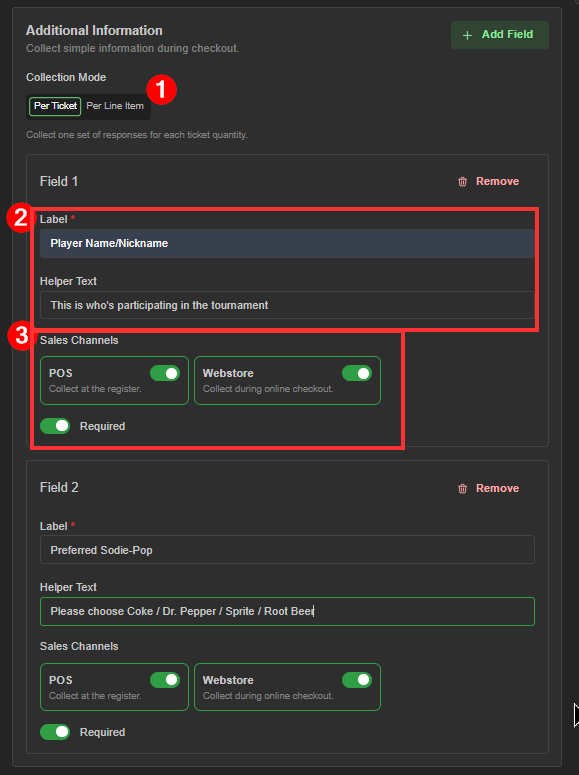
- Collection Mode (toggle)
Per ticket: Requires all information for each quantity purchased of same event.
Per Line Item: Requires all information only once per same event, regardless of quantity purchased. - Field: This is a set of required information for a customer
Label: example) Player Name / Player Nickname / Gamertag
Helper Text: example) Person participating in tournament / What they call you online / Xbox , PSO login name - Sales Channel: Select where the event is available for signup
Required (toggle): When toggled on, the information must be filled out to complete the purchase.
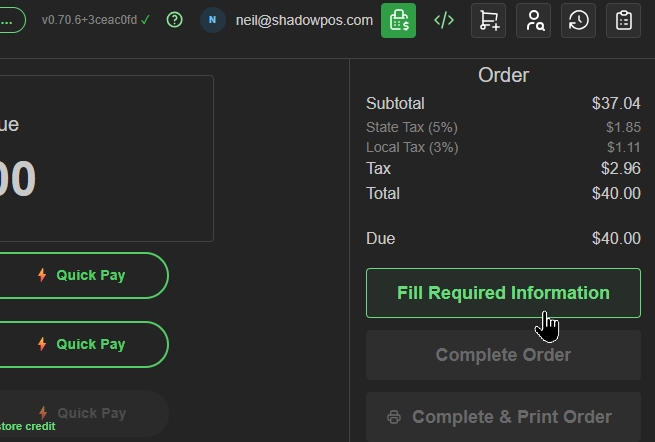
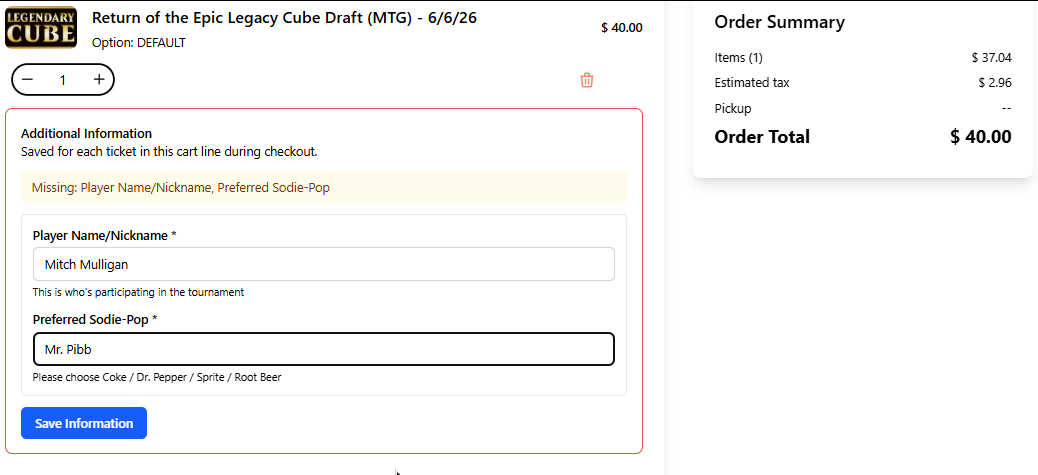
If section 4 is activated, see below how the inputs appear in the both HQ and the webstore:
(button in the point of sale checkout)
(section in the online checkout process)
Now that you've filled out all the event information, click Create Event at the top of the page to save the product.

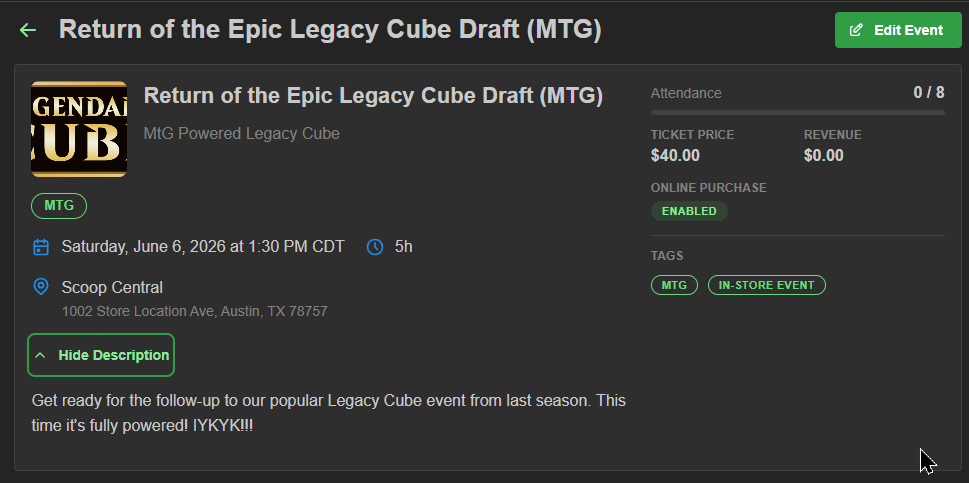
Your event is now available to view/edit conveniently from Settings > Events.
Configuring Event Type Colors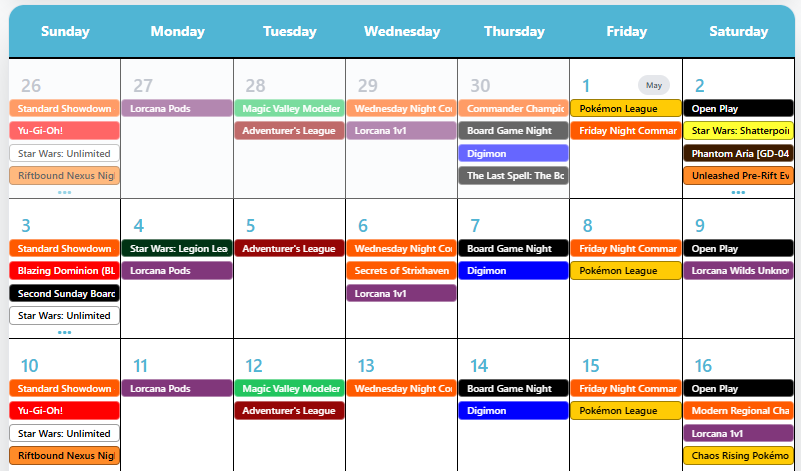
Want to color code your event types for easier identification on your webstore event calendar?
Visit the 'Event Type Colors' menu!
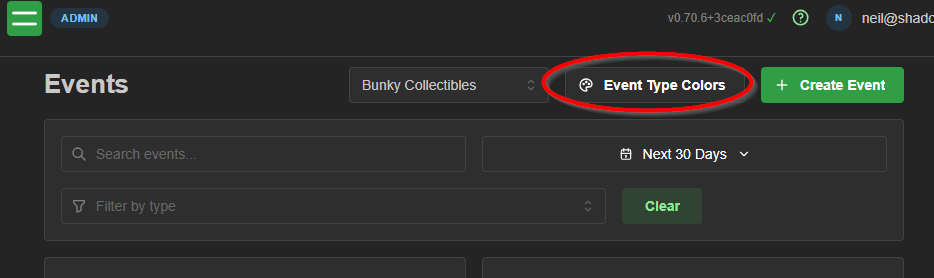
Choose the event type on the left and select a color on the right via visualizer, eyedropper, or by assigning the color code directly. Add as many event types as needed, and don't forget to click 'Save Colors' before exiting the pop-up window.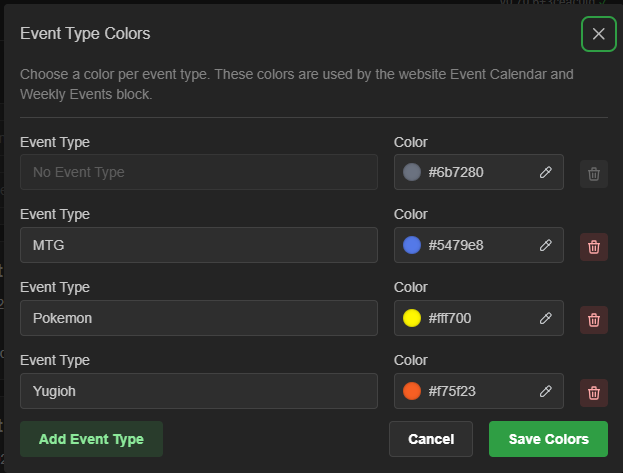
Was this article helpful?
That’s Great!
Thank you for your feedback
Sorry! We couldn't be helpful
Thank you for your feedback
Feedback sent
We appreciate your effort and will try to fix the article