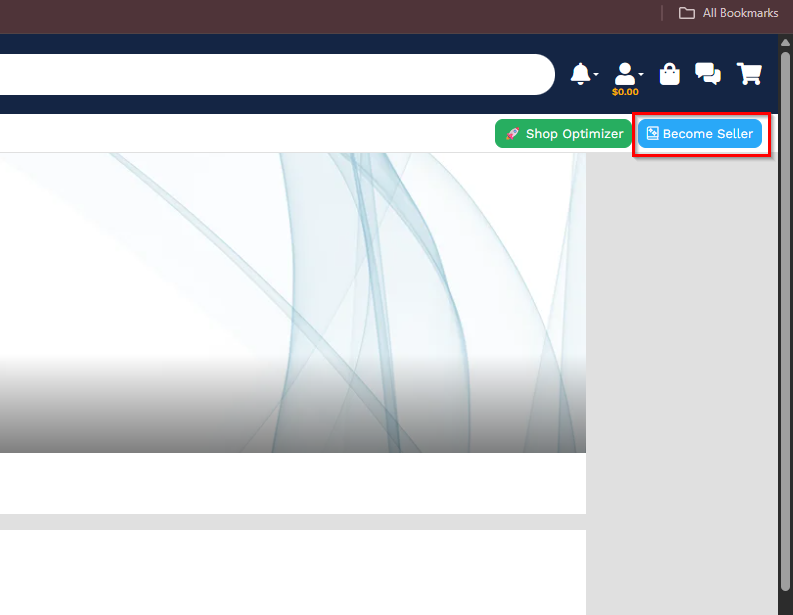
After creating your Card Trader account and enabling sales by filling out the required information in the “Become Seller” section on the homepage, you'll want to link your ShadowPOS and Card Trader accounts!
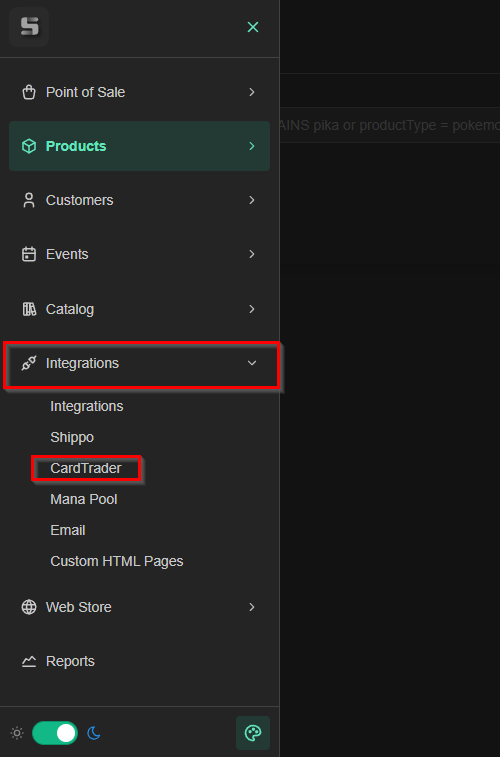
First, you’ll want to locate the Card Trader integration tab in ShadowPOS.
You can do so by clicking the 3 lines in the top left corner, then clicking “Integrations” to expand the sub menu. In this submenu, click “Card Trader” and you’ll be taken to the integration page.
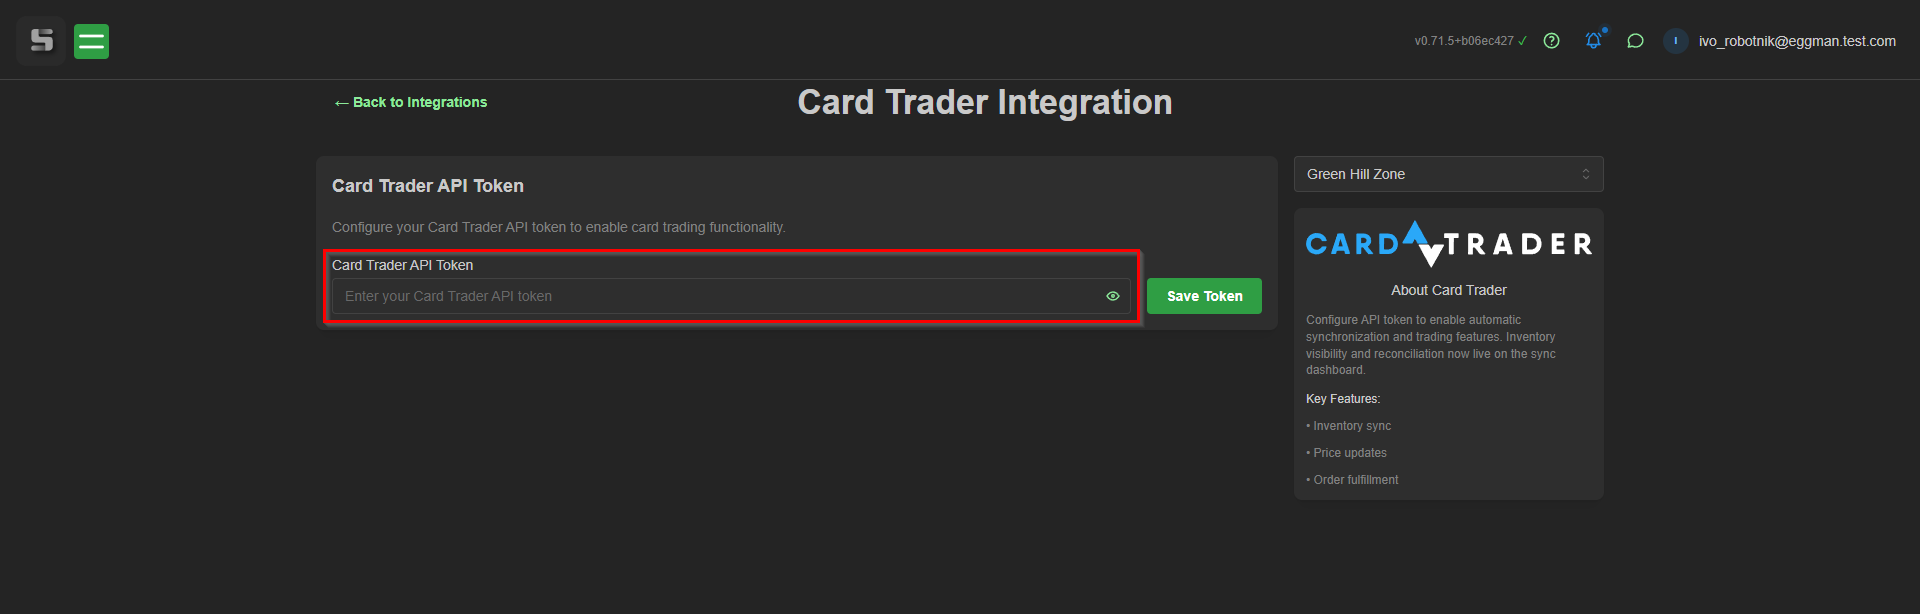
This page will prompt you for a Card Trader API Token to start linking the two accounts.
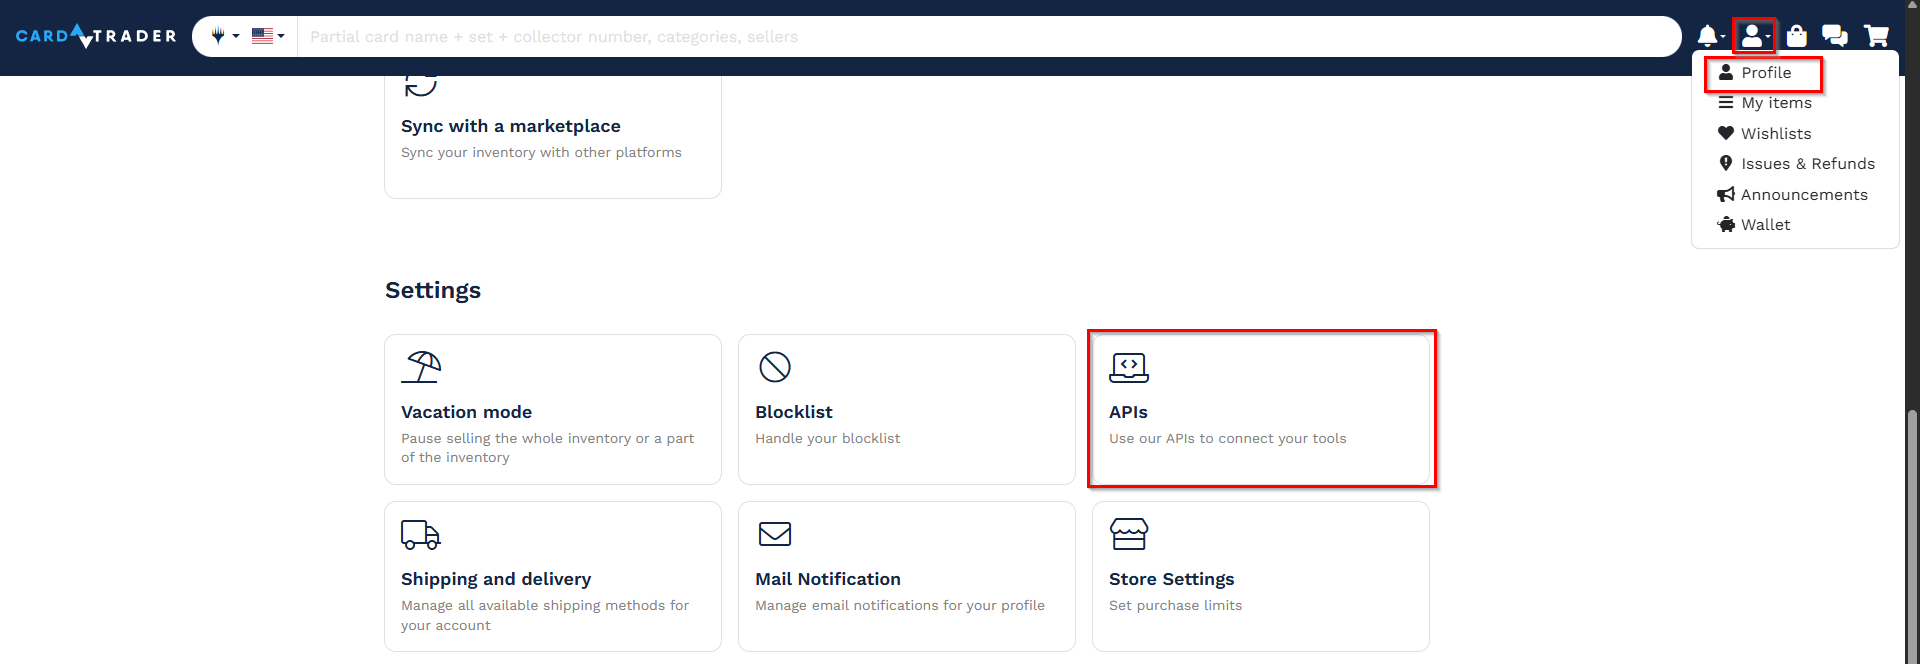
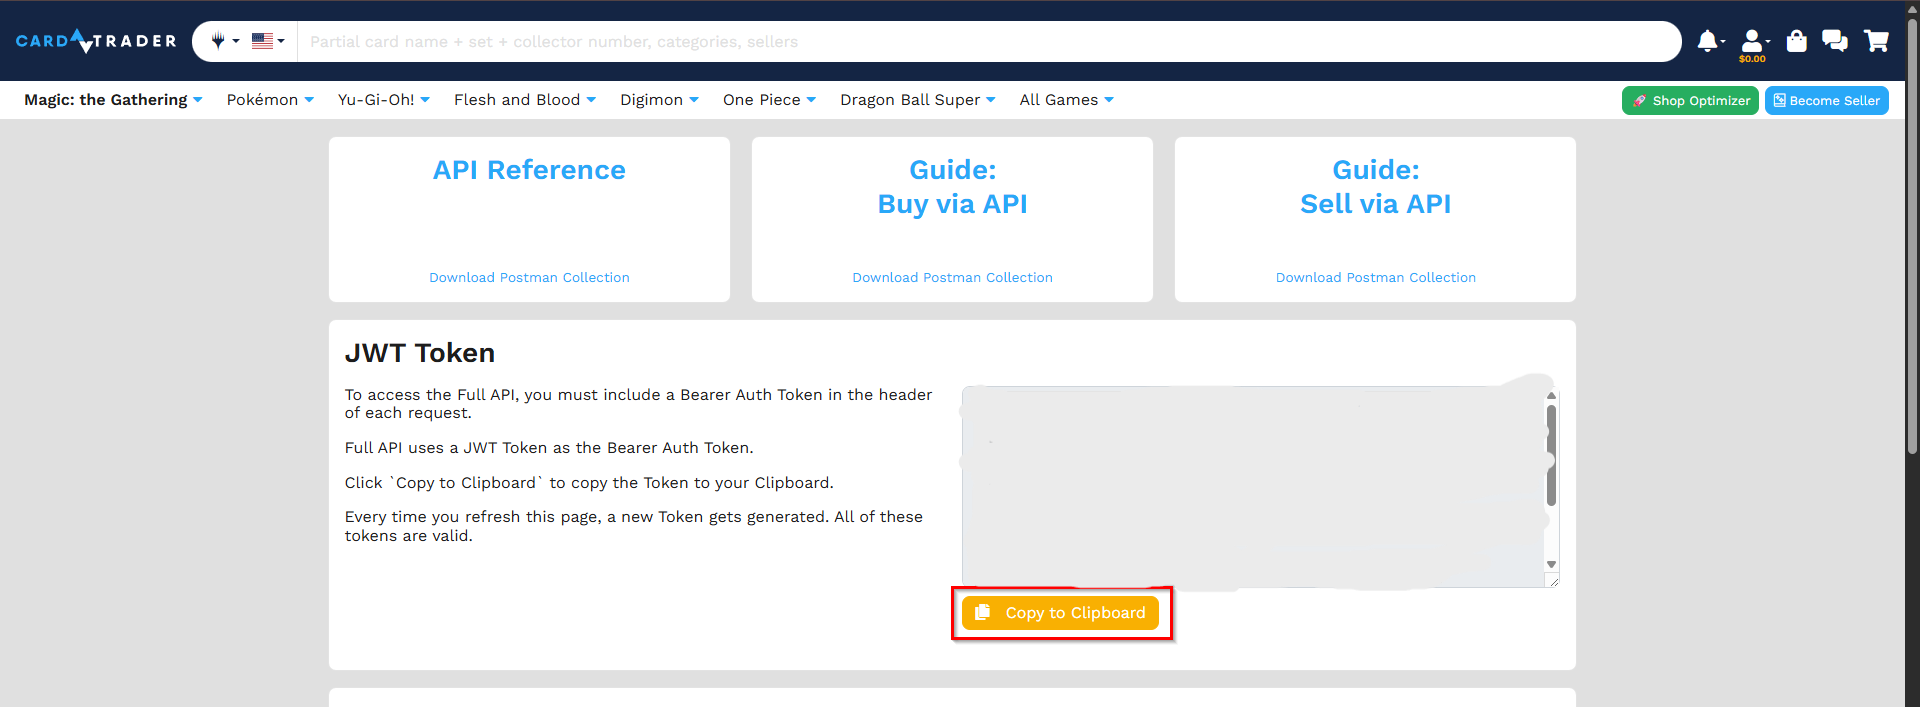
You can find your Card Trader API Token by logging into Card Trader, then clicking the profile icon in the upper right corner. That will open up a drop-down menu where you can select “Profile”. After entering your profile screen, scroll down until you reach the settings and click “APIs”.
In the APIs menu, click on “Copy to Clipboard” located underneath the freshly generated API Token.
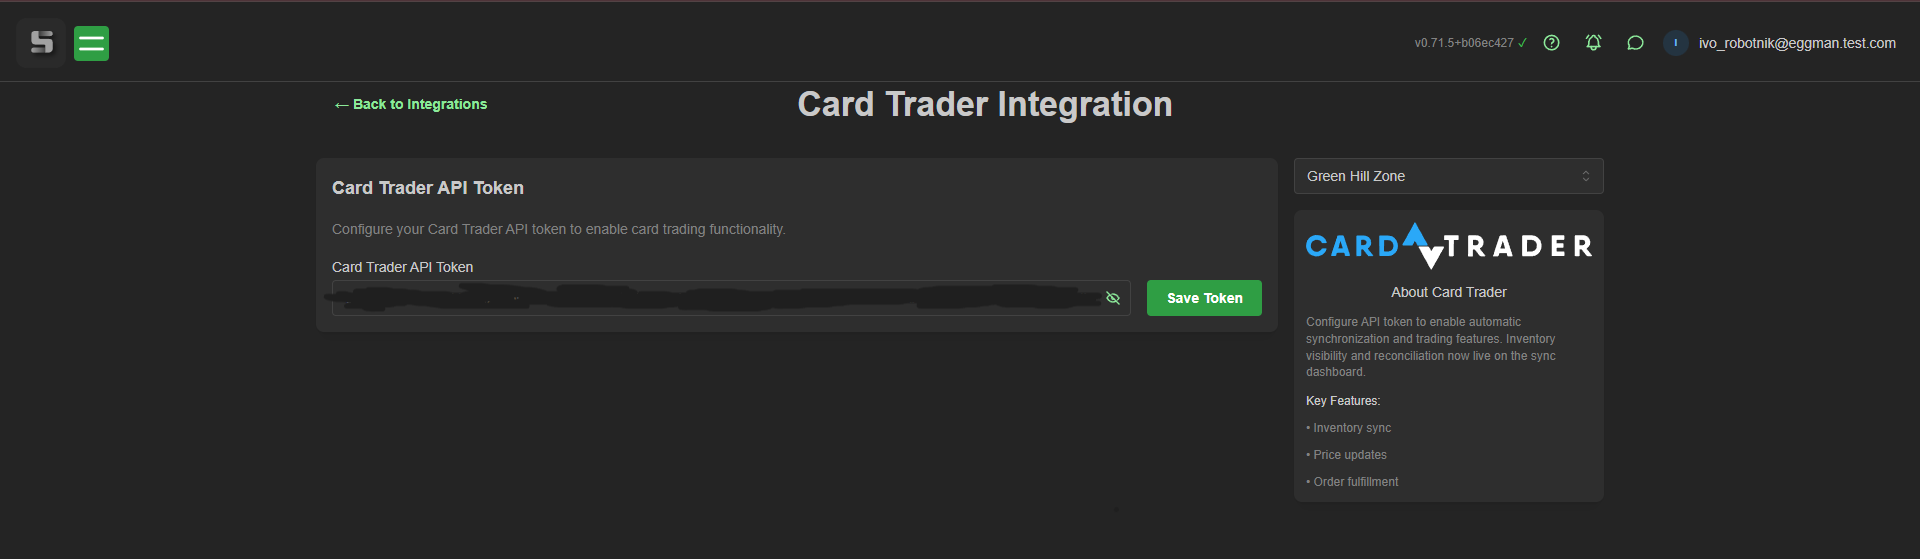
Navigate back to ShadowPOS’s Card Trader Integration page and paste your API Token into the text box. It should be a string of various numbers and characters. Click “Save Token” Congratulations! Your Card Trader and ShadowPOS accounts are now linked, however ShadowPOS still needs the ability to view and complete orders.
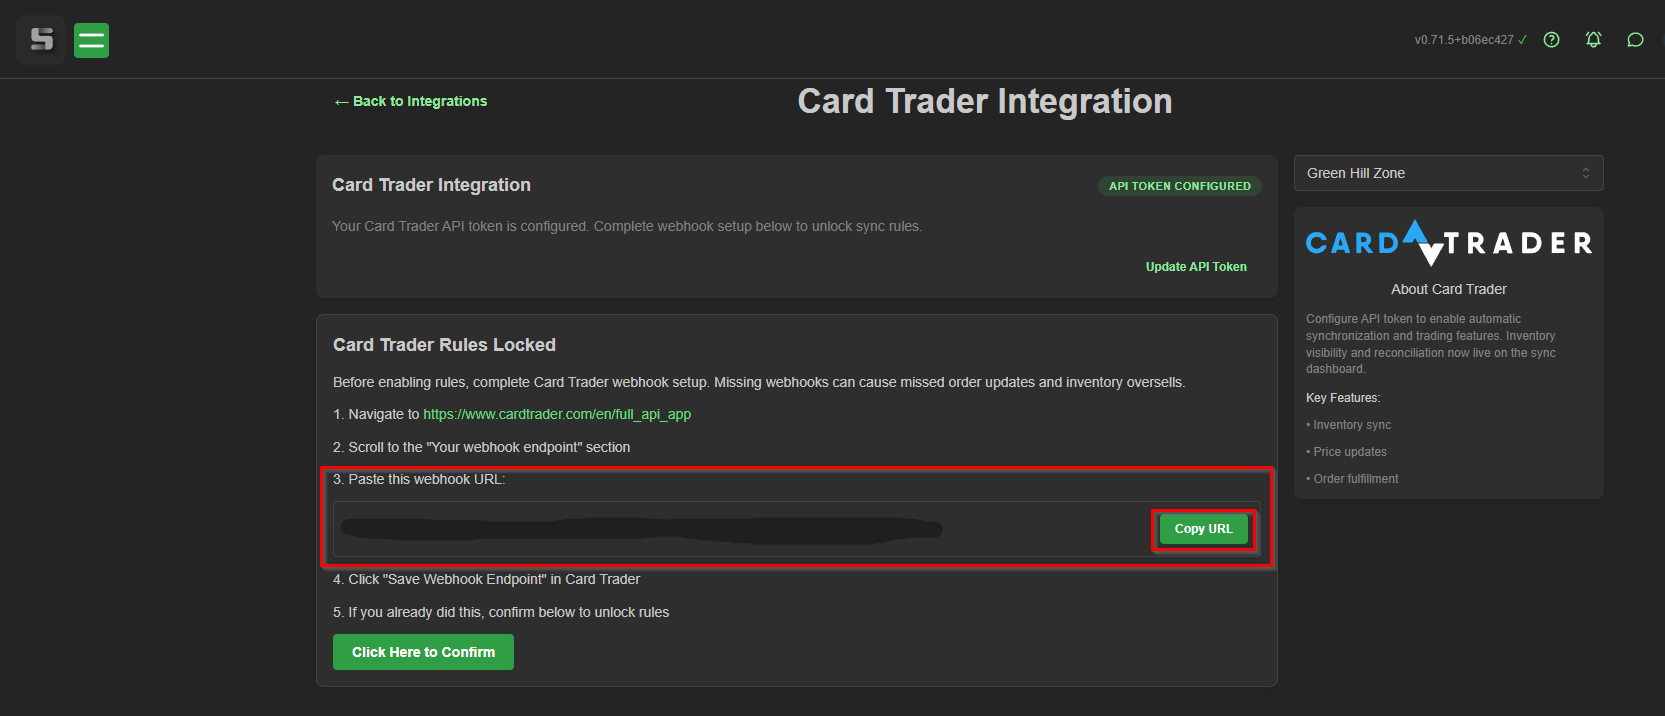
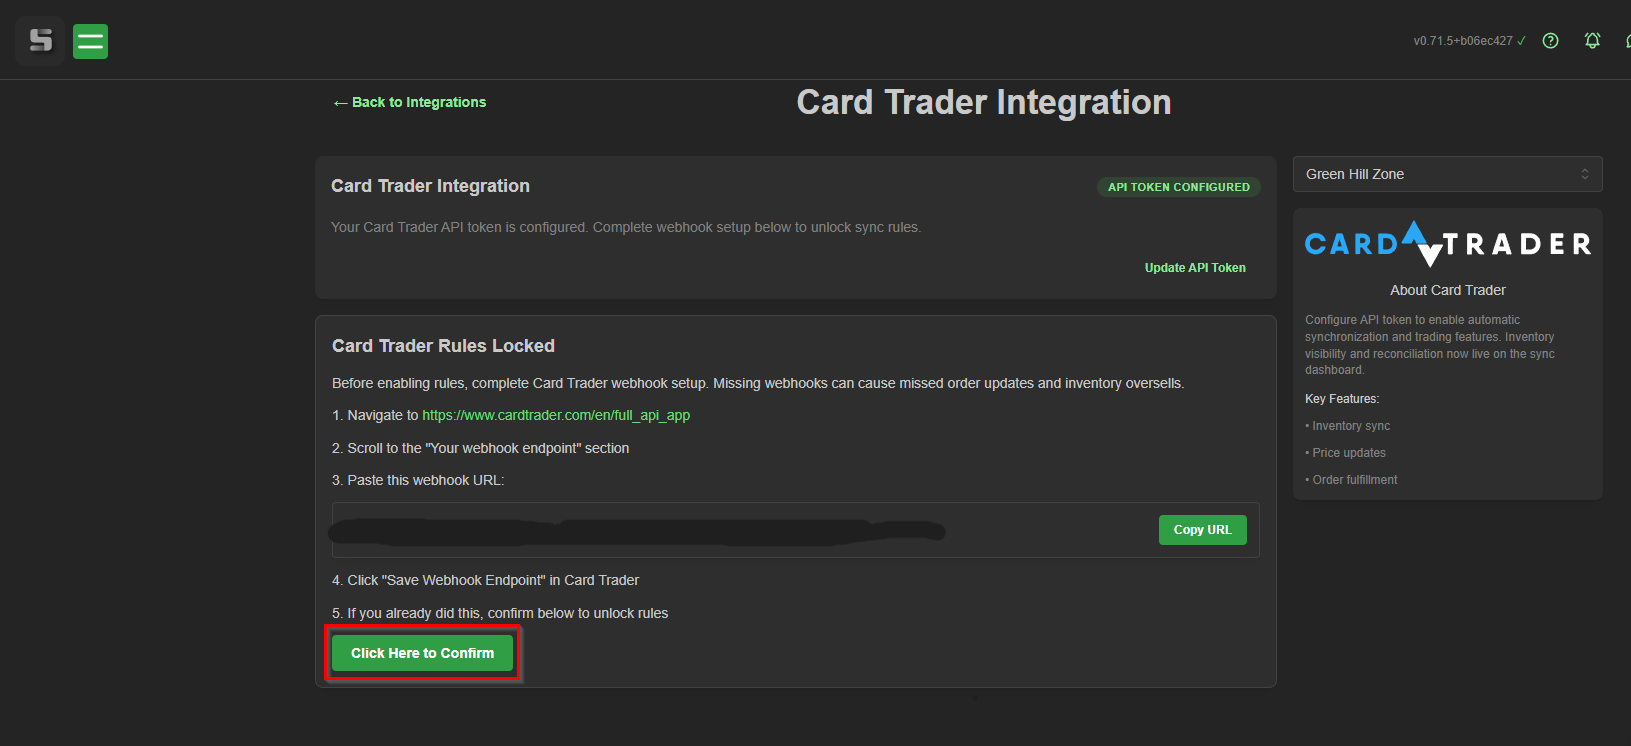
After saving your API Token, ShadowPOS will prompt you to add a Webhook URL to Card Trader. To do so, click “Copy URL” located next to the URL provided in the middle of the box.
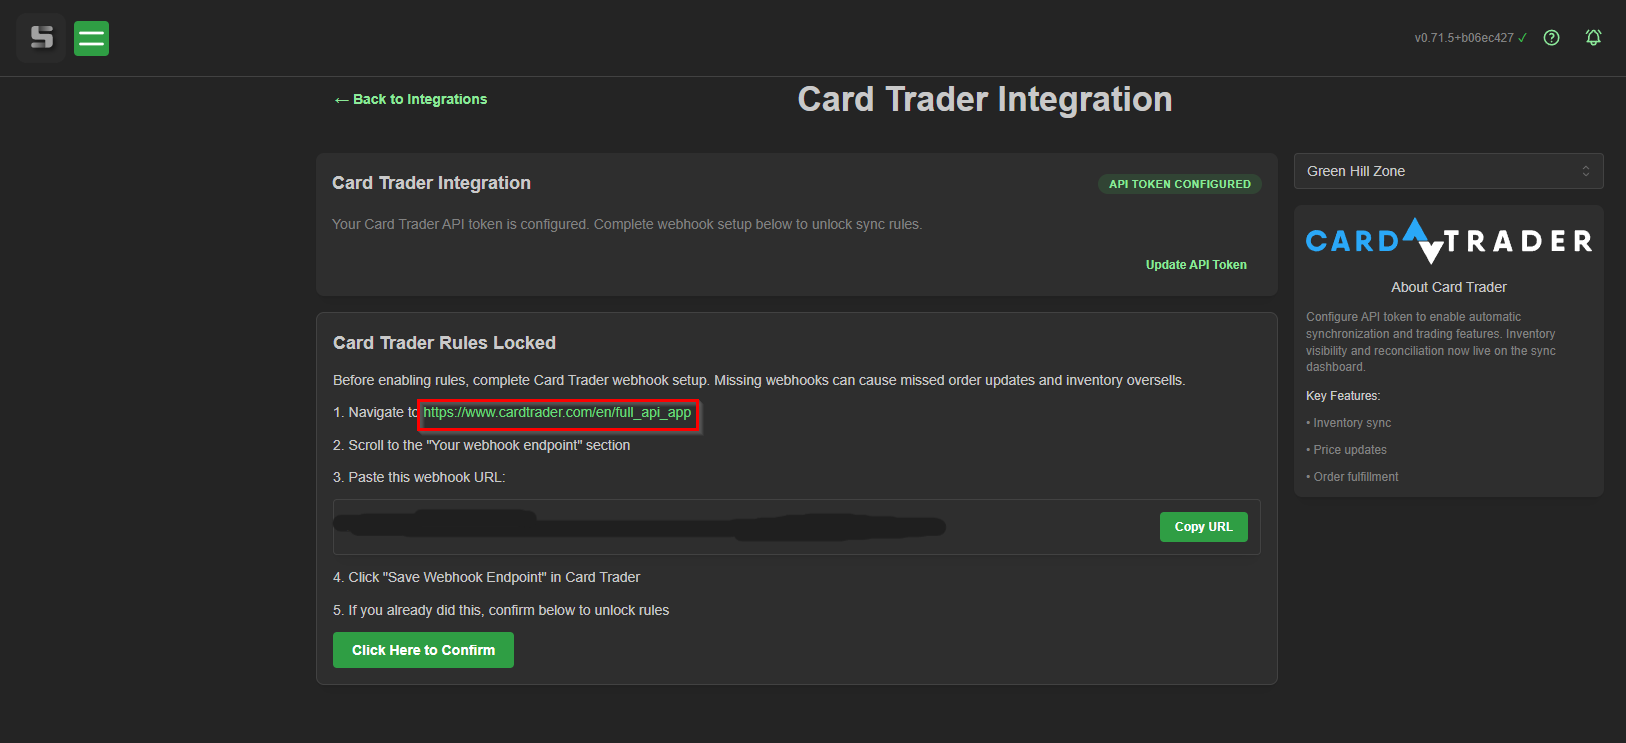
You can either navigate back to your previous tab in Card Trader, or click the link located above the Webhook URL to go back to the APIs page in Card Trader.
Ensure you are signed into the correct account, and scroll down to the bottom of the API’s page. In the “Webhook” section, paste the URL you previously copied into the text box provided. Click “Save Webhook Endpoint”
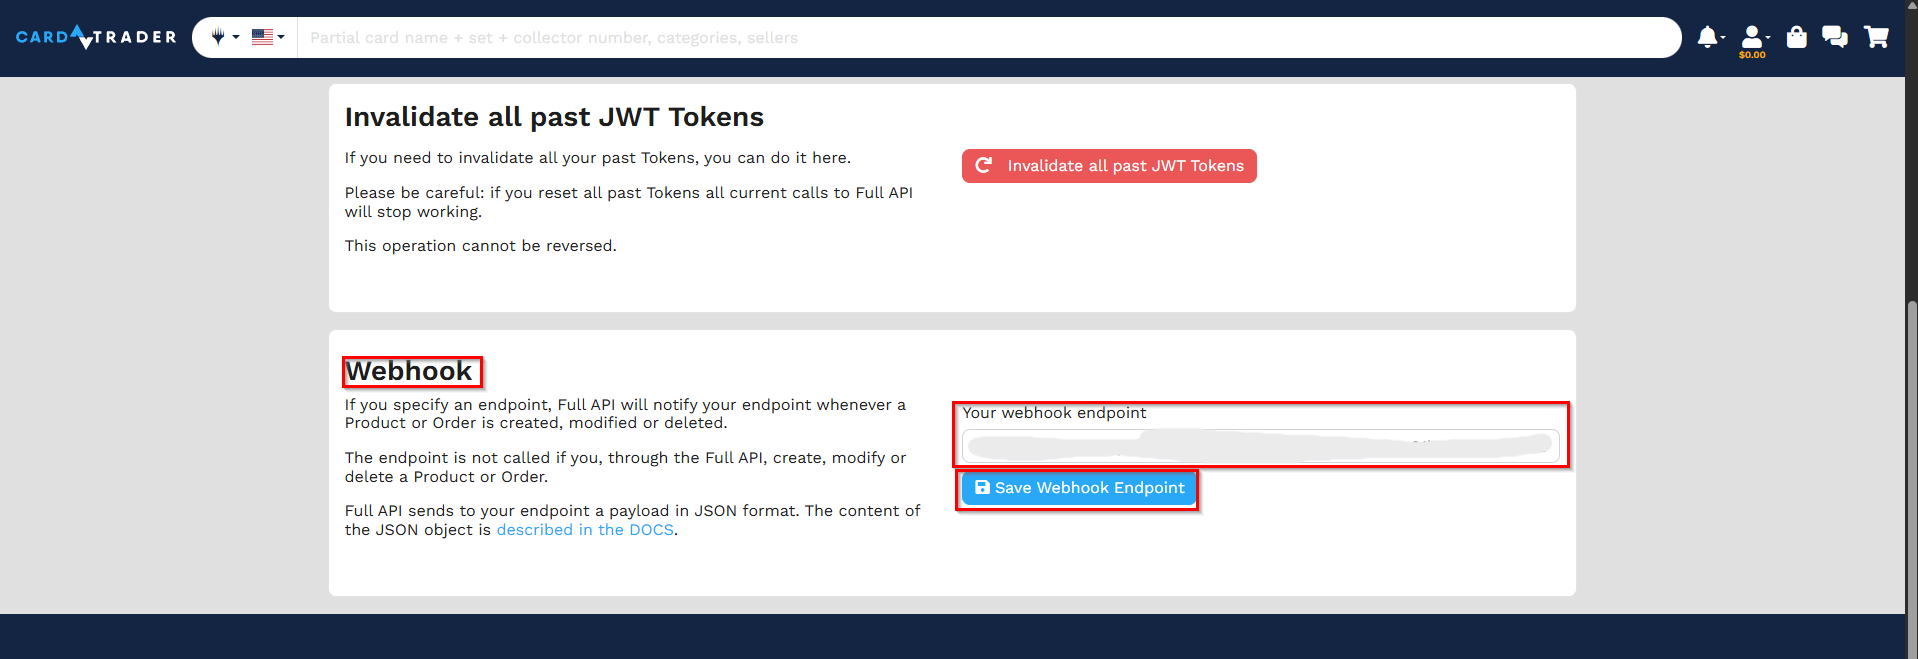
After saving the Webhook Endpoint, you'll get a message that says “Your inventory is synced with another marketplace”, letting you know Card Trader and ShadowPOS can now communicate with one another. Go back to ShadowPOS and click the “Click here to Confirm” button located under the Webhook Endpoint.
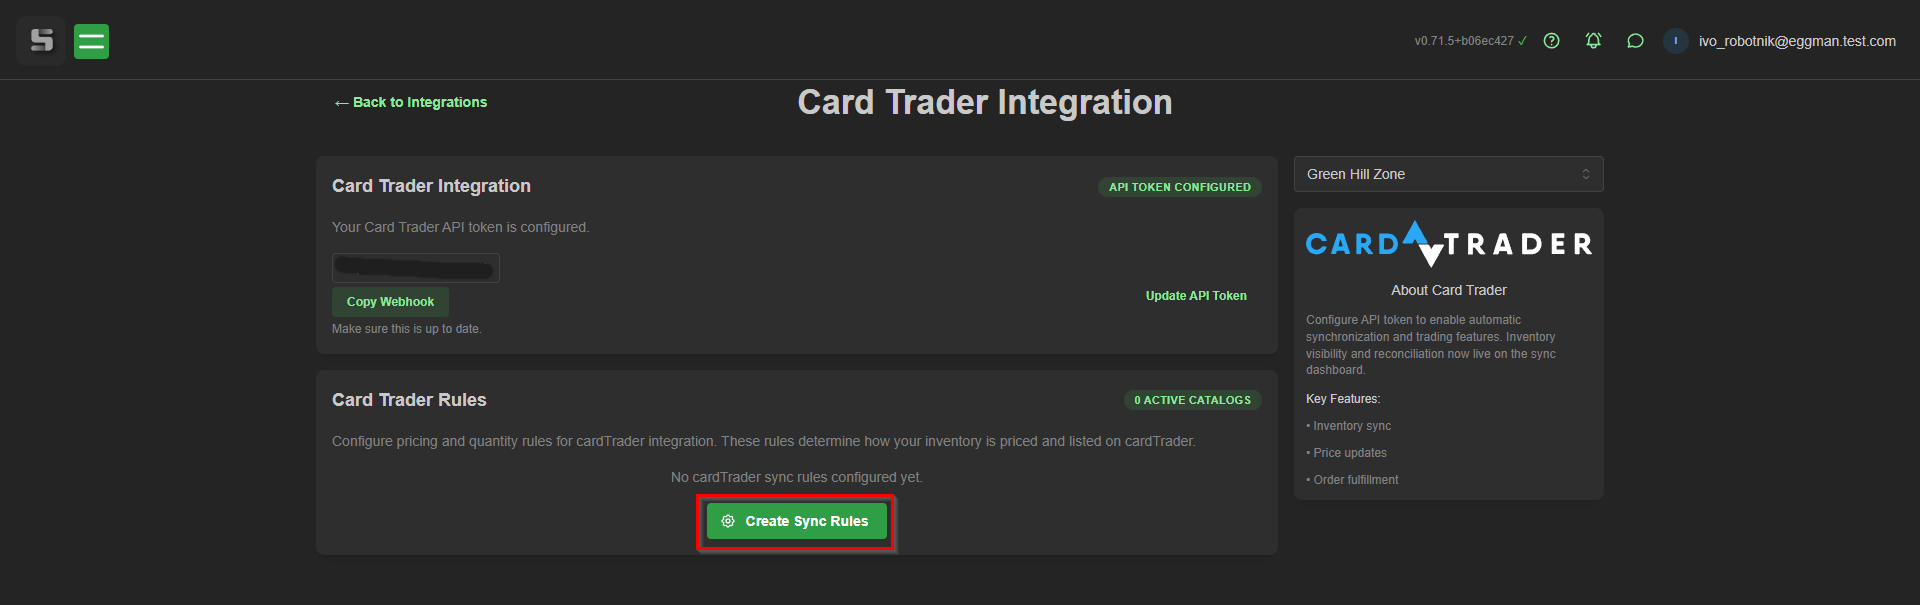
Now that everything is connected, you can set up Sync Rules to dictate what will be sold on Card Trader. Click “Create Sync Rules”.
Before making any rules, you must select which catalogs you have that you'd like to sell on Card trader.
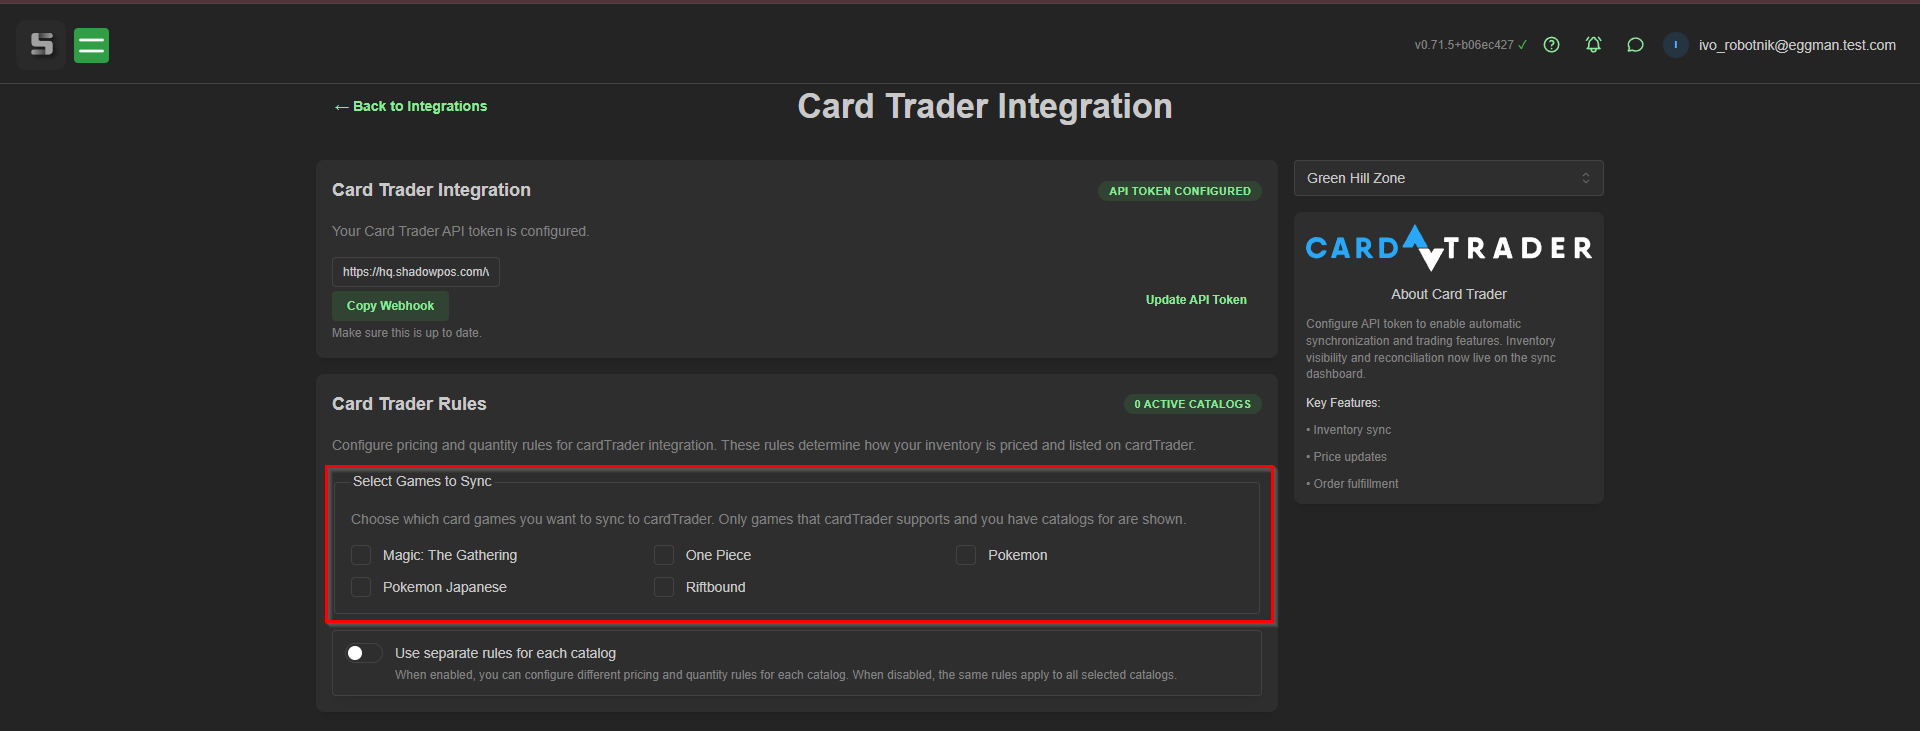
After selecting each of your catalogs, you’ll be given a menu to create your Sync Rules. If you'd like different rules for your various catalogs, you would tick the box that says “Use separate rules for each catalog”.
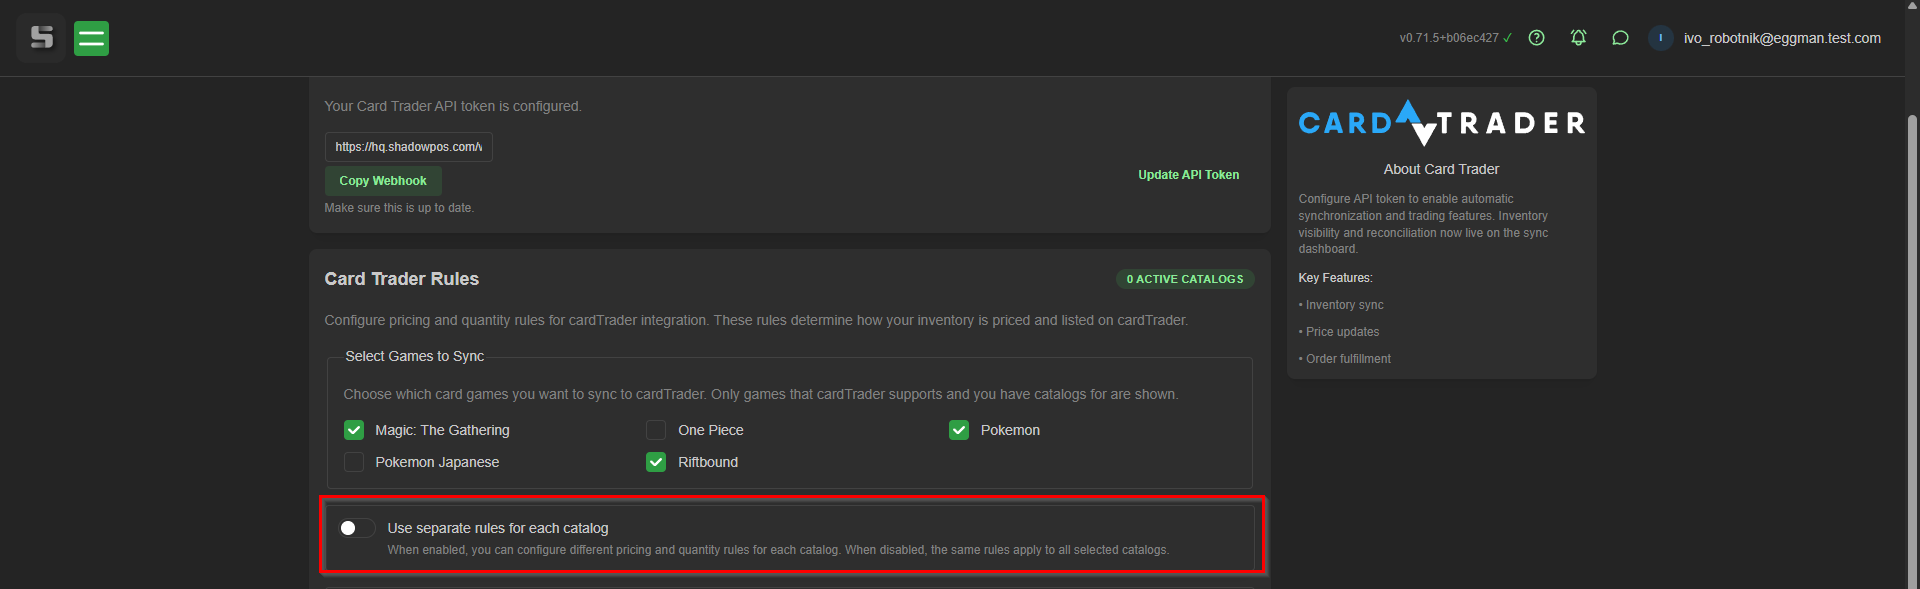
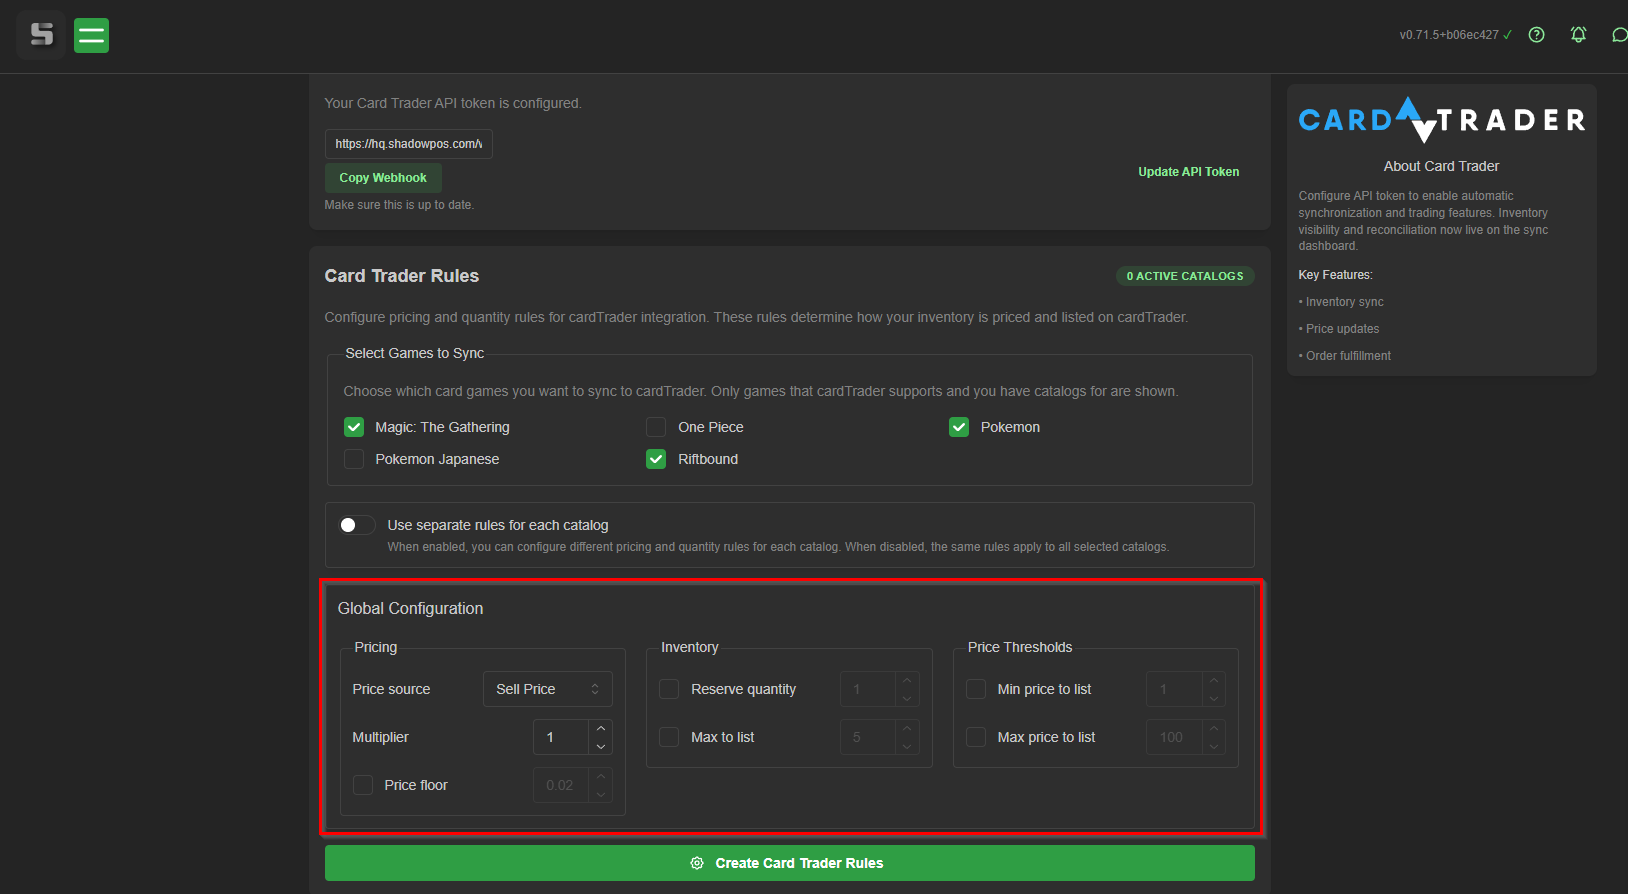
If you choose not to use separate rules for each catalog, you’ll be given a “Global Configuration” box, these are all of the rules that you can set that will cover all of your catalogs on Card Trader.
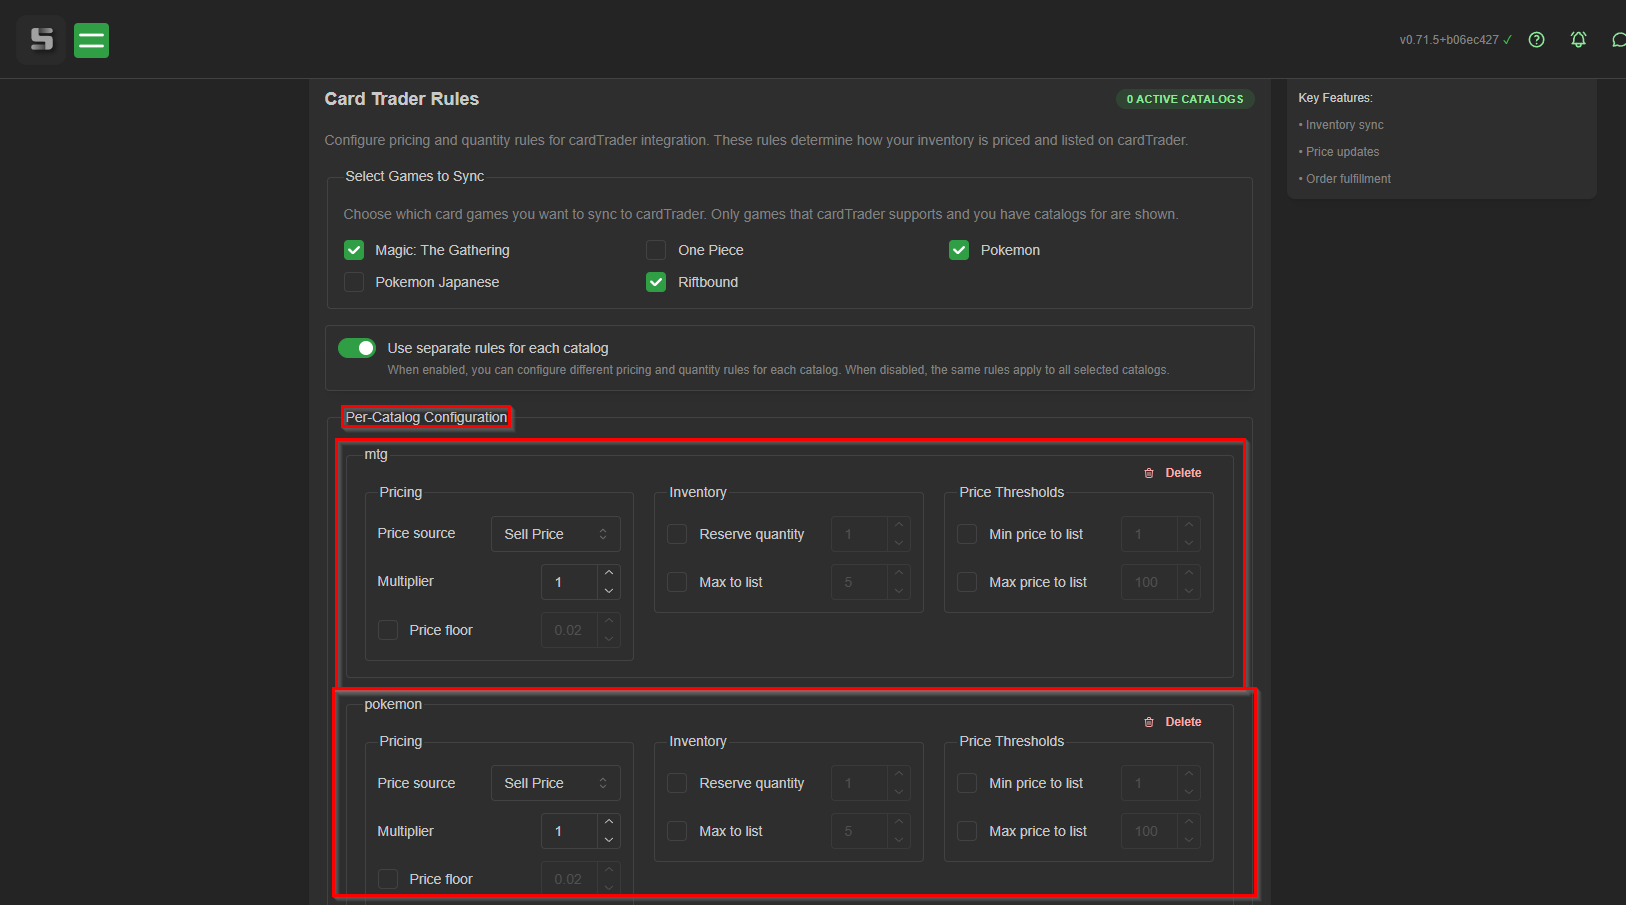
If you choose to use separate rules for each catalog, you will instead be given a “Per-Catalog Configuration” box instead for each catalog, with the same rules as the “Global Configuration”
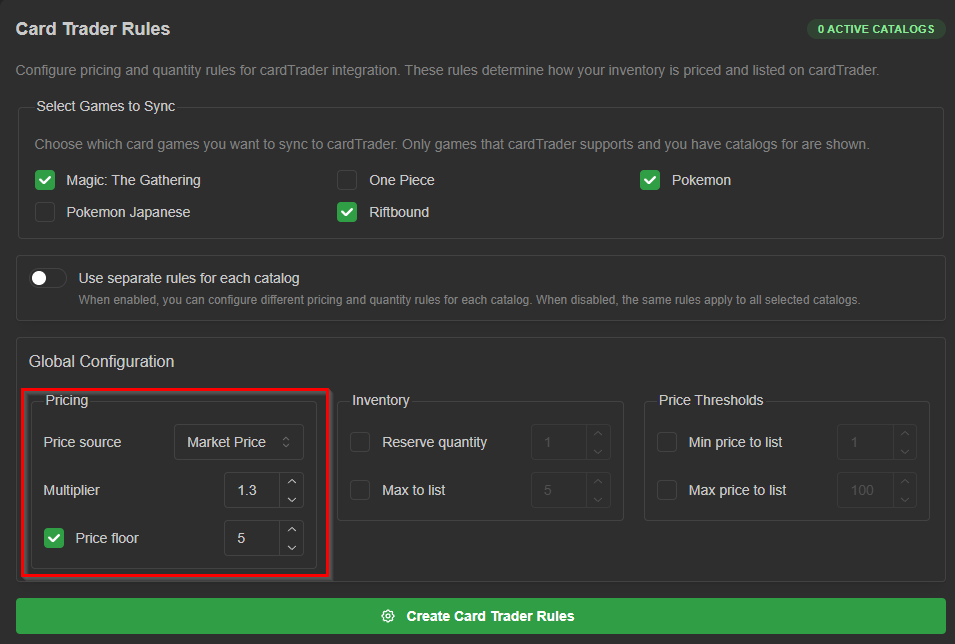
The “Pricing” rules will determine the price your cards are listed for on Card Trader. “Price Source” determines the initial listing price, and can be set to your sell price, market price, low price, and mid price. The “Multiplier” determines if there is a markup on the cards you list on Card Trader. A multiplier of 1 would be the initial listing price, but if you were to change it to 1.2, then the card would list for 1.2 times the price from your price source. “Price Floor” would determine the minimum price a card could be listed for.
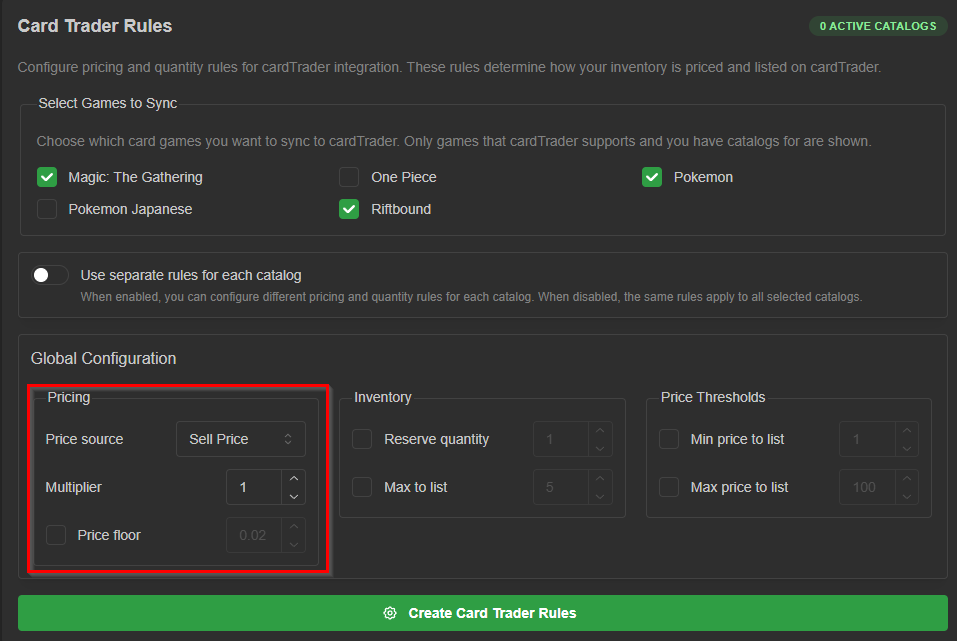
For our example rules, we want our price source to be based off of market price, with a multiplier of 1.3, and a price floor of $5. To do so you would select “Market Price” from the dropdown menu next to “Price source”, set the multiplier to 1.3 and enable a price floor of $5.
The “Inventory” box will determine how much of the product you actually list from each game. The “Reserve Quantity” box will list all cards when unchecked. Checking the box will allow the system to list only cards where you have more than the reserve quantity in stock. The “Max to list” box will also allow all cards to be listed, but will cap the amount listed at the number of your choosing.
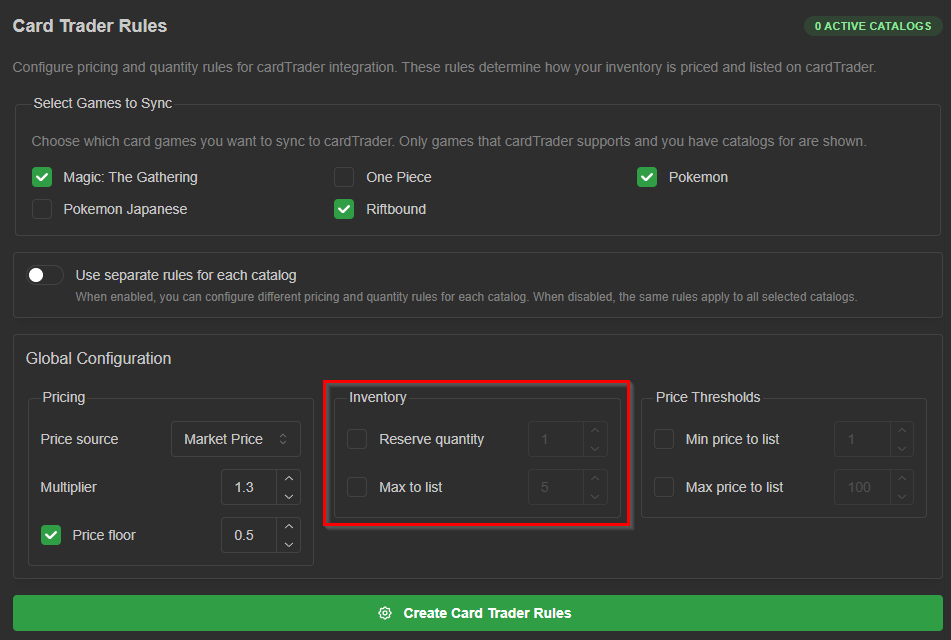
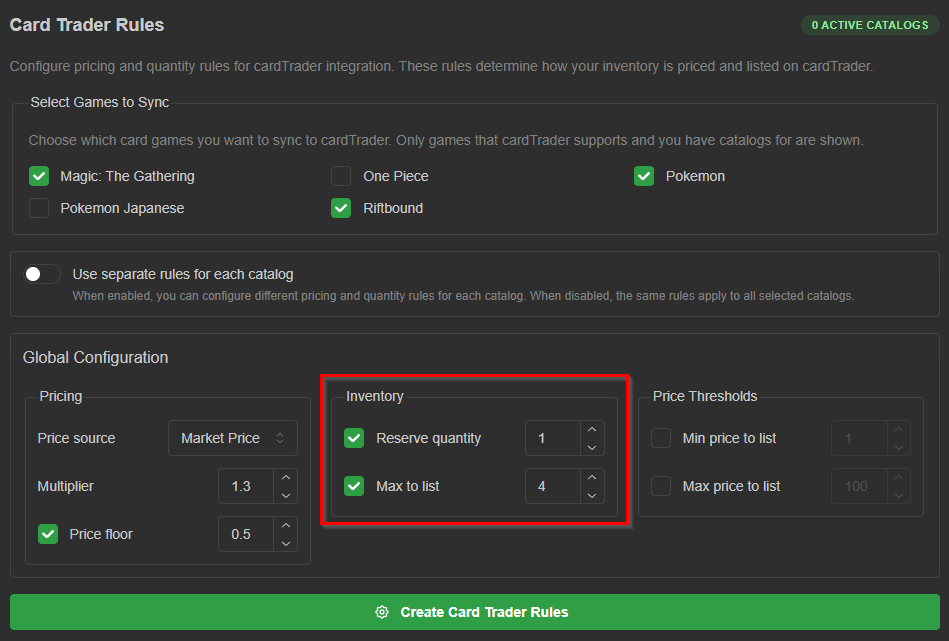
For our example rules, we will also include a reserve quantity of 1, so we always have 1 copy of the card in store that is not listed on Card Trader. We will also set a max to list of 4 so there are never more than 4 copies of a card listed.
The last box is the “Price Thresholds” box. This will determine which cards are listed based on their price. Min price to list would mean anything under that price would not get listed, and max price to list means anything over that price also wouldn’t be listed.
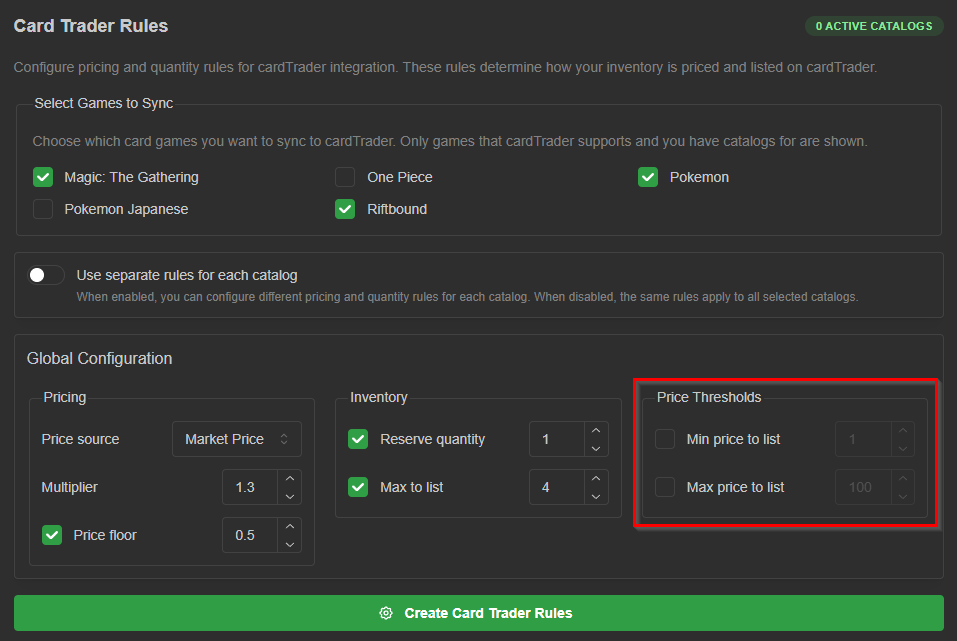
For our example rules, I do not want anything under $5 or over $150 listed on Card Trader, so I would enter “5” in the “Min price to list” box and “150” in the “Max price to list box”.
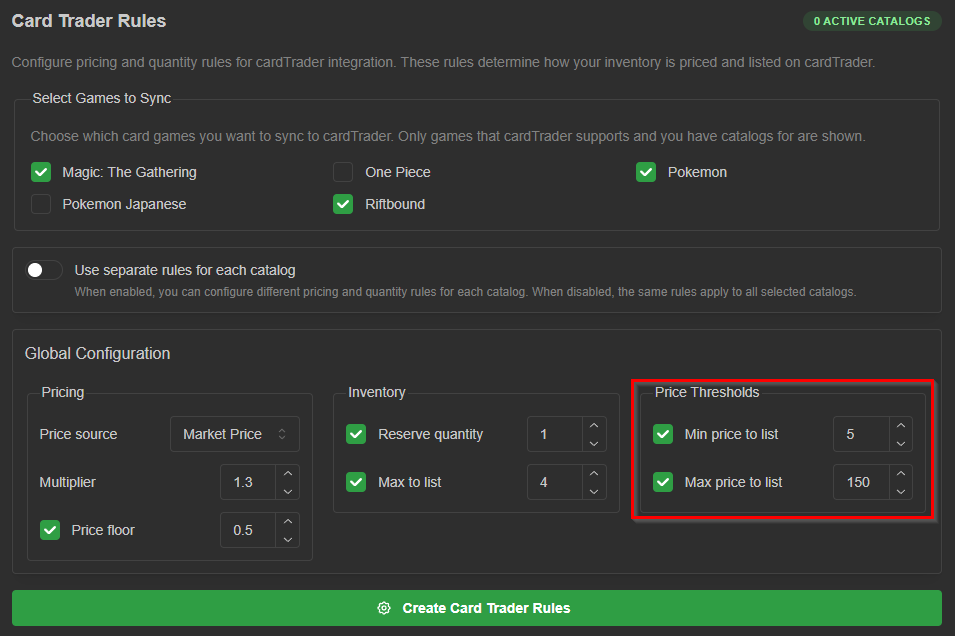
With these example rules in place. We would be listing all Magic: The Gathering, Pokemon, and Riftbound cards priced between $5 and $150. Each card would be listed as 1.3x Market Price, and no more than 4 of the same card would be listed at a time, always saving at least 1.
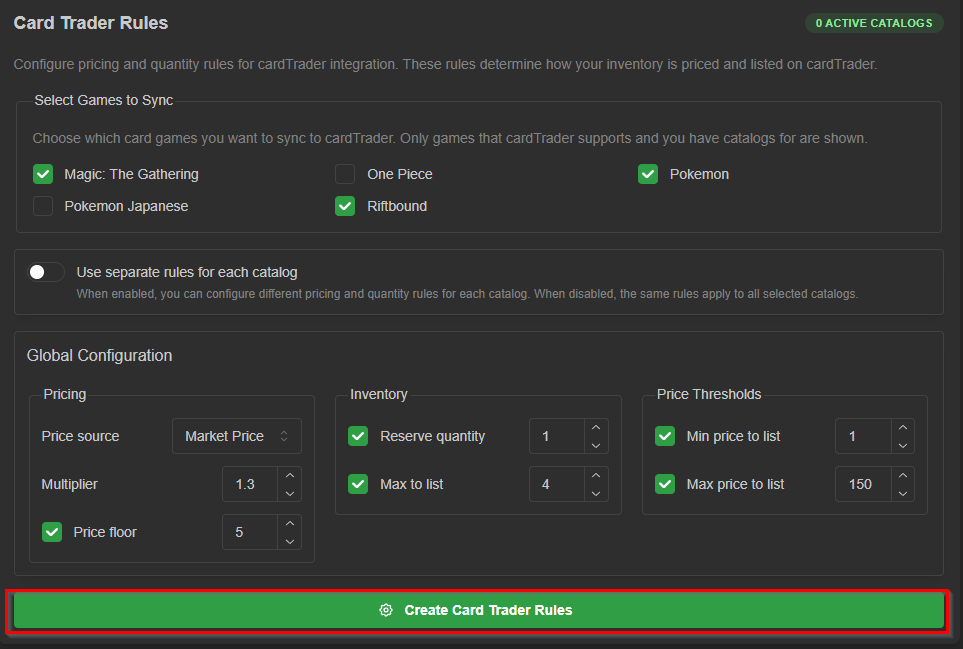
Once you are done creating your rules, click “Create Card Trader Rules”.
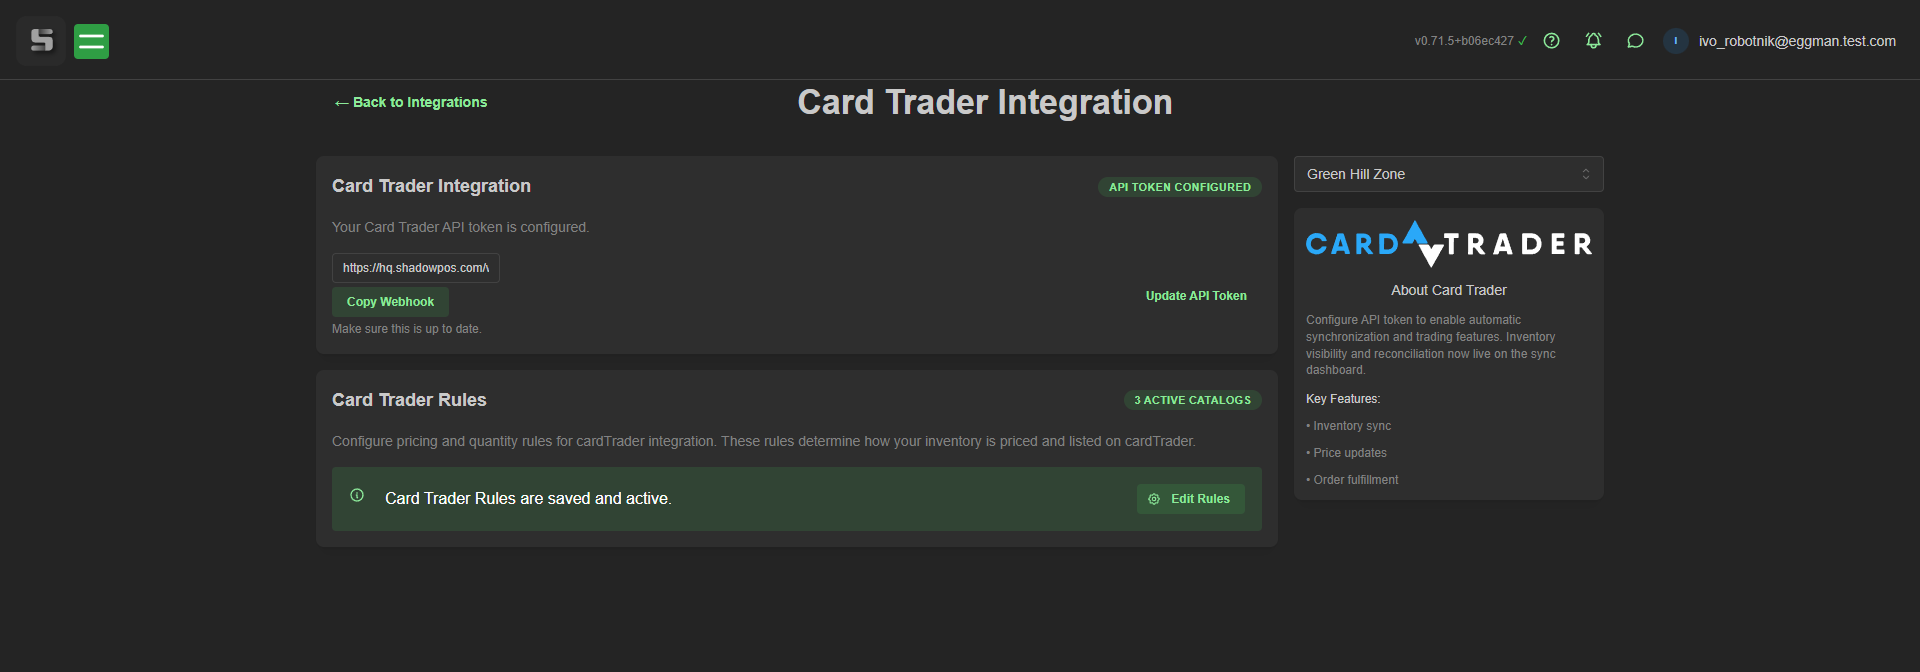
The rules manager should disappear and be replaced by a box that says “Card Trader Rules are saved and active.” This means your Card Trader rules are complete, and both accounts are fully linked! You should see your inventory populate on Card Trader once these rules are complete.
Orders that customers place through Card Trader will appear your in your ShadowPOS Orders page with the “Source” type as “Card_Trader”
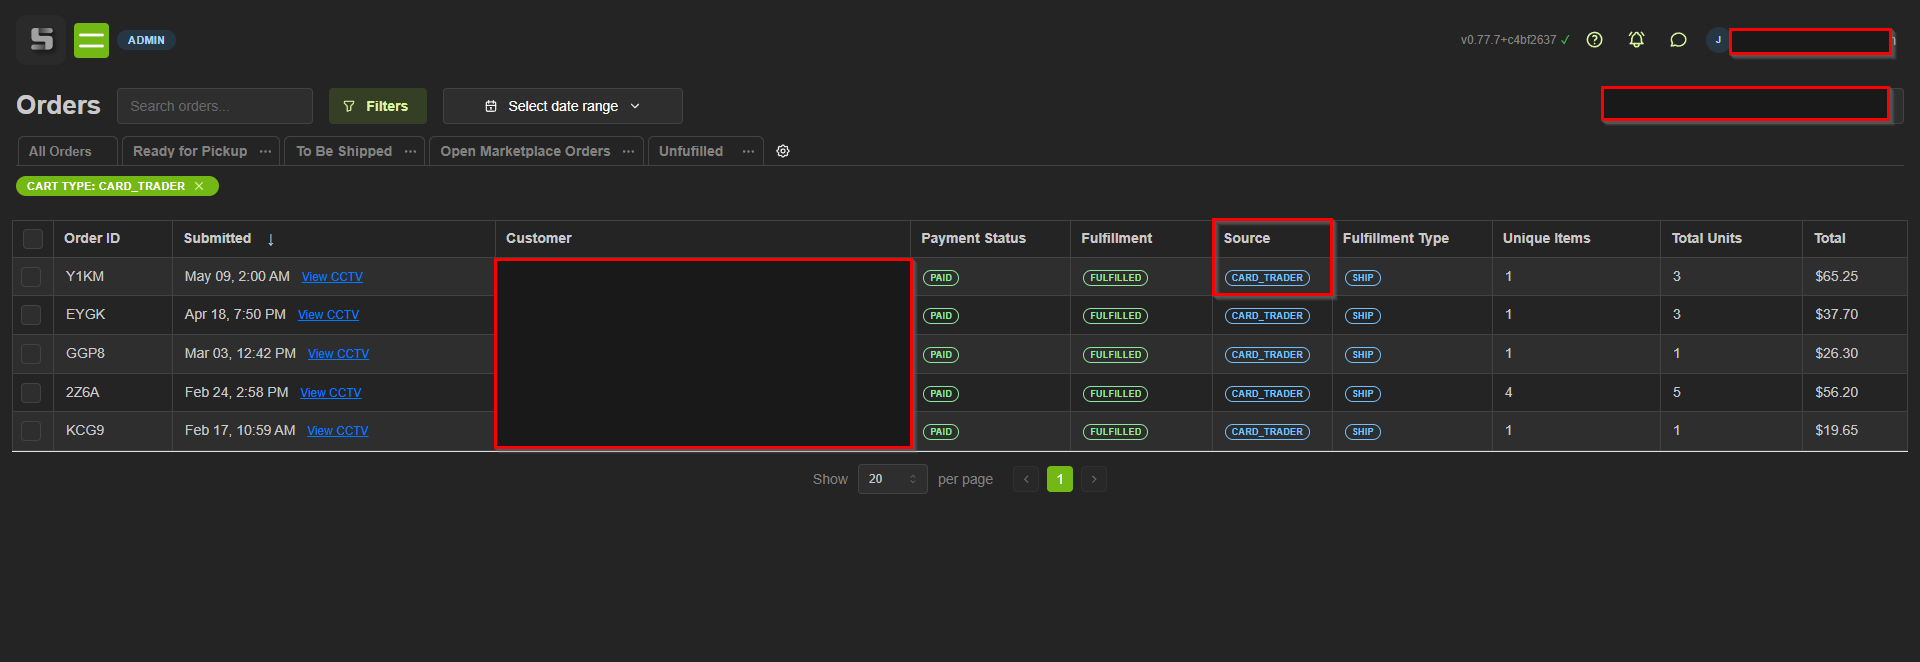
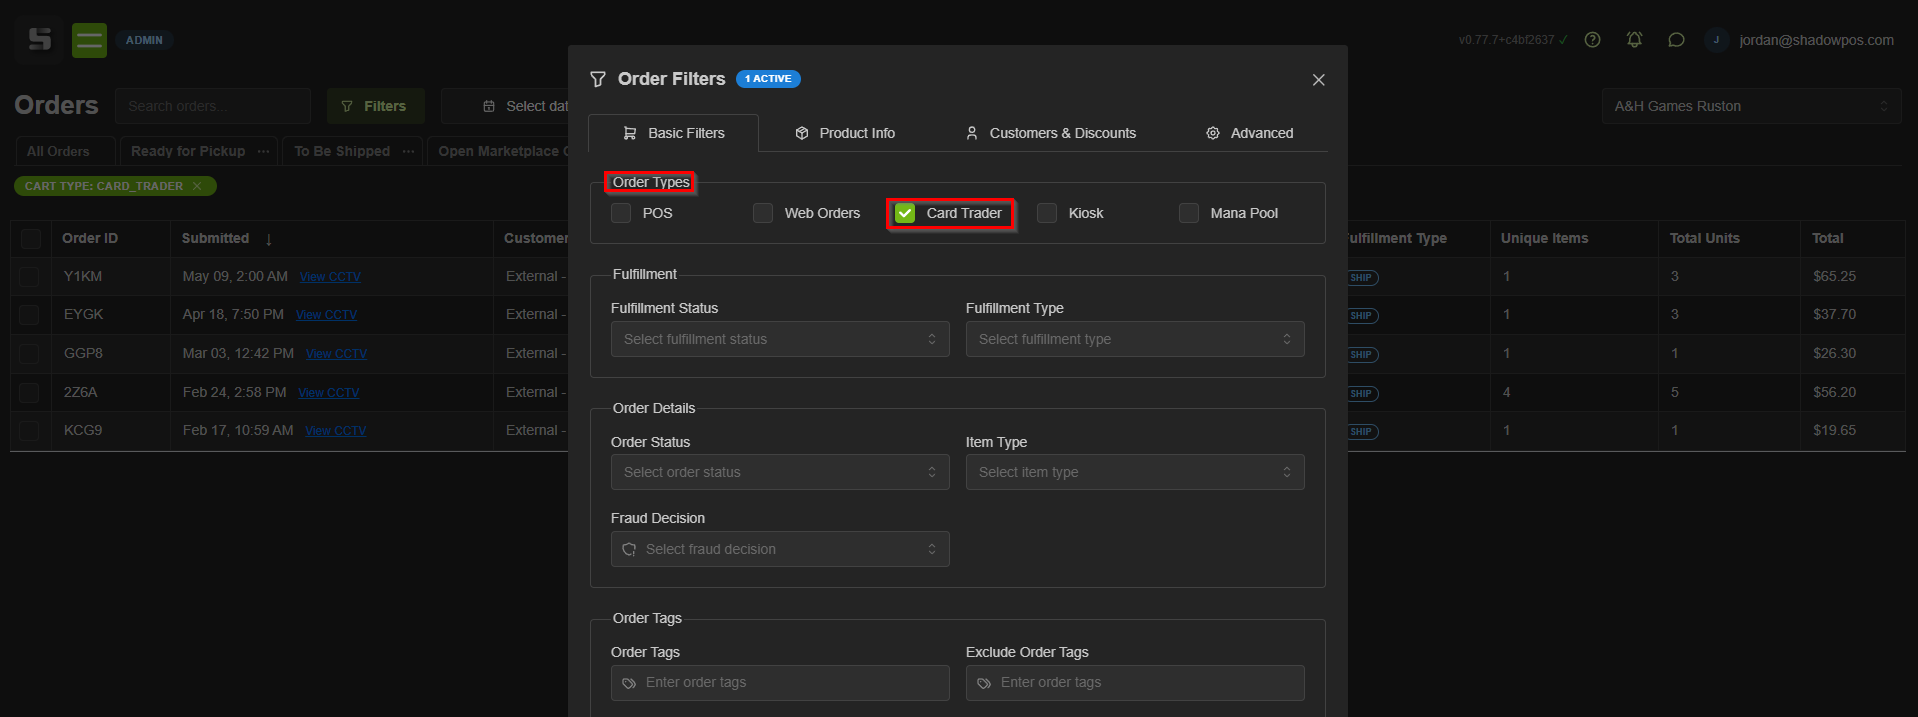
You can also filter your orders to show only Card Trader orders by clicking the “Filter” Button, then checking the “Card Trader” box.
Was this article helpful?
That’s Great!
Thank you for your feedback
Sorry! We couldn't be helpful
Thank you for your feedback
Feedback sent
We appreciate your effort and will try to fix the article