ShadowPOS collects all transaction data on the Orders page. If a sale or buy order still needs to be fulfilled/processed, reviewed on paper or through compatible CCTV system, refunded, or just have receipts reprinted, visit the orders page.
Visit Point of Sale > Orders

We'll cover the following processes:
- Order fulfillment
- Processing a refund
- Finding specific carts / using order filters
- Executing bulk actions
- Creating pull sheet templates
Order Fulfillment
Orders you need to fulfill to complete (store pickup, shipped orders, Card Trader bulk) that haven't had their items pulled yet, are labelled 'Unfulfilled' in the orders page Fulfillment column
- Click a single cart ID. If fulfilling multiple order, it may be best to filter your orders to an order type you want to take care of, then choose a cart.
- Note the amount of items needed for fulfillment, as you may need to compile/print a pull sheet for reference when gathering items.
- (optional) click the Pull Sheet button in the top right to open its page. Confirm the item pulling order and click Print Pull Sheet in the top right.
- Pull product and confirm quantities/accuracy.
- Click 'Mark as ready for pickup' below the checkout list on the curent cart's order page. The button will become a 'Mark as fulfilled' button for use when the customer picks up the order.
- Once customer has picked up the order, click the 'Mark as fulfilled' button. The order is now fulfilled and complete.
at a glance: an order
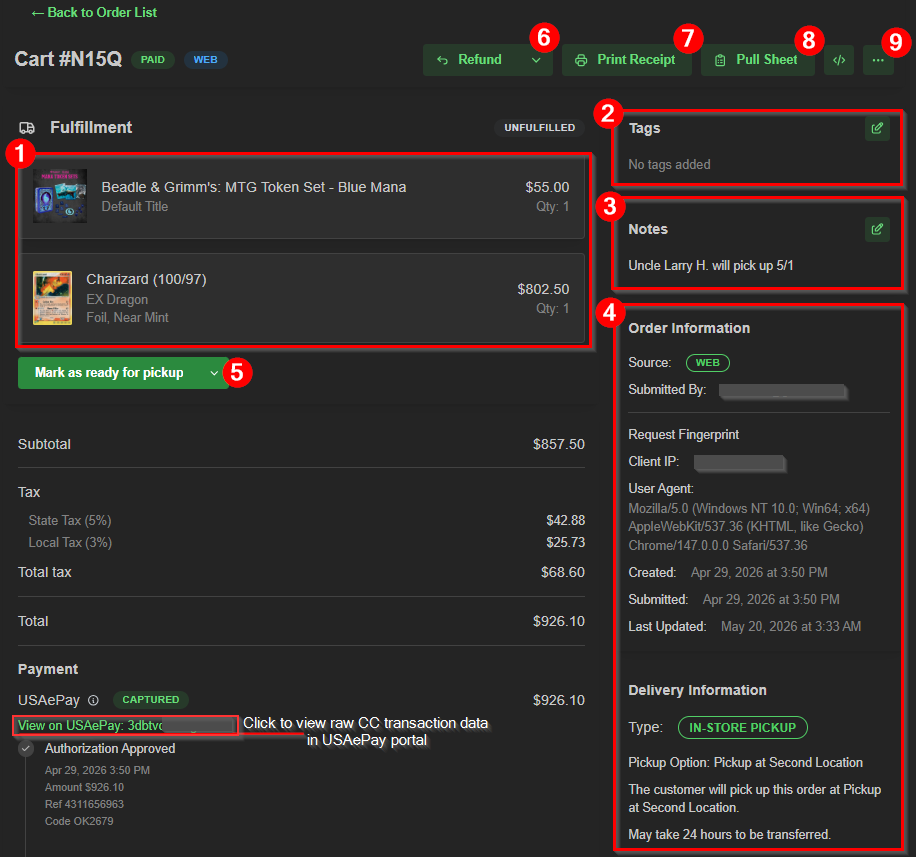 Cart page info:
- Order contents - List of items for fulfillment
- Tags - Click to add/edit helpful tags that can be used to filter/search orders by. Order tags and product tags are not the same, but offer the same convenience.
- Notes - Click the add/edit button to attach important info pertaining to this cart/order (store-side reference only)
- Order Information panel - Useful facts regarding the order, such as such order submission source, IP source (if Web Order), and pickup/delivery preferences.
- Mark as ready for pickup button - Only select once all items for the order have been pulled. You may choose from the dropdown to mark only as fulfilled if mailing without tracking
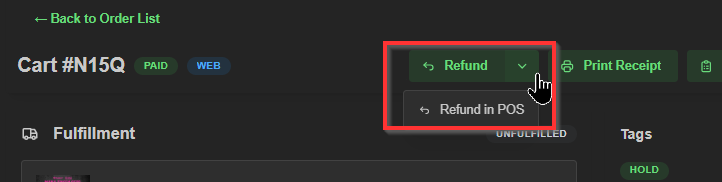
- Refund/Return - Click to initiate a return process for this order directly. Clicking the button's dropdown arrow will show the option to open the return in the point of sale; this is usually preferable when the customer wants an exchange.
- Print Receipt - Print an identical copy of the original order receipt.
- Pull sheet page - Visit the Pull Sheet page to view/print an efficient pull order per your store's sorting method.
Note:
Integrated payments (in the 'Payment' section) will have direct links to the payment portal for viewing more credit/debit transaction info.
Processing a refund
Find the order via the 4-character cart/order number (#XXXX). Click the Refund button to initiate the process, or the dropdown arrow to select the 'Refund in POS' option; this is preferable when there are multiple order tenders, or if the customer wants an exchange.
at a glance: Refund window
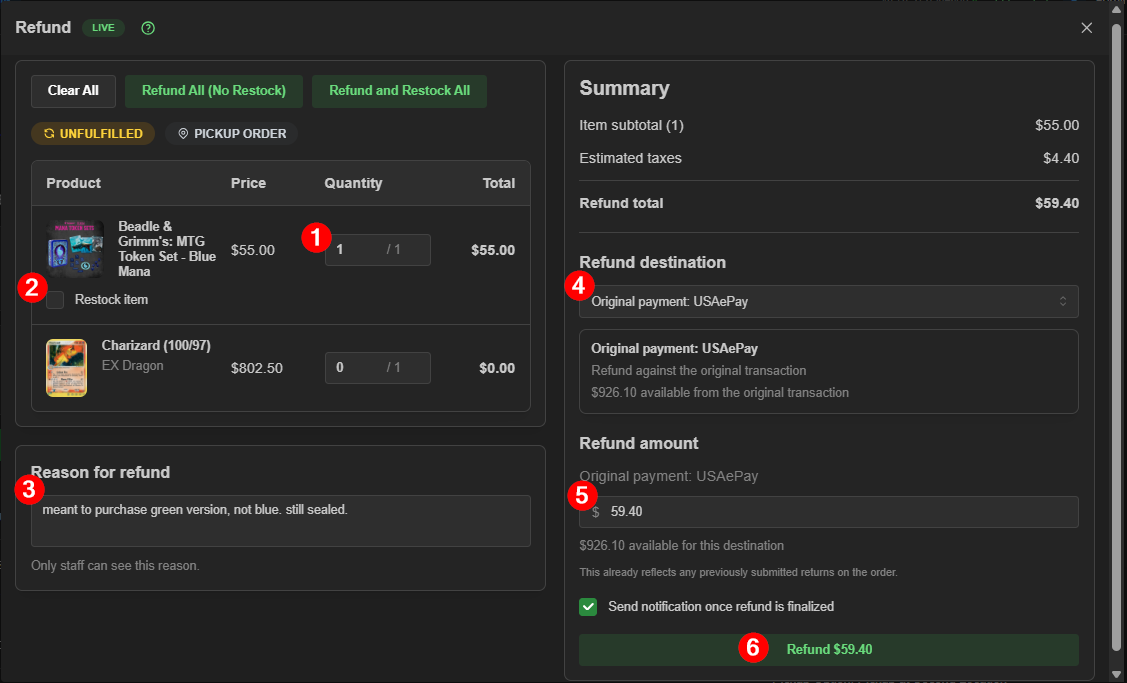
- Enter the quantities of each item being refunded.
- Click applicable checkboxes for 'Restock item' if the item will be available for sale following the refund process.
- Document the reason for refund in detail for easy reference by staff members
- Select the appropriate refund destination. The original payment method will appear by default.
- Confirm the refund amount.
- Click the refund button at the bottom to complete the refund/return process.
Finding specific carts / using order filters
You can always search specific carts/orders quickly via 4-character ID, customer name, tags, or item names.

Utilizing the filters is also very helpful, especially when bulk actions are desired.

- Click the Filters button in the top left for the Order Filters card to appear. There are 4 filter category tabs (Basic Filters, Product Info, Customers & Discounts, Advanced) to select various options from.
- Choose a variety of checkboxes and/or dropdown options from any/each of the 4 pages
- Click 'Apply Filters' at the bottom to update the orders page, showing all orders matching your selected criteria.
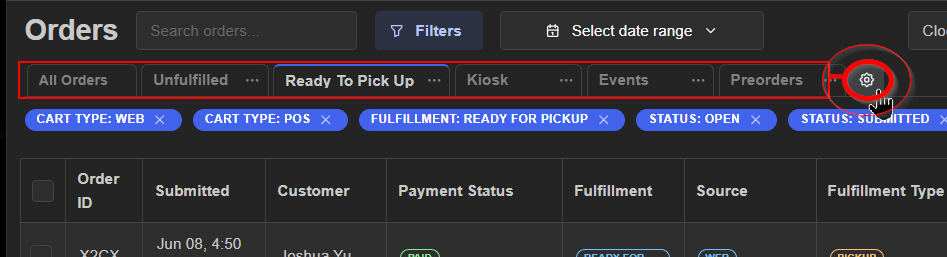
Tip: Filter group presets
Setting the same group of filters often? Save it as the default preset!
Save multiple filter tab groups for easy switching in the future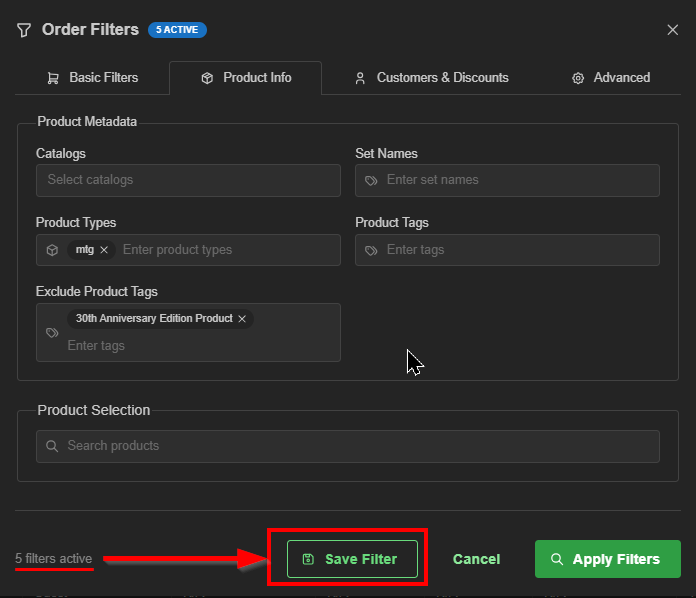
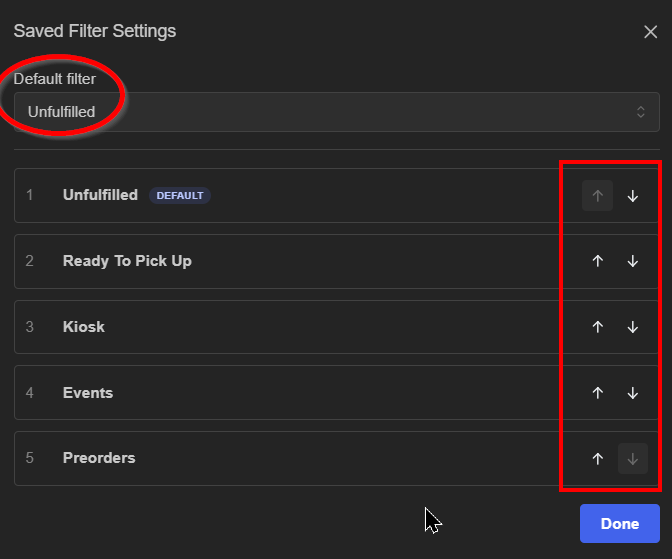
Edit the order of filter group tabs easily by clicking gear icon
Rearranging or choosing your default filter is simple. Just click 'Done' to confirm new order or appearance
Executing bulk actions
Bulk actions can be executed when two or more orders are selected.
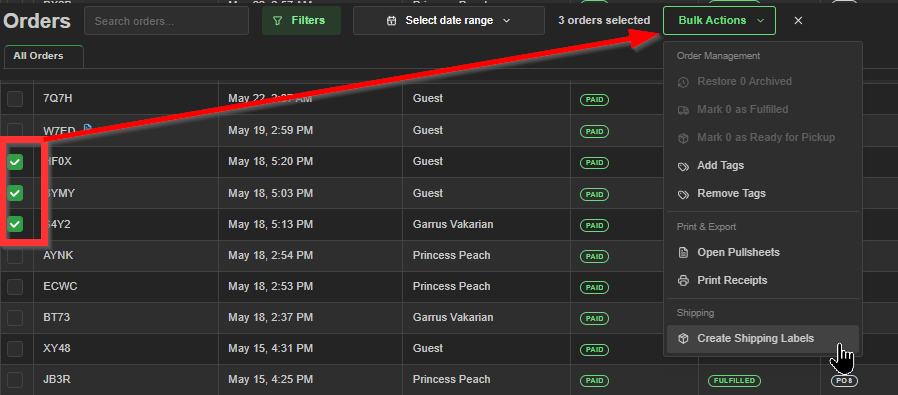
- To the left of the furthest left column, click desired tickboxes or select the tickbox at the top of the order page to select all orders. Notice a new Bulk Actions button appear at the top of the page.
- Click 'Bulk Actions' button.
- Use one of the options listed to add/remove order tags, mark all as ready for pickup, fulfilled, archived, open all orders' pullsheets, print receipts, or create all shipping labels for selected orders.
Creating custom pull sheet templates
On occasion you'll prefer a particular pulling method, or your store may overhaul its inventory sorting style over time, so utilizing the Pull Sheet Template configurator could become a staple in your workflow.
Navigate to the your pull sheet via the point of sale (after 1 or more items are added to the cart),

or a submitted order's page

Click the gear icon in the top right of the pull sheet page to open the template configurator.

Pull sheet template configurator:
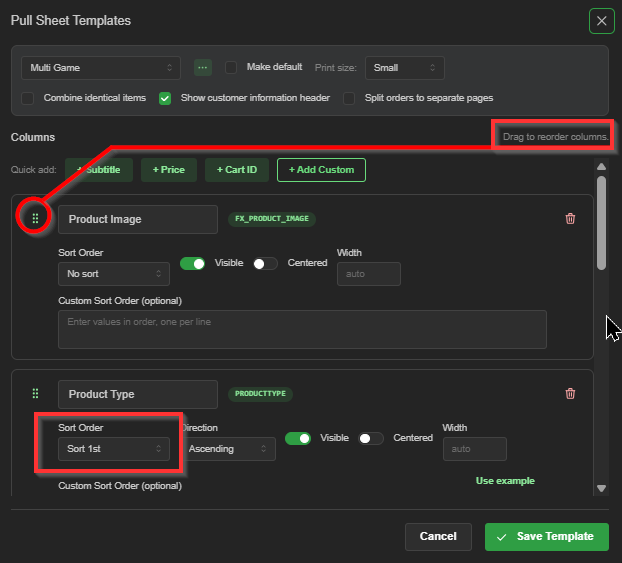
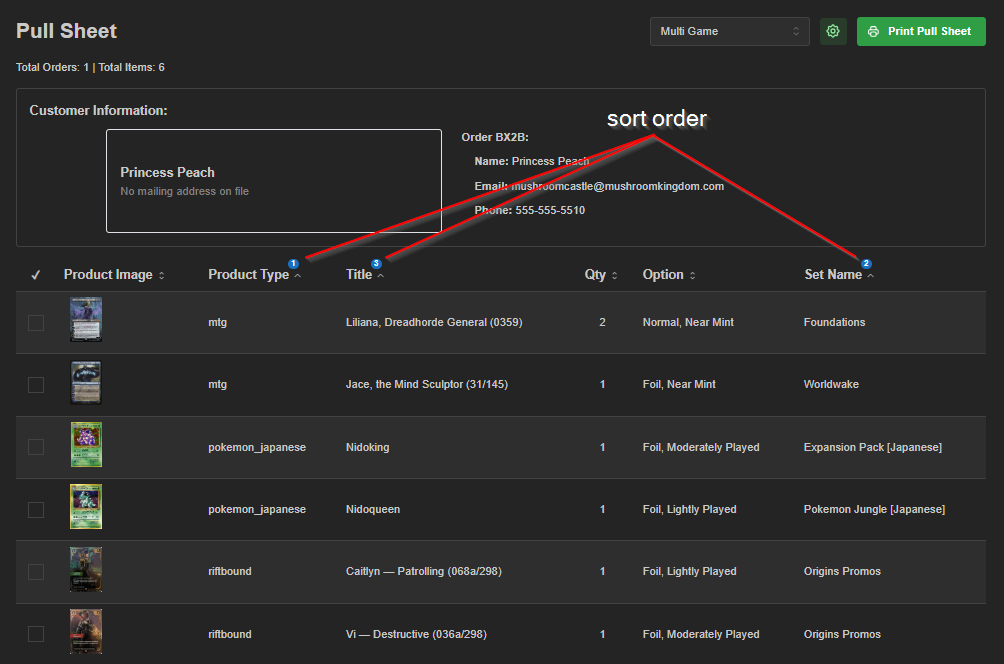
Here you can configure different styles of pull sheet templates. Note that the drag-reordering of columns is not the same as your 'sort order'. A column assigned 'Sort 1st' will sort each item on the pull sheet completely before sorting a 'Sort 2nd' column. Every sort order past 1 will only arrange products so long as it does not change the order defined by the previous column.
Think of column sort orders in the way that you keep your physical inventory sorted. An efficiently built pull sheet's sort hierarchy will enhance the flow of pulling items around your store.
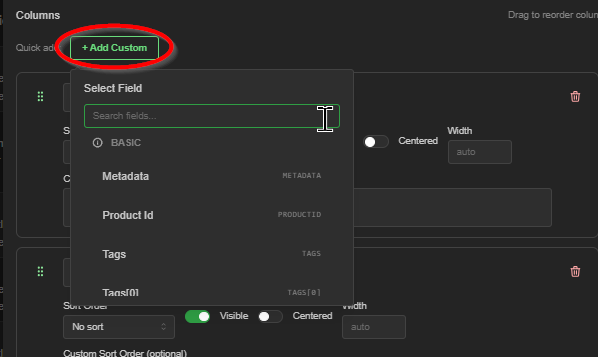
If desired, add a custom column to your pull sheet template. Popular custom options include 'Product Image', 'Set Code' (MtG), 'Tags', etc. Keep in mind that many custom column fields are only compatible with specific catalogs.
Be sure to name and save the template before closing the configurator.
Note: Pull sheet columns' sort order priority is indicated by the numbered bubbles
Was this article helpful?
That’s Great!
Thank you for your feedback
Sorry! We couldn't be helpful
Thank you for your feedback
Feedback sent
We appreciate your effort and will try to fix the article