All inventory adjustments in ShadowPOS are essentially treated as transfers with different statuses, and they can all be viewed from the Transfers page. This structure centralizes every type of inventory movement (including sales, returns, .csv imports, purchase orders, and incoming or outgoing shipments) into a single location where each one can be reviewed, approved, rejected, or undone.
Visit Products > Transfers
at a glance

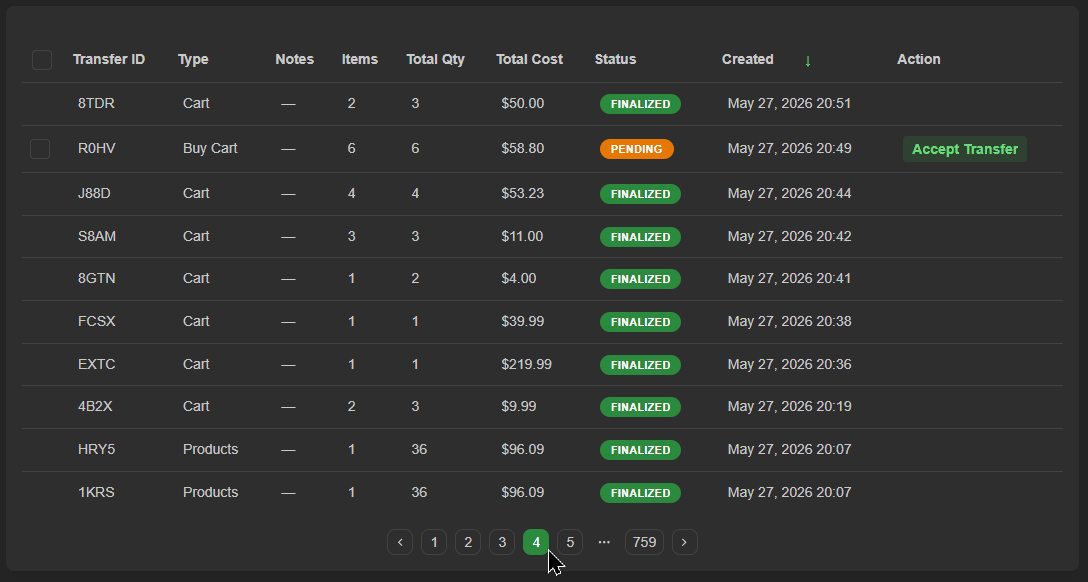
- Quick Search by included product name, cart quick ID, or Transfer ID
- Filter by transfer type, status, internal notes
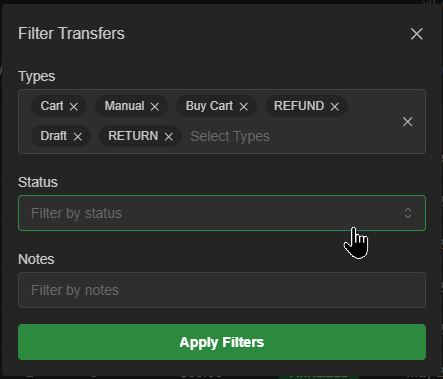 Filter Types (6)
Cart / Buy Cart / Refund / Return / Manual / Draft
Filter Statuses (4)
Pending / Finalized / Partial / Rejected
Filter Notes
Searches notes' keywords - Create Transfer to start building a manual transfer
We'll cover these processes:
- Creating a transfer
- Accepting and/or reviewing transfers
- Undoing a transfer
Creating a transfer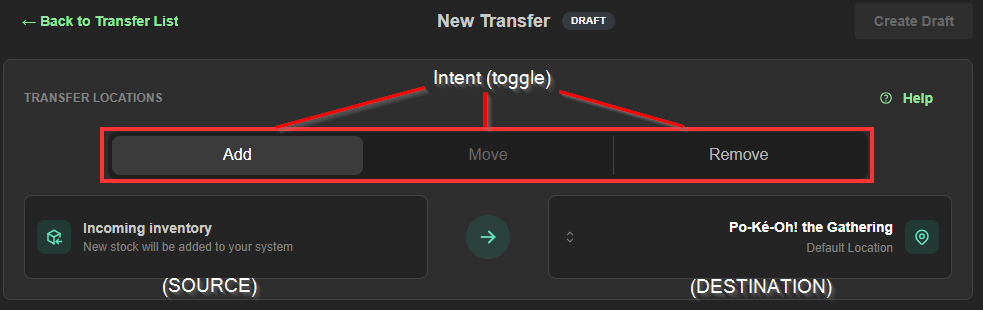
- Select Create Transfer in the top right.
- Verify Source and Destination of transfer. By default, 'Add' mode is selected.
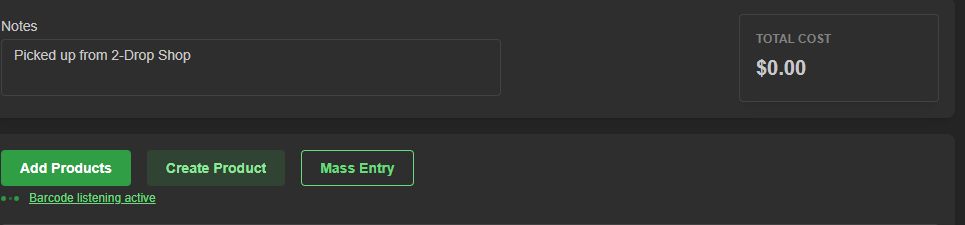
- Enter any applicable notes (for internal reference)
- Use 'Add Products' to search ,'Create Product', or try Mass Entry (Beta) to begin building the transfer list
At a glance: 'Add Products'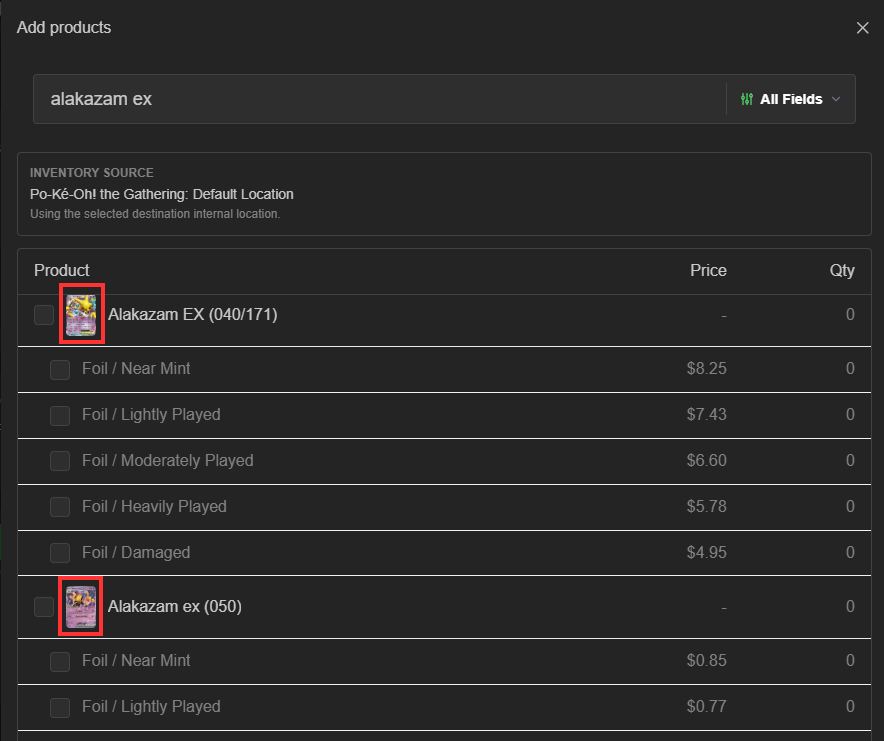
Note:
Many products have similar names and accompanying pictures. Ensure you've chosen the proper one by consulting the title and/or expanding the product image
At a glance: 'Mass Entry' (Beta)
Use Mass Entry option (Beta feature) to paste tab-delimited format product info into the data field.
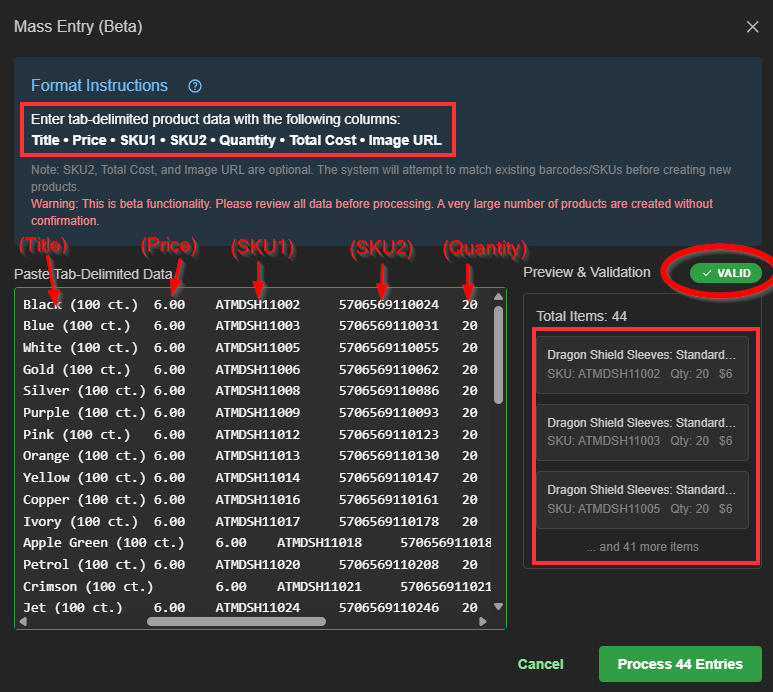
5. Properly review each item to ensure variant and cost accuracy.
6. Select 'Create Draft' in the top right to save your progress. Record of the transfer is now established in the system.
 Note: Product can be added at any time, then saved by selecting 'Update Draft'.

7. When all product is accounted for, click the 'Mark as Final' button in the top right to finalize the current transfer.
Note: You can still modify contents of the transfer by clicking Edit.
Accepting and/or reviewing transfers
- Select the transfer to process or use quicksearch/filter to narrow the range of transfers in view

- Click Receive Inventory button.
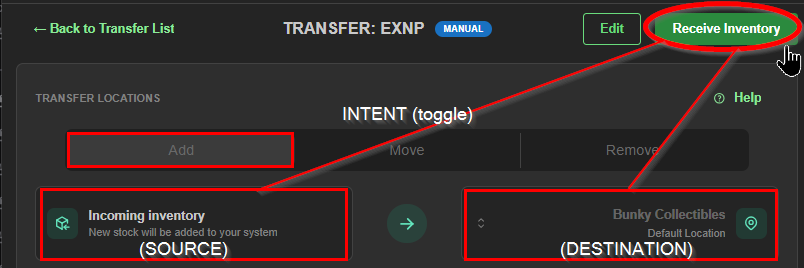 Note the original intent, source, and destination of the transfer.
 - Review incoming product and adjust for any discrepancy. Your default columns show all changes accompanied by visual indicator bar in the Received field to the right.
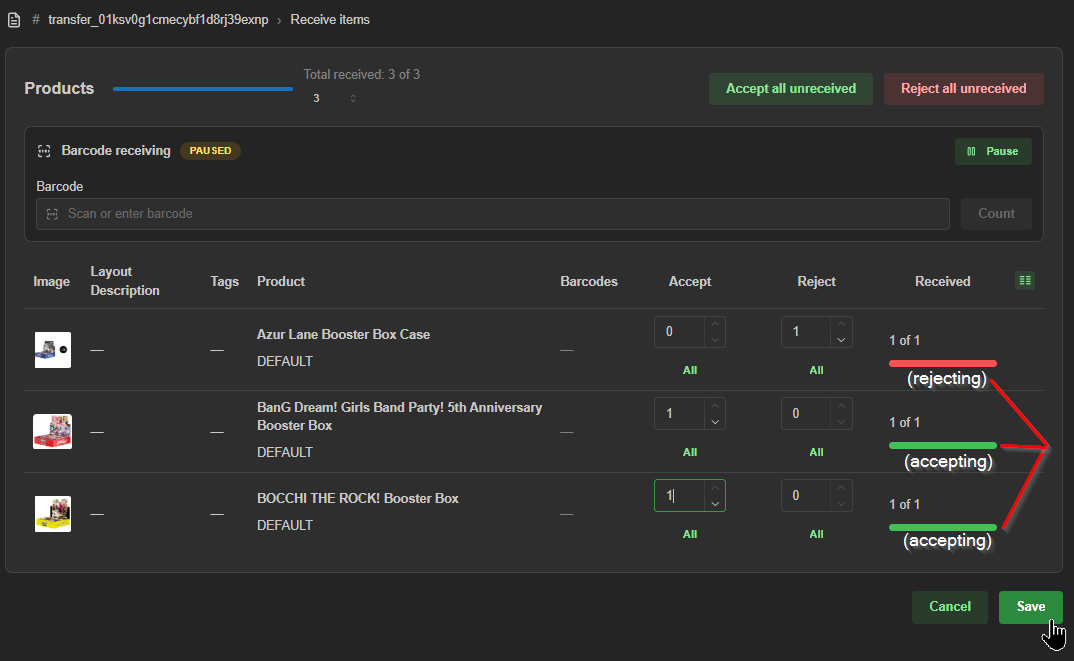
- You may manually adjust per item, or verify all immediately by selecting 'Accept all' or 'Reject all' in the top right. Once your choice is confirmed in the pop-up window, that transfer will be closed with a 'Finalized' or 'Rejected' status on the main Transfers page. No further modification of the transfer is possible.
Note: if no review/verification is desired, select the Accept Transfer action button to process all immediately from the main Transfers page.
Undoing a transfer:
Undoing a transfer reverses the effects of the transfer being undone. This seems obvious, but can lead to confusion if not handled properly. The terminology stays the same throughout the process, so don't get confused. You'll still be 'accepting' a product that will be leaving your inventory.
- Select a transfer you want to undo; note the nature of the transfer. This was product added to the default location. Click the 'Undo Transfer' button
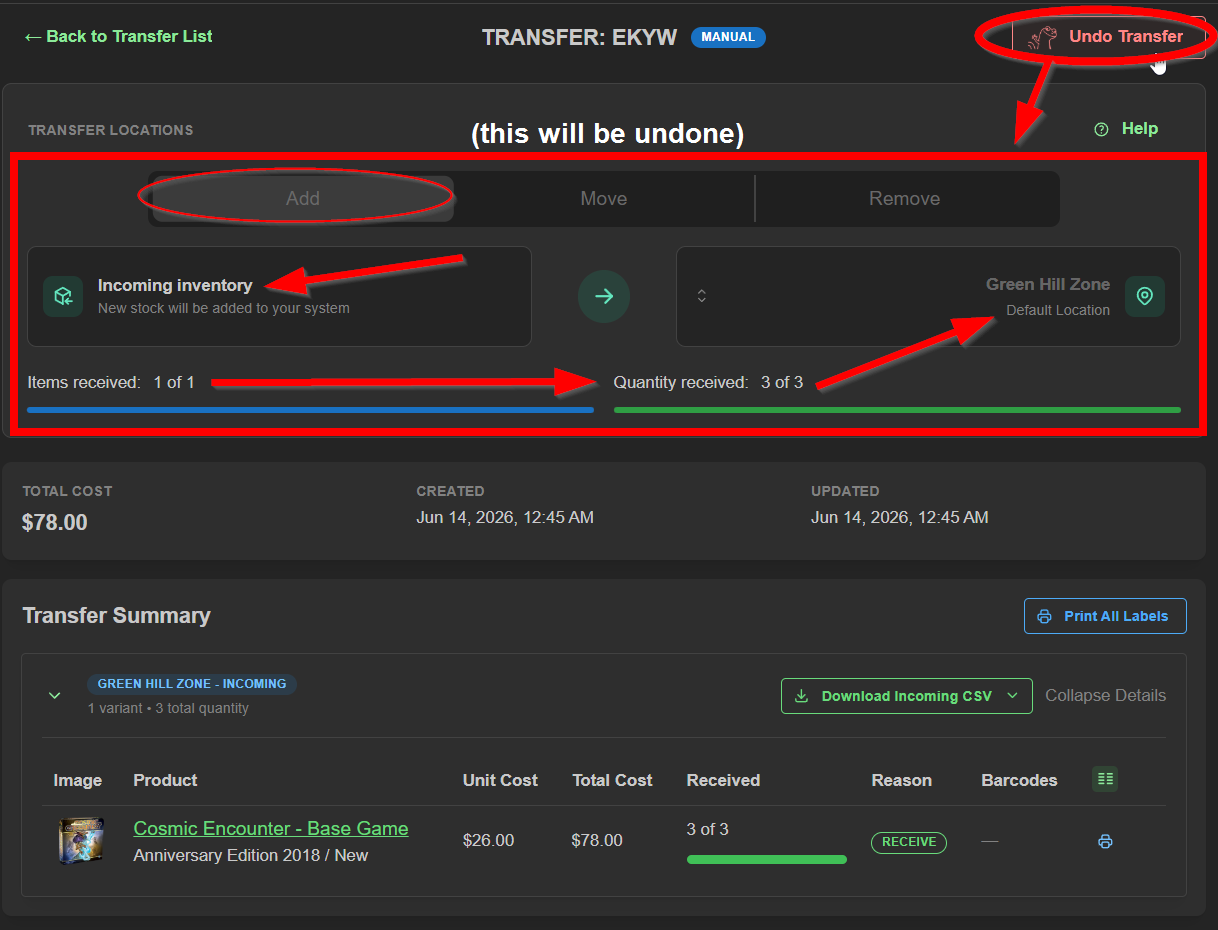 This will create draft, like all other transfers, which must be marked as final and 'Received'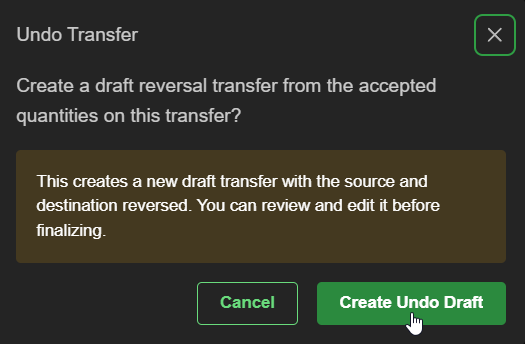
- Click 'Receive Inventory'
 or 'Accept Transfer' from the main page
- Receiving Inventory via its page of course allows you manually 'accept' each item or accept all and save.
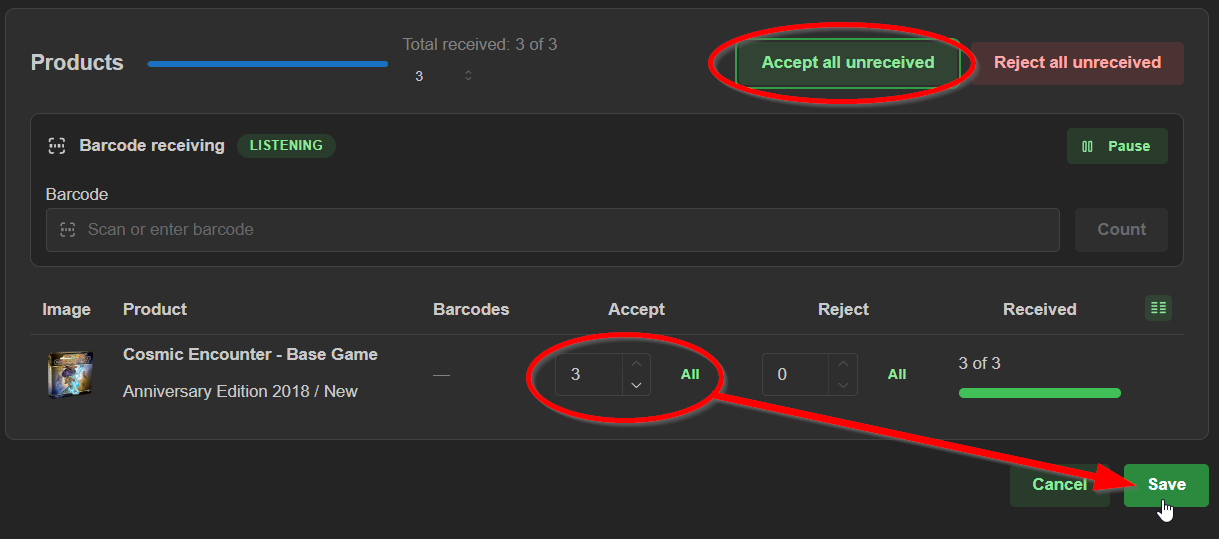 while 'Accept Transfer' from the main Transfers page is a one-step process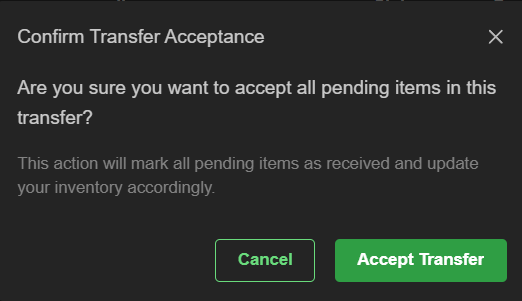
Note: an undone transfer has its own transfer ID, and stock was not added to the default location this time, it was moved (out). If you need to Undo the undone transfer, it will reverse that transfer's effects. Be vigilant if you have to use this feature.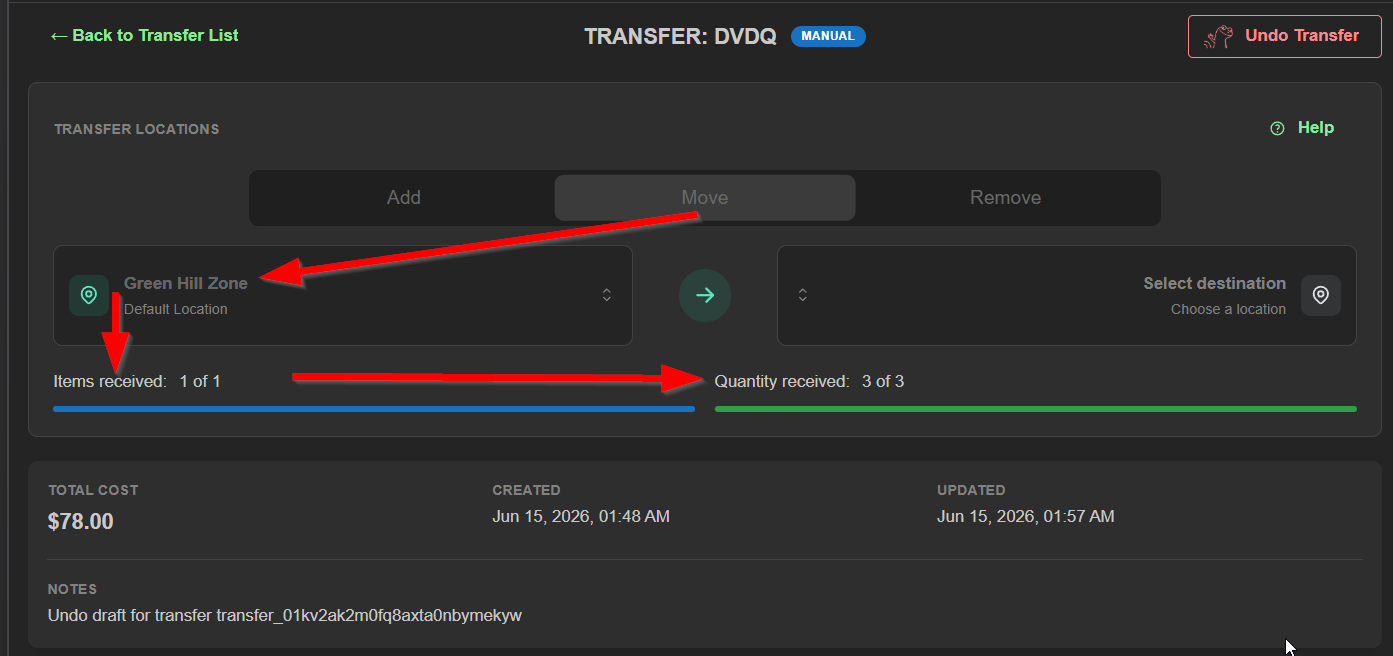
Processing a return/restock
For returns processed in the Point of Sale where 'Restock Item' is left unchecked, a transfer is created for the returned product and must manually be reviewed and accepted back into your inventory here via 'Accept Transfer'
Returns can also be viewed/processed through the Point of Sale; the following is an alternate way of executing the process
- Find the desired transfer or narrow the range of transfers by 'cart' by referring to the transfer ID and Type, or by using the Filter (top right) to include only 'Cart' and/or 'Return'
- Select an appropriate transfer to process
- Click 'View cart' next to the Cart ID in the top left to open the corresponding transaction's order page.
- Click 'Refund & Return' near the top
- Adjust appropriate quantities and/or remove items not being returned, and verify each item's options dropdown
- proceed to Checkout
- note the original transaction's payment method and complete the transaction.
Was this article helpful?
That’s Great!
Thank you for your feedback
Sorry! We couldn't be helpful
Thank you for your feedback
Feedback sent
We appreciate your effort and will try to fix the article