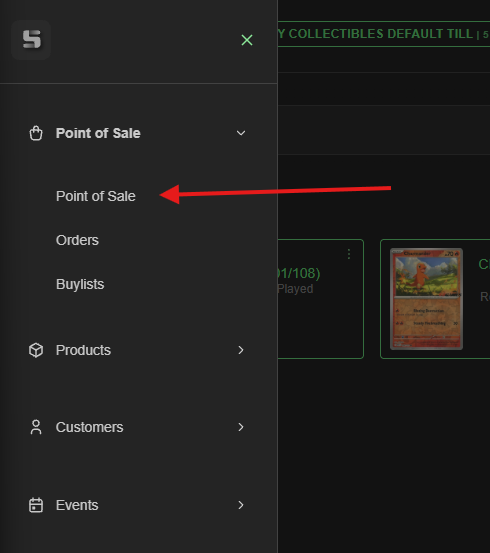
It's time to make your first sale, very exciting! The first thing you'll need to do after logging in is make your way to the Point of Sale from the navigation:
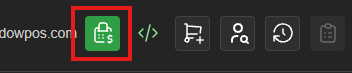
Next you'll need to open a till (which you will have set up ahead of time), in the top right corner:
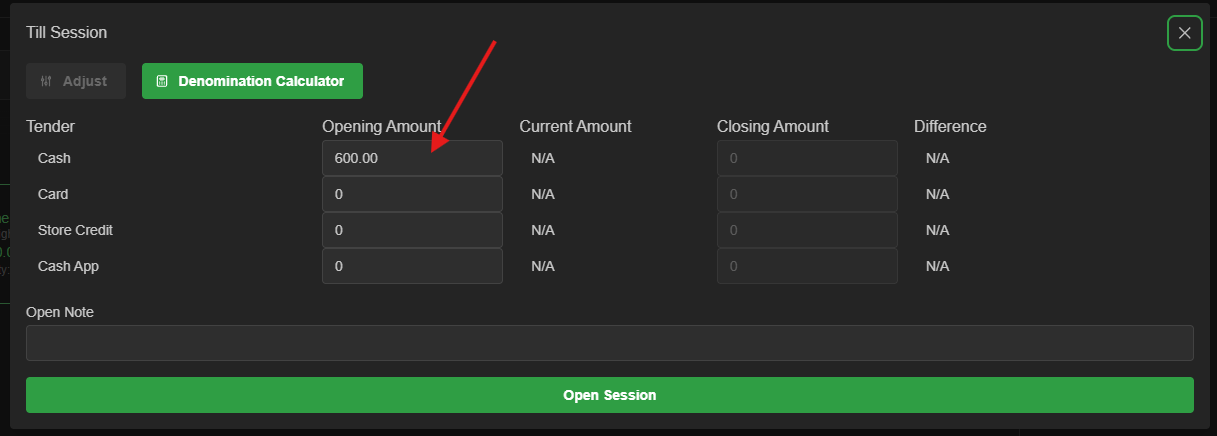
Note: Depending on your store's opening process, you may want to add whatever your starting amount in the cash drawer. For this example, we'll go with $600:
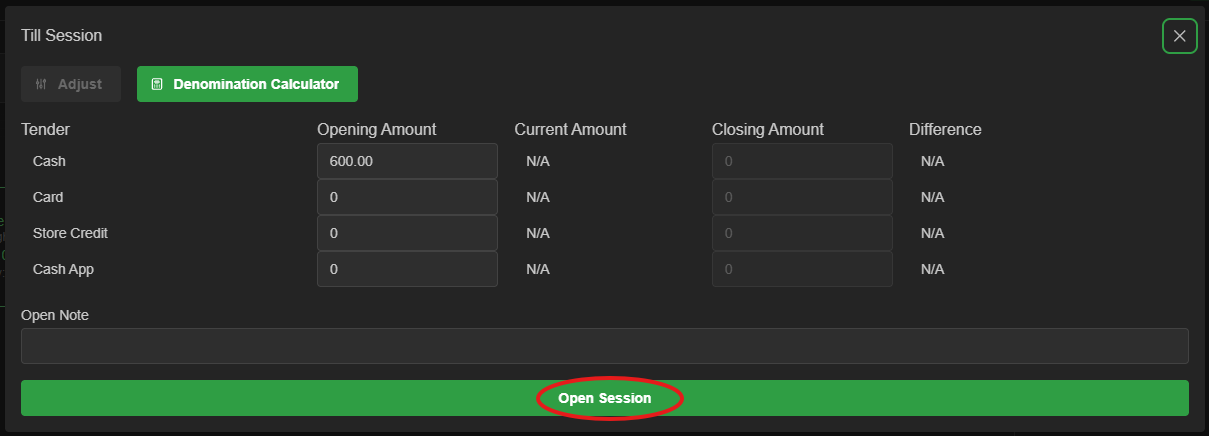
Once that's done, simply click 'Open Session' at the bottom:
Now, you're ready to start your first transaction!
You can easily search for anything in the catalog, we'll go with an "Abrade" for now:
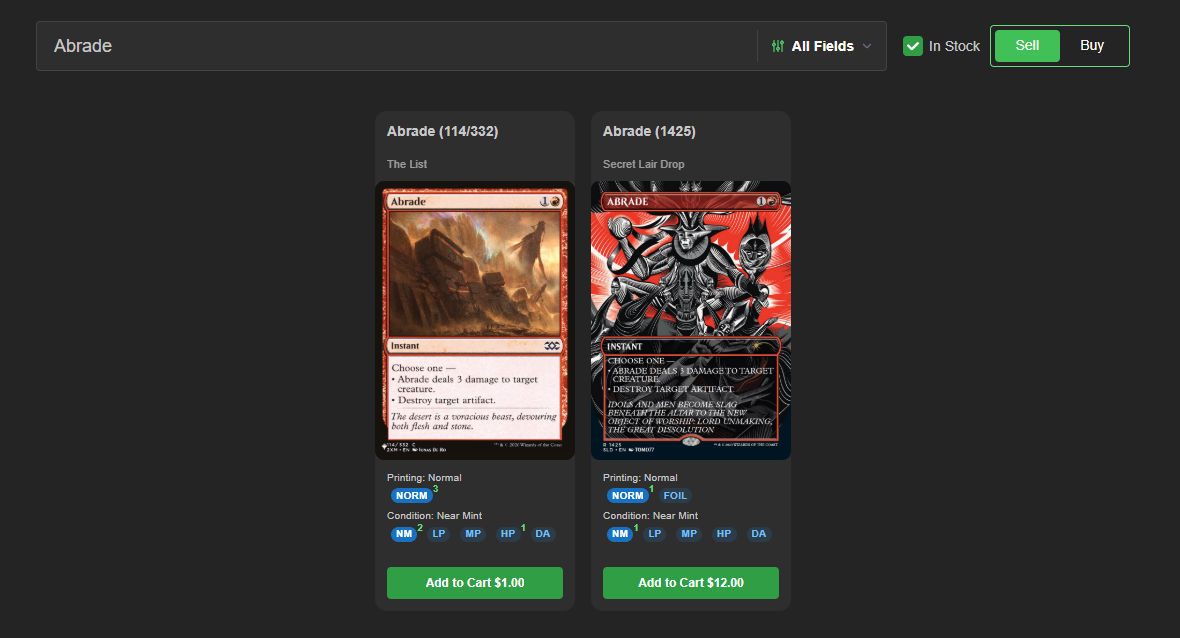
Suggestion: You can always narrow down and often make the transaction for anything that doesn't have a barcode faster by clicking the 'In Stock' option next to the search bar:

Since we are selling this card and not buying, you want to double check and make sure we're in 'Sell' mode:

When we look at any item in the POS there are a few things to keep in mind when selecting. In particular for singles, you may need to select the printing and condition:
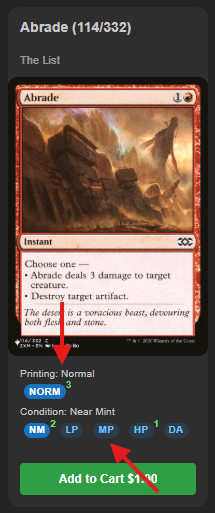
Remember: When you click on the appropriate printing and/or condition the system will automatically make the price adjustments accordingly.
We'll go ahead and stick with the normal near mint for this transaction, so now you'll click 'Add to Cart':
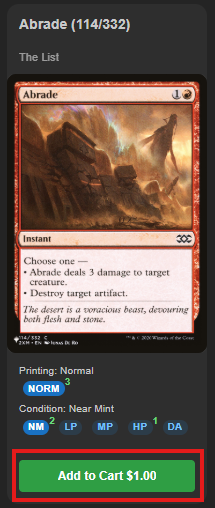
Note: Here it says '$1.00', but it will reflect whatever the price of the item is.
Now the card is in the cart:
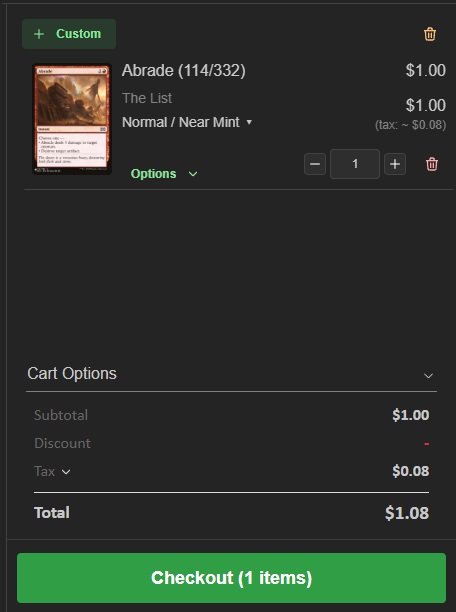
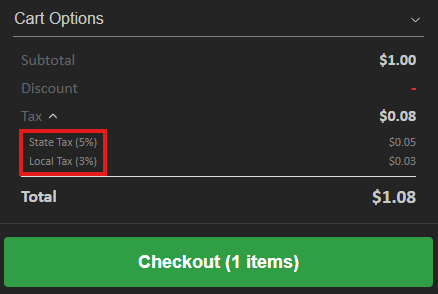
The taxes are automatically calculated according to what you've set up, and if you need to see a break down you can hit the drop down next to 'Tax':
If a customer is paying with store credit or you want to track the transaction for any reason (employee purchases for example), you would add a customer by clicking the Customer Search in the top right:

Note: you can also create a customer directly from the customer search as well!
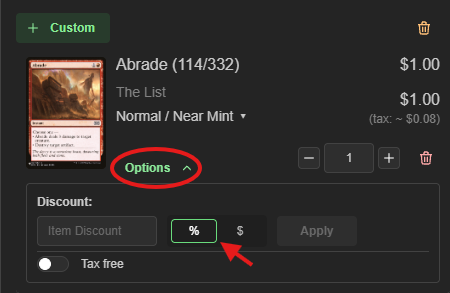
There are two discount options for any transaction that you can utilize, per item or per cart.
Per item is done using the 'Options', and you can select a dollar amount or a percentage by switching the toggle:
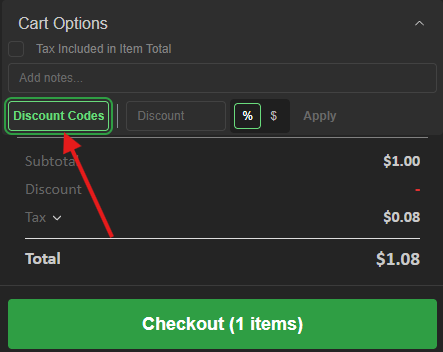
For the whole cart discount, you'll click the drop down arrow next to 'Cart Options". You can add a discount code if you have those set up, by clicking 'Discount Code':
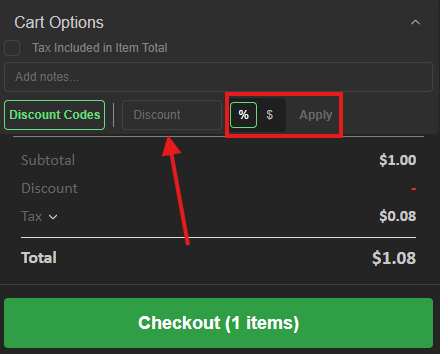
You can add a general discount and toggle between percentage and cash as well by switching the toggle here:
Before you checkout, you may want to generate a pull sheet first to ensure the products are in stock.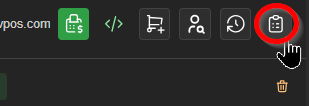 The default pull sheet not customized to your liking?
Click to learn more about pull sheet templates
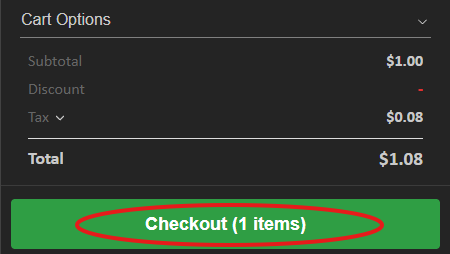
Once everything in the cart is ready to go, you'll hit 'Checkout':
You'll then be taken to the tender screen. By default you'll have 'Cash', 'Card', and 'Store Credit'. You can also see that we have 'Cash App' enabled on our till as well:
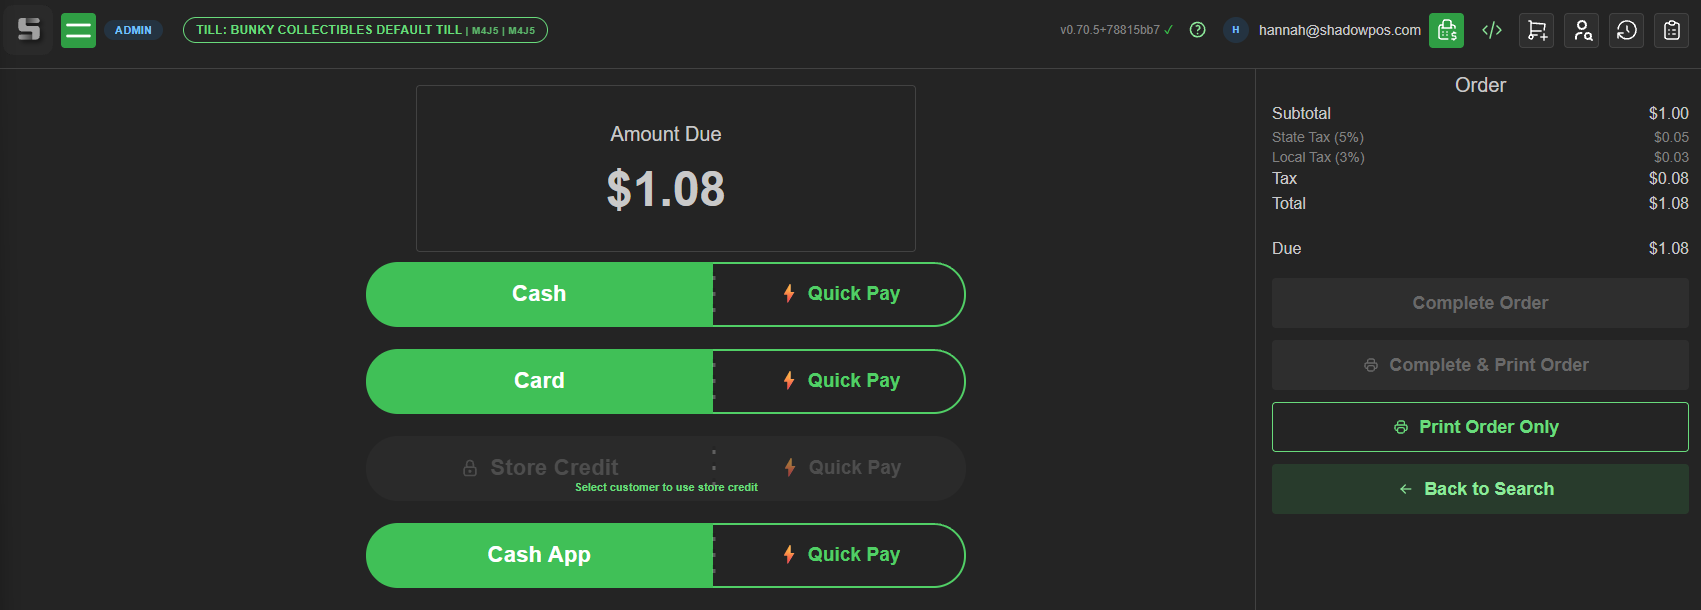
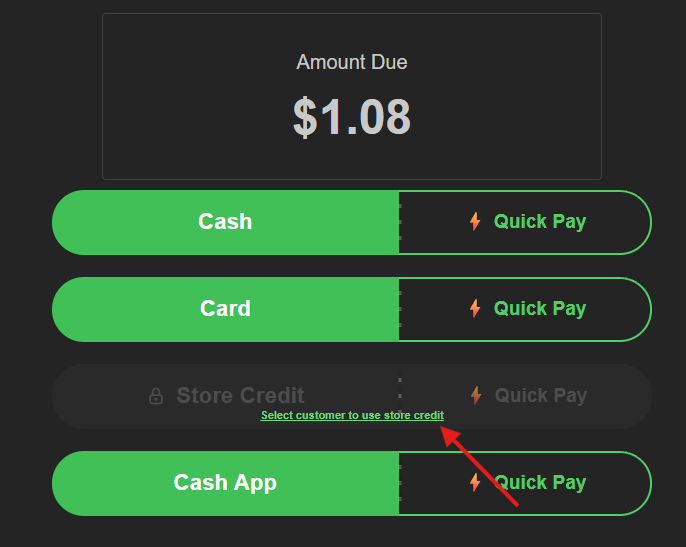
Note: If the customer wants to pay with store credit, you'll notice that you're unable to until the customer is selected:

You can click on the link and it will pull up the 'Customer Search'.
For each tender type, there are two buttons, the name of the tender and 'Quick Pay'. If you click the tender type it will bring up a manual calculator:
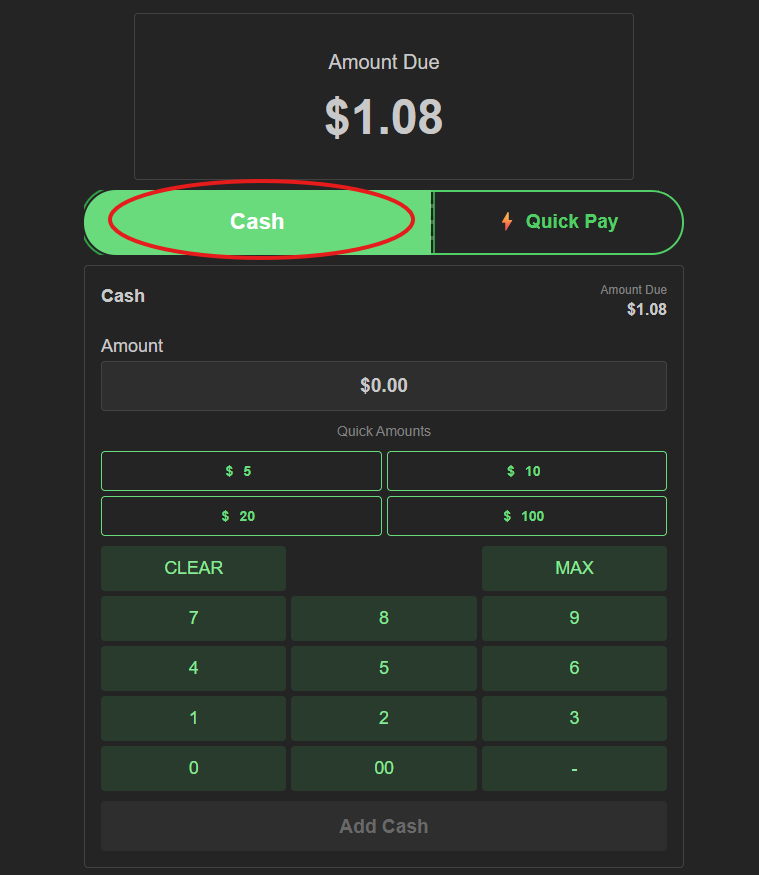
We've added a few bill denominations that are frequently used, and if you click one of those it will automatically populate that into the 'Amount' field. For example, we'll click the '$5':
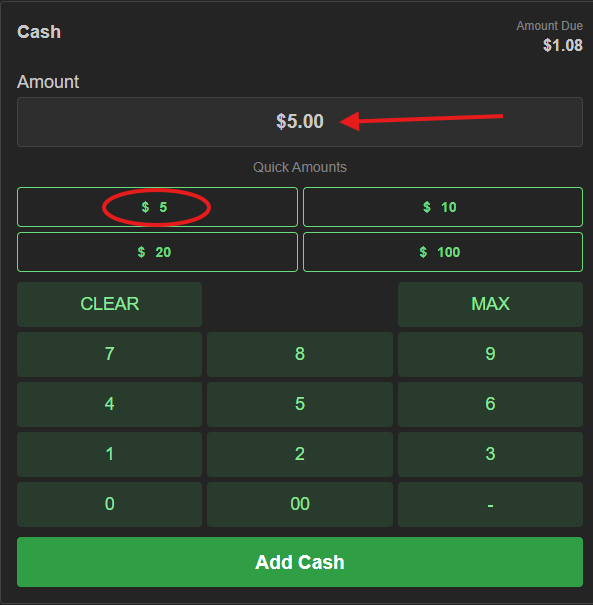
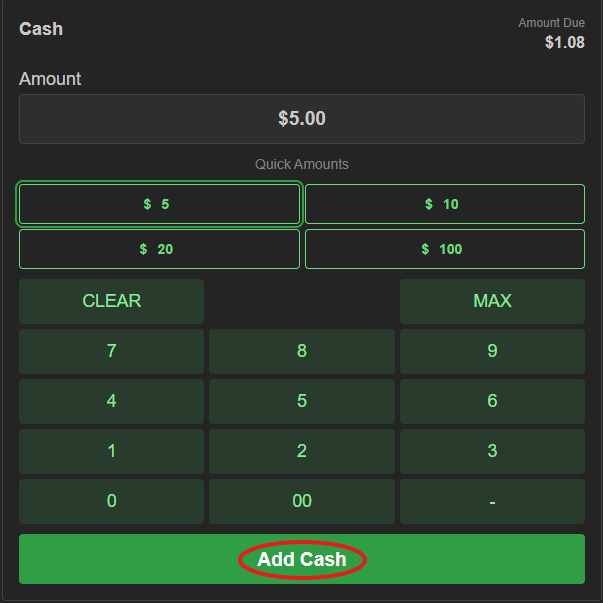
You'll then click the 'Add Cash' button at the bottom:
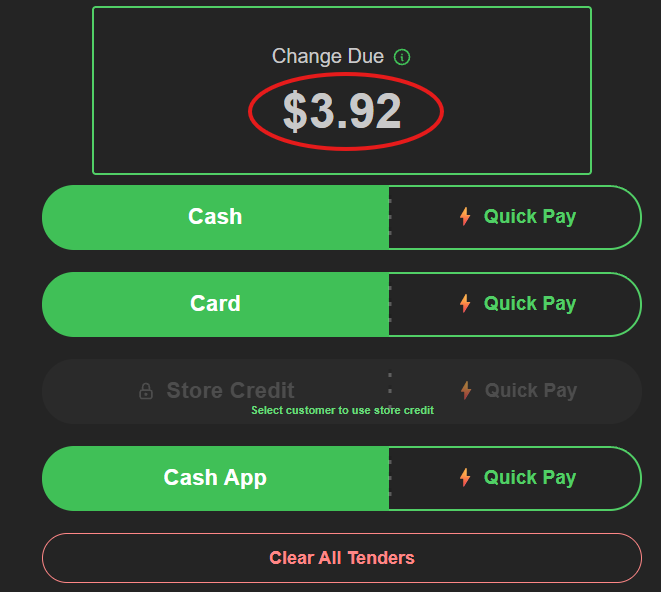
And then the 'Change Due' will appear both above the tenders and on the right hand side in the cart view:
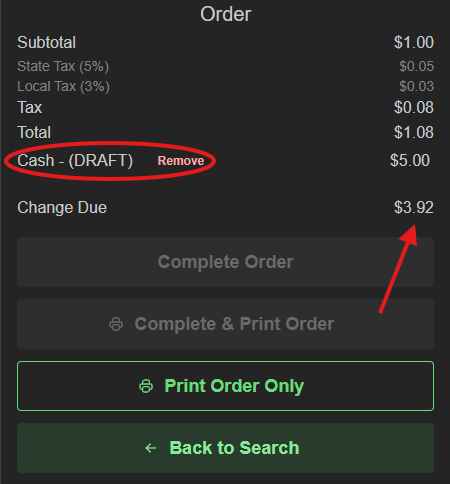
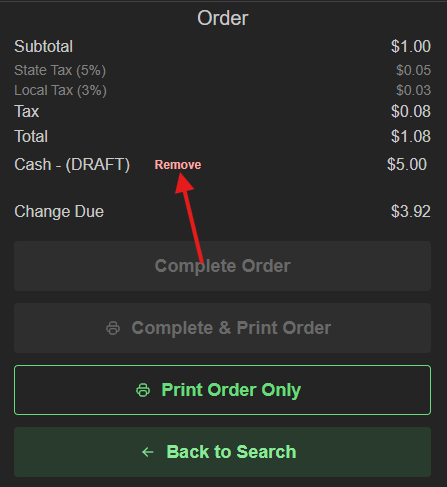
If you ever need to remove a tender for any reason, you can do so by clicking the 'Remove' button next to the tender in the cart view:
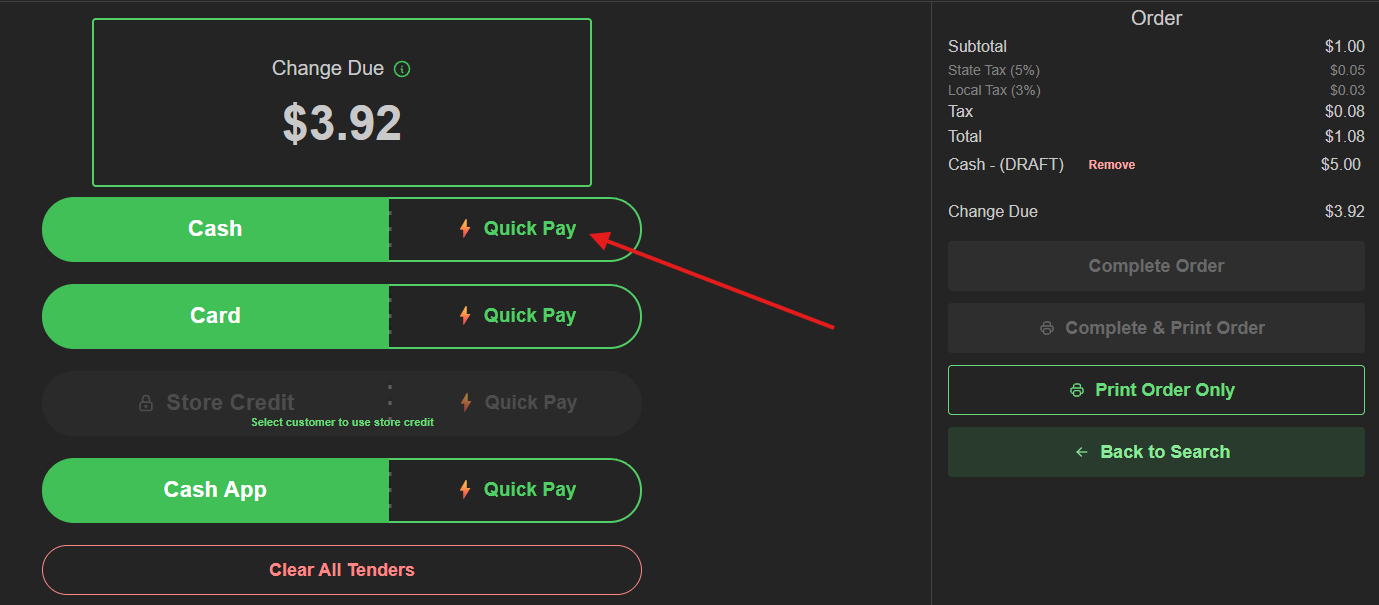
Now that we've got the cash in hand we'll give them their change by hitting the 'Quick Pay':
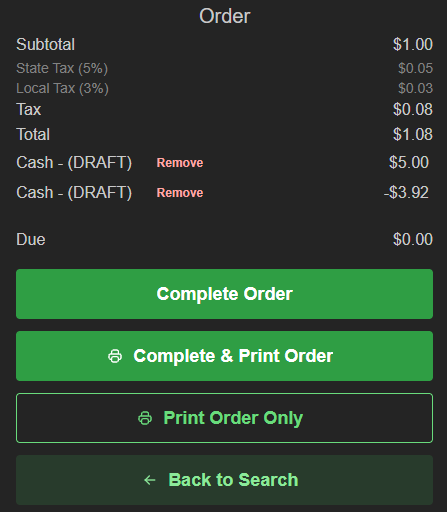
You're now ready to ring them out! This is what the cart looks like now:
If you're doing a credit card transaction, in most instances you'll only need to choose the 'Quick Pay' option.
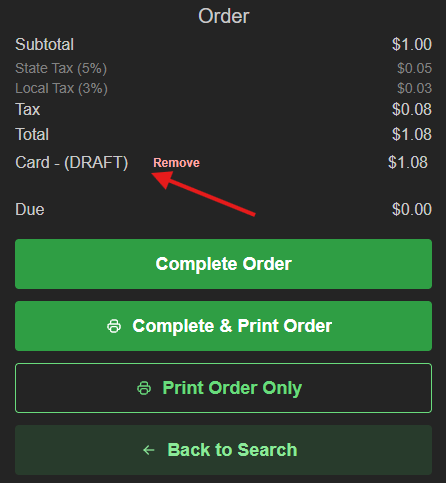
If you're wanting to do a split payment, then you can select the 'Card' option and select how much you want to charge on the card:
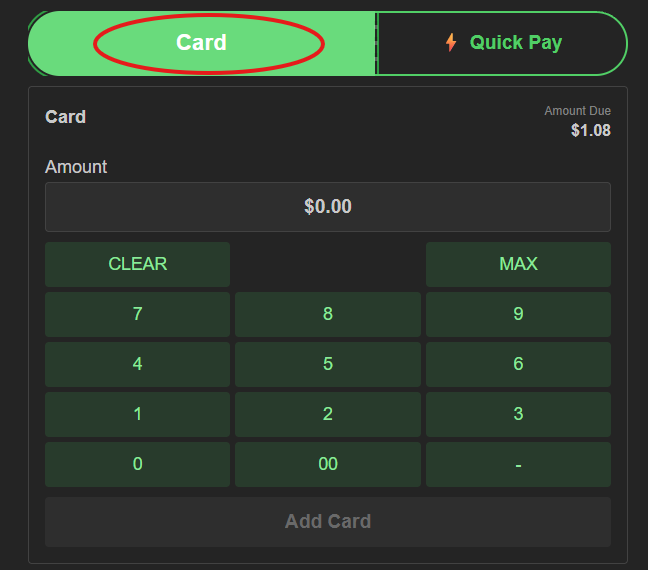
Then you would add the appropriate cash or store credit amount to fulfill the total balance.
Store credit is very easy as well. If you haven't already attached the customer to the transaction on the main POS screen:
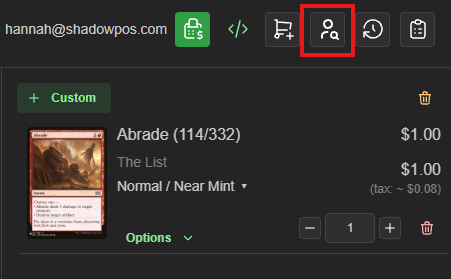
You can do so directly through the check out screen as well, and in fact you won't be able to use it until you've selected a customer:
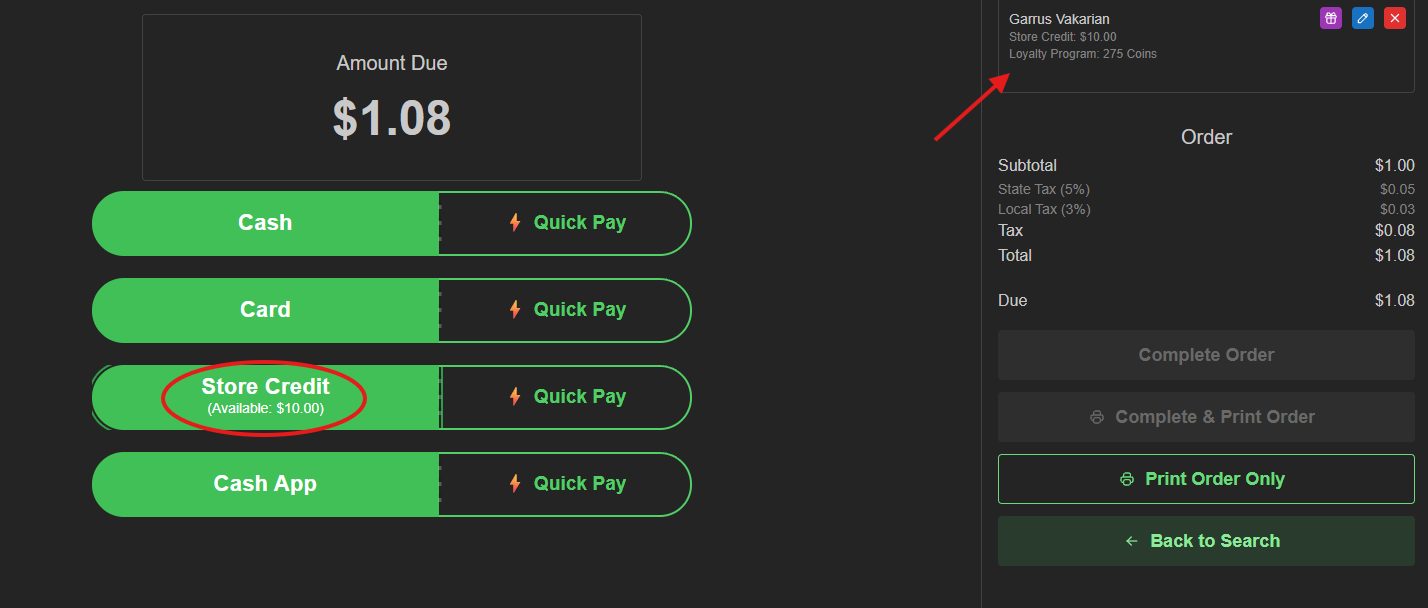
Once the customer is added, you're able to use it like the other tenders. You'll also notice that the customer's info is now displayed as well:
Okay, tenders are added. We now have two options for completing the transactions, 'Complete Order' and 'Complete & Print Order'. 'Complete Order' does just that. You'll now be taken back to the main POS search screen/interface. If you choose 'Complete & Print Order' the order will complete and depending on your printer settings, you'll get a popup to print your receipt:
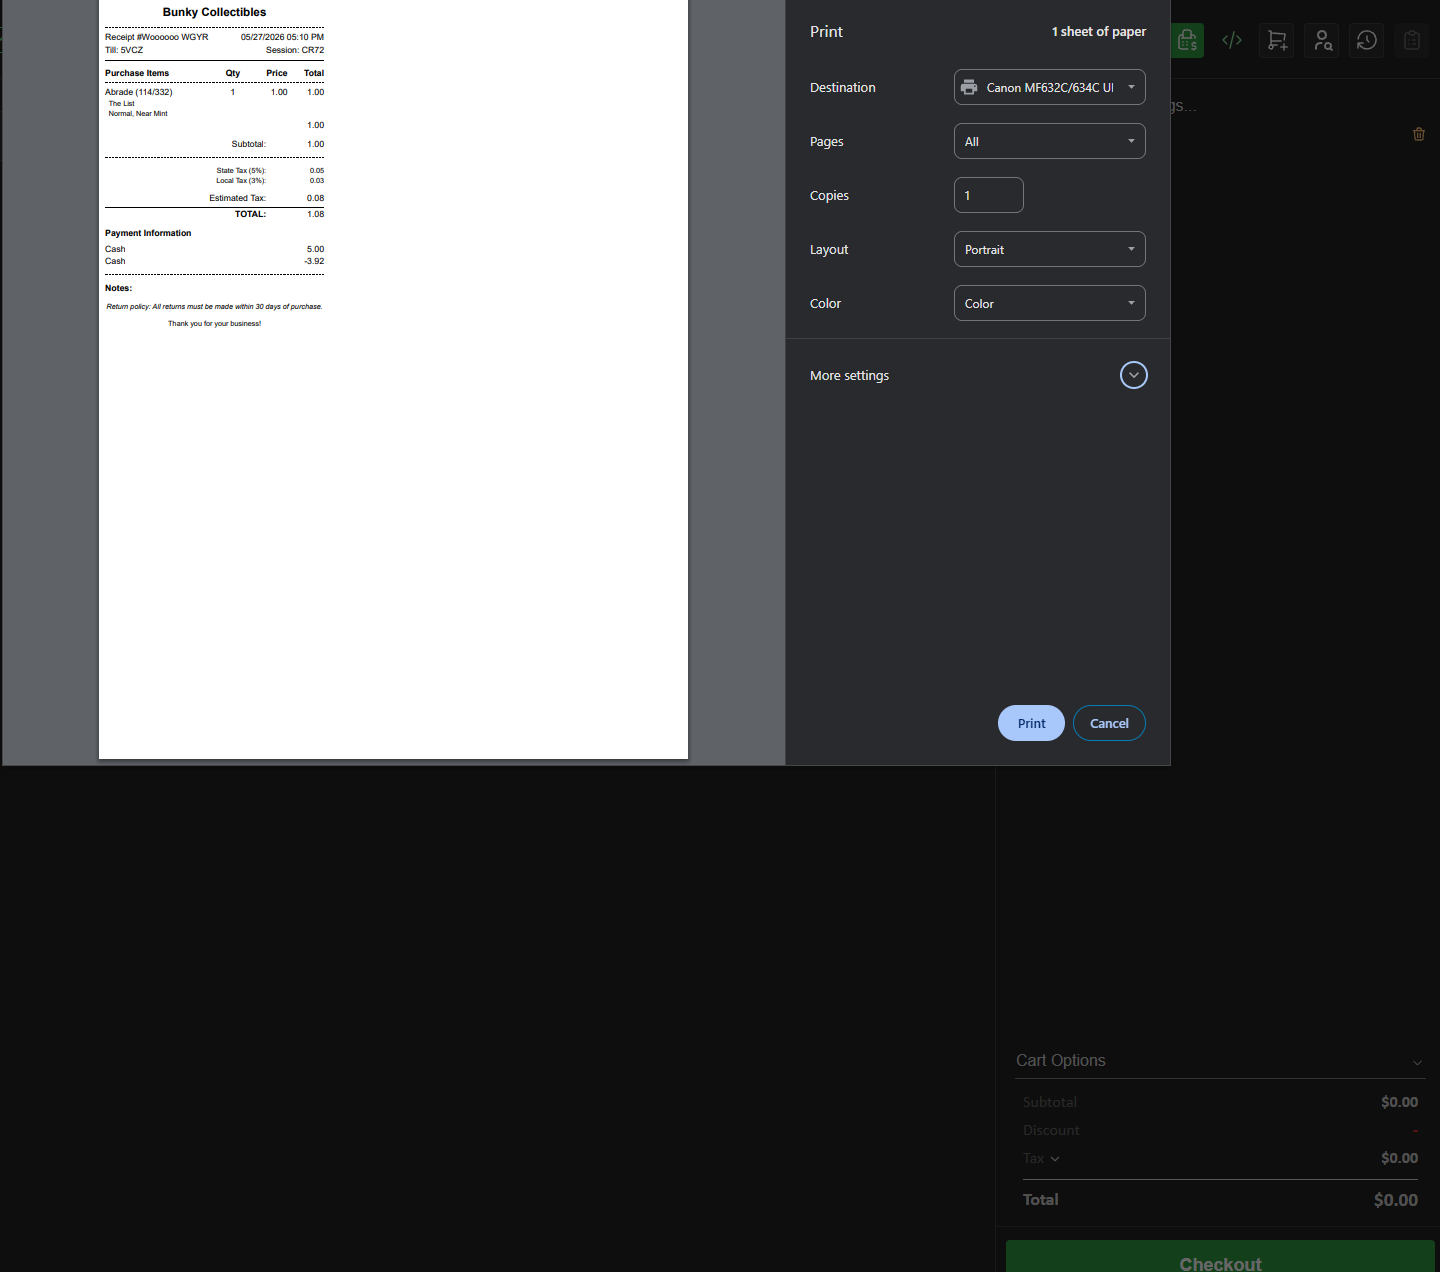
Once printed you're good to go! You're back to the main POS search/interface.
The last two buttons on the cart are for printing the receipt without completing the order:
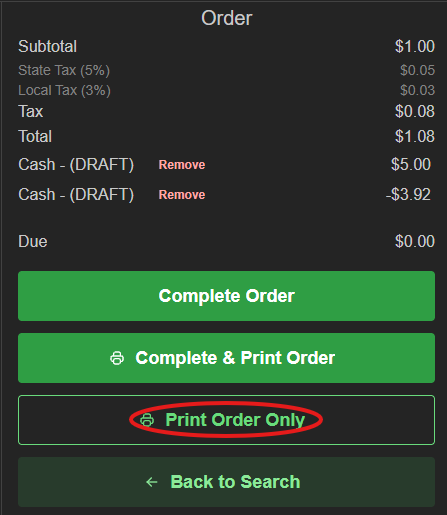
Hint: This can be very useful if someone wants to start pulling cards ahead of time!
And 'Back to Search'; this will take you back to the main POS search/interface with the cart still intact:
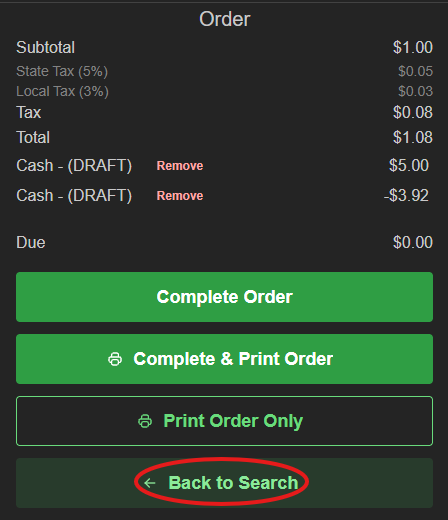
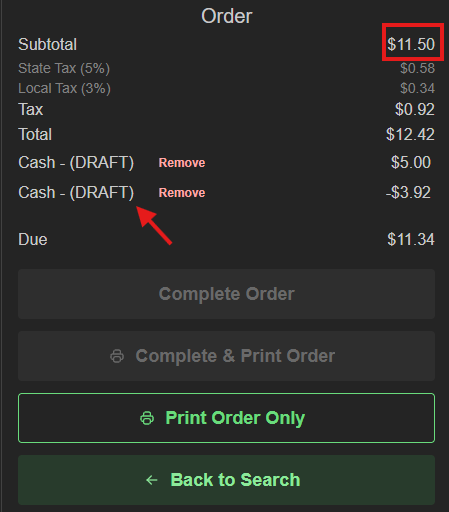
Note: if you return to search with tenders in the cart, those tenders will still be present when you return to the checkout screen, even if you make changes to the inventory in cart. For example I added another card to my cart and came back to check out:
And that's your first sale done!
Was this article helpful?
That’s Great!
Thank you for your feedback
Sorry! We couldn't be helpful
Thank you for your feedback
Feedback sent
We appreciate your effort and will try to fix the article