CSV imports are often necessary when bringing into inventory a large quantity of product from an external source. Whether you're migrating from a previous system or starting fresh internally after an inventory count, it's important that the import process goes smoothly, ensuring beforehand that your .csv files are properly formatted for the situation
Visit Products > Imports
We'll cover the import process:
- Importing (queuing) a product CSV (steps 1-10)
- Checking the queued job status (step 11a)
- Reviewing job lines (step 11b)
- Reviewing history of completed imports (step 12)
at a glance
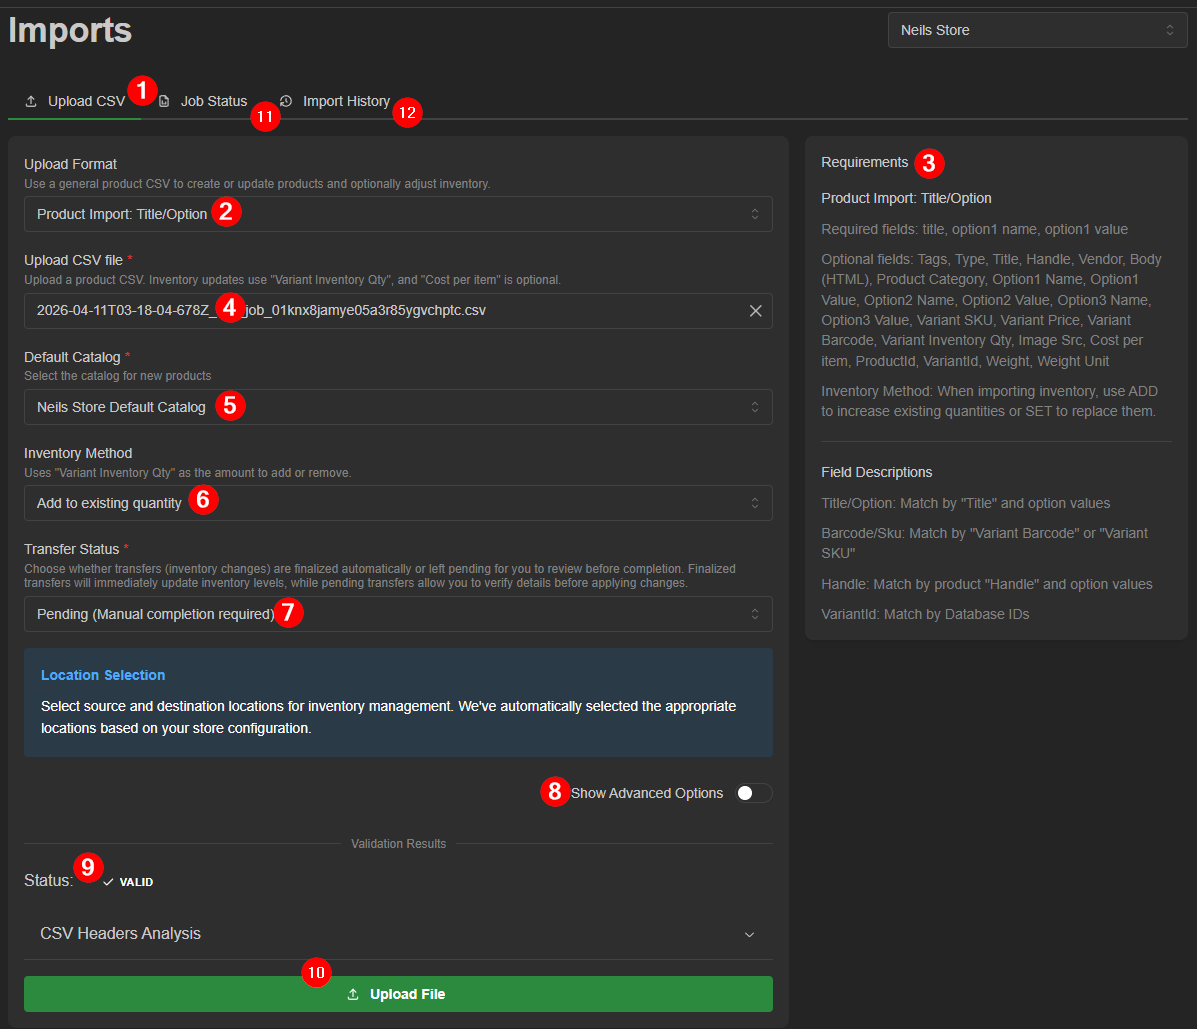
- Upload CSV tab: This is the default page for queuing a product transfer via CSV file import. Once the import job is queued and processing, you can view the job status at any time (11)
- Select a CSV import format. options include:
-VariantID: ShadowPOS format; use when re re-importing a CSV exported via ShadowPOS HQ. Uploaded items will route to their respective associated catalogs
-Title/Option: Use when CSV's 'Title' and 'Option' columns contain most prominent data; most popular choice for bringing in or updating quantities of custom product in owned catalogs
-Barcode/Sku: Use when CSV's 'Barcode/Sku' column has most prominent data; for bringing in or updating quantities of custom product in owned catalogs
-Handle: Use when CSV's 'Handle' column has most prominent data; for bringing in or updating quantities of custom product in owned catalogs
-TCGplayer Pro Import: Use when uploading a CSV exported from a TCGplayer Pro account (This is not the same as a TCGplayer Collection CSV). Hint: 'Cost per item' column can be added prior to upload for cost tracking.
-Scryfall MTG Import (Beta): Use when uploading a Scryfall exported CSV.
-Manabox MTG Import (Beta): Use when uploading a Manabox Collection CSV. - Check file requirements: This section changes depending on import format selection. Consult the information here to ensure your CSV contains the required columns for matching, and take note of the optional fields in case they're useful for your inventory
- Upload CSV file that matches your intended format above
- Select Catalog (owned) that new products will be created in if you control more than one owned catalog
- Choose inventory method. options are:
-Add to existing quantity: Adds each item's quantity from the CSV to the quantity already in your ShadowPOS store.
-Set exact Quantity: Overrides any items' quantities in your ShadowPOS store with the quantity amount in the CSV - Choose transfer status. options are:
-Finalized: The transfer(s) created by this import will be automatically accepted and inventory immediately modified
-Pending: The transfer(s) created by this import will require manual acceptance before inventory is modified - (optional) advanced source/destination options:
-Source location: Override where inventory is coming from (From)
-Destination location: Override where inventory will be received (To)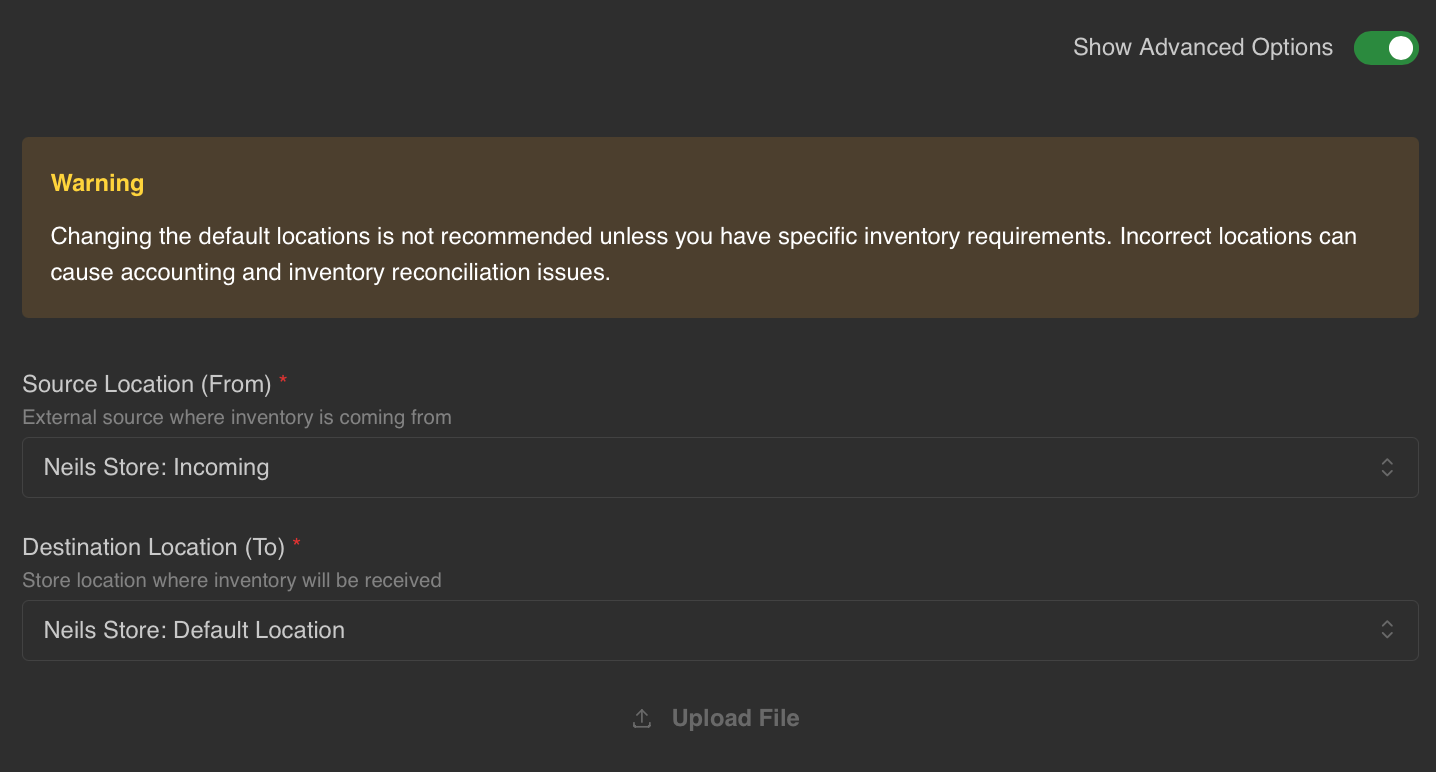 Warning:
Changing the default locations is not recommended unless you have specific inventory requirements.
Incorrect locations can cause accounting and inventory reconciliation issues. - Check the CSV Status: Uploaded file is checked for required column discrepencies
- Upload File. Congratulations; You import job has been queued! You'll be automatically switched over to the 'Job Status' tab to continue
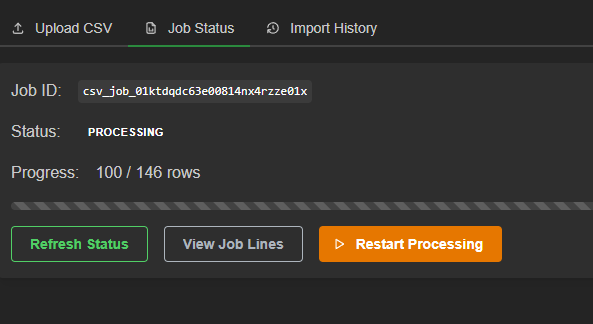
- Check the current job status. You can refresh the status, view job lines, or download a new export of the product in VariantID (ShadowPOS) format
 Upon completion we observe that 2 transfers were created, but the job was 'completed_with_errors'
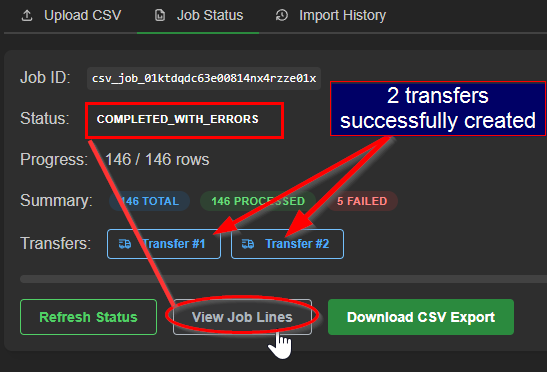 Let's click 'View Job Lines'
We can toggle the job line filter to view 4 categories: Failed / Completed / Currently Pending / Currently Processing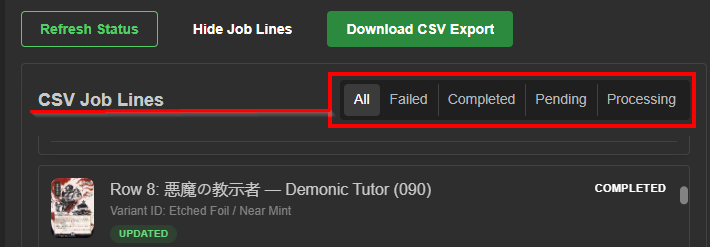 In this example, we want to click 'Failed', and expand the 'Row Data' for each failed item.
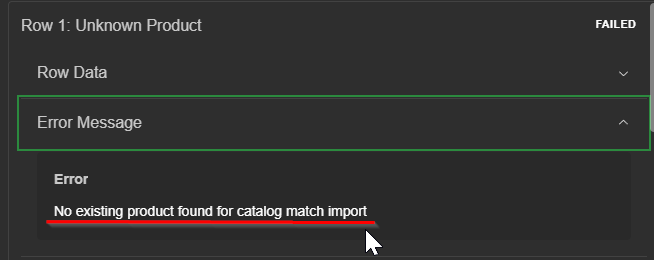
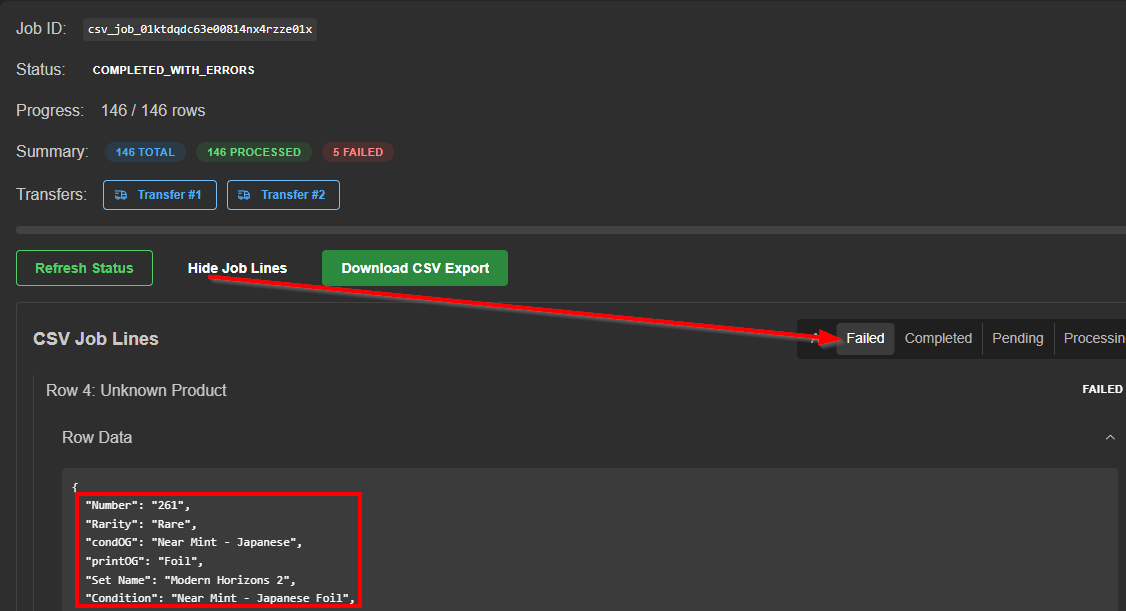 We can also expand the 'Error Message'
 Hint:
Hint:
Take note of the failed line items and check your CSV for possible discrepencies. You can either add the items manually through the Products page, or import a new CSV for these items with the correct column data. - Reviewing import history
Conveniently revisit a specific import's list of created transfers (linked), or load any import job to the 'Job Status' tab for review or CSV export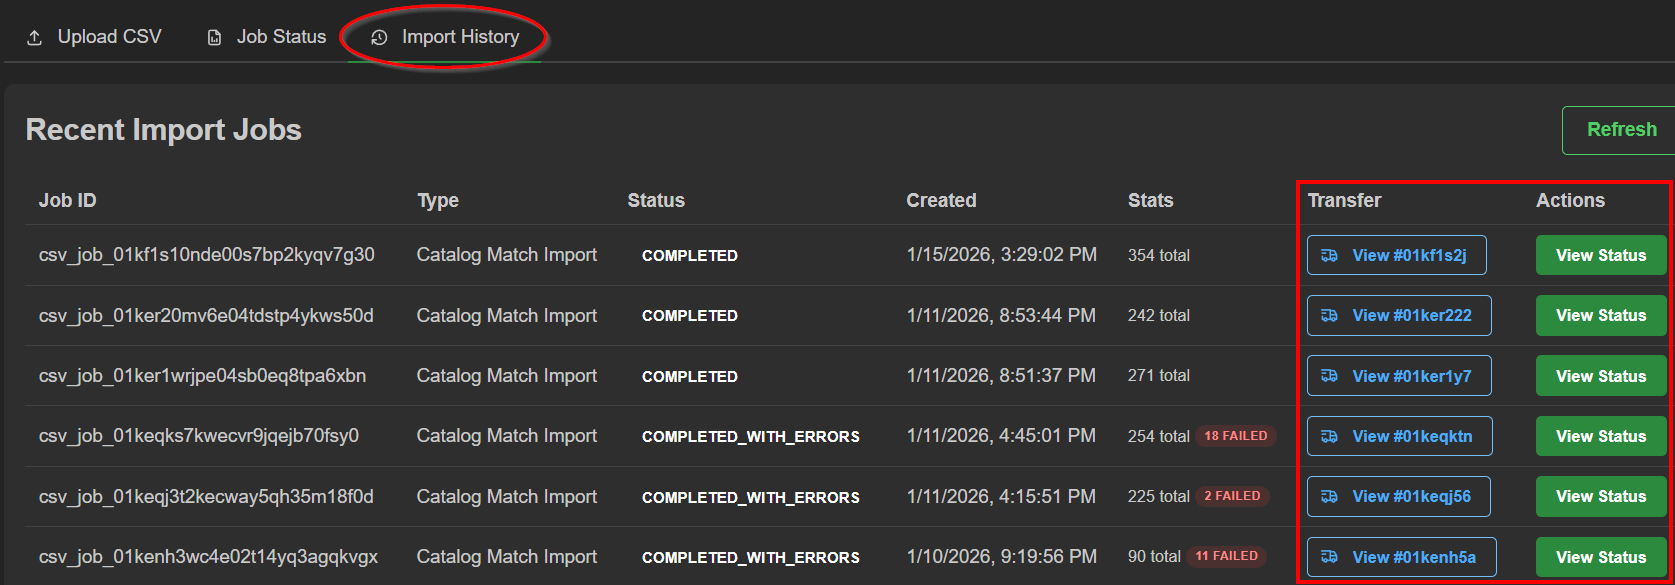
Was this article helpful?
That’s Great!
Thank you for your feedback
Sorry! We couldn't be helpful
Thank you for your feedback
Feedback sent
We appreciate your effort and will try to fix the article