The ShadowPOS label printer provides stores with an exciting label printing system that empowers stores to automatically print highly customizable labels for your incoming transfers/buylists with ease, or on-command per item by visiting the versatile and dedicated label printer page.
at a glance
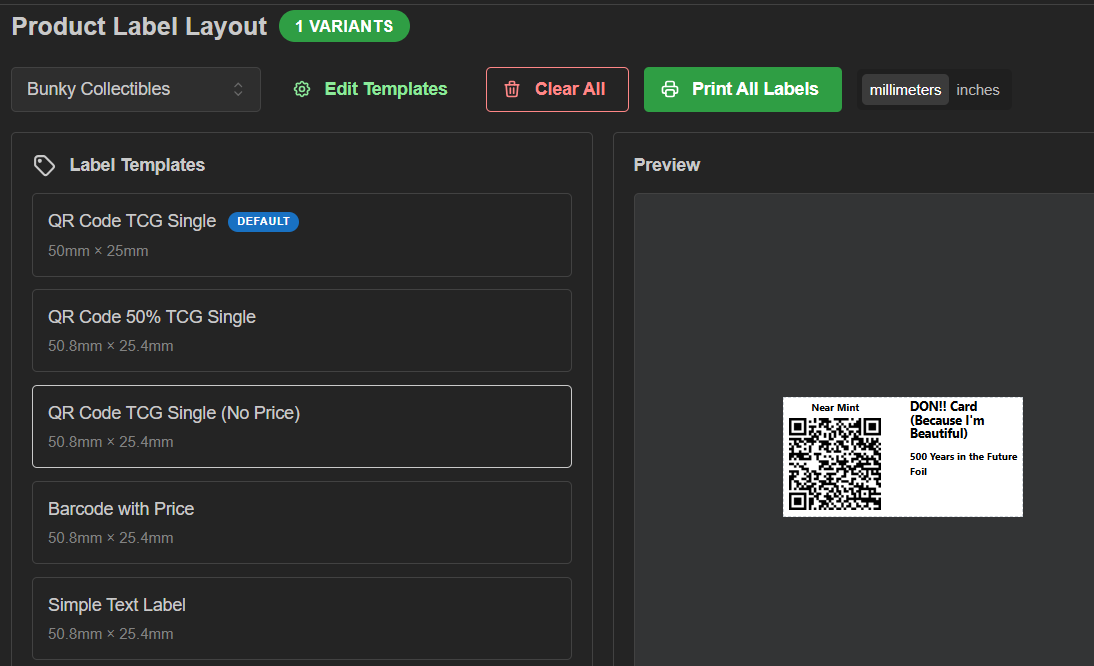
Visit Products > Label Printer
This is your Product Label Layout page. There are 5 default Label Templates to start off with. They can be edited and/or new templates can be created by clicking 'Edit Templates' at the top of the screen
We'll cover:
- Configuring your label template (Windows)
- Printing product labels
- Editing/creating/importing a label template (Advanced)
- Basic troubleshooting
Configuring your label template (Windows):
Depending on your printer, you may need to install its drivers first. Once drivers are installed, you'll be able to verify or create the proper paper size in your operating system's settings for the label printer.
in Windows:
1) Visit your printer's settings ('Printing preferences' in Windows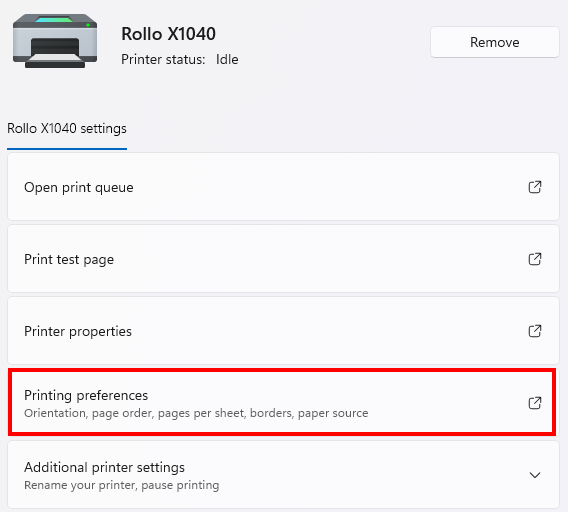
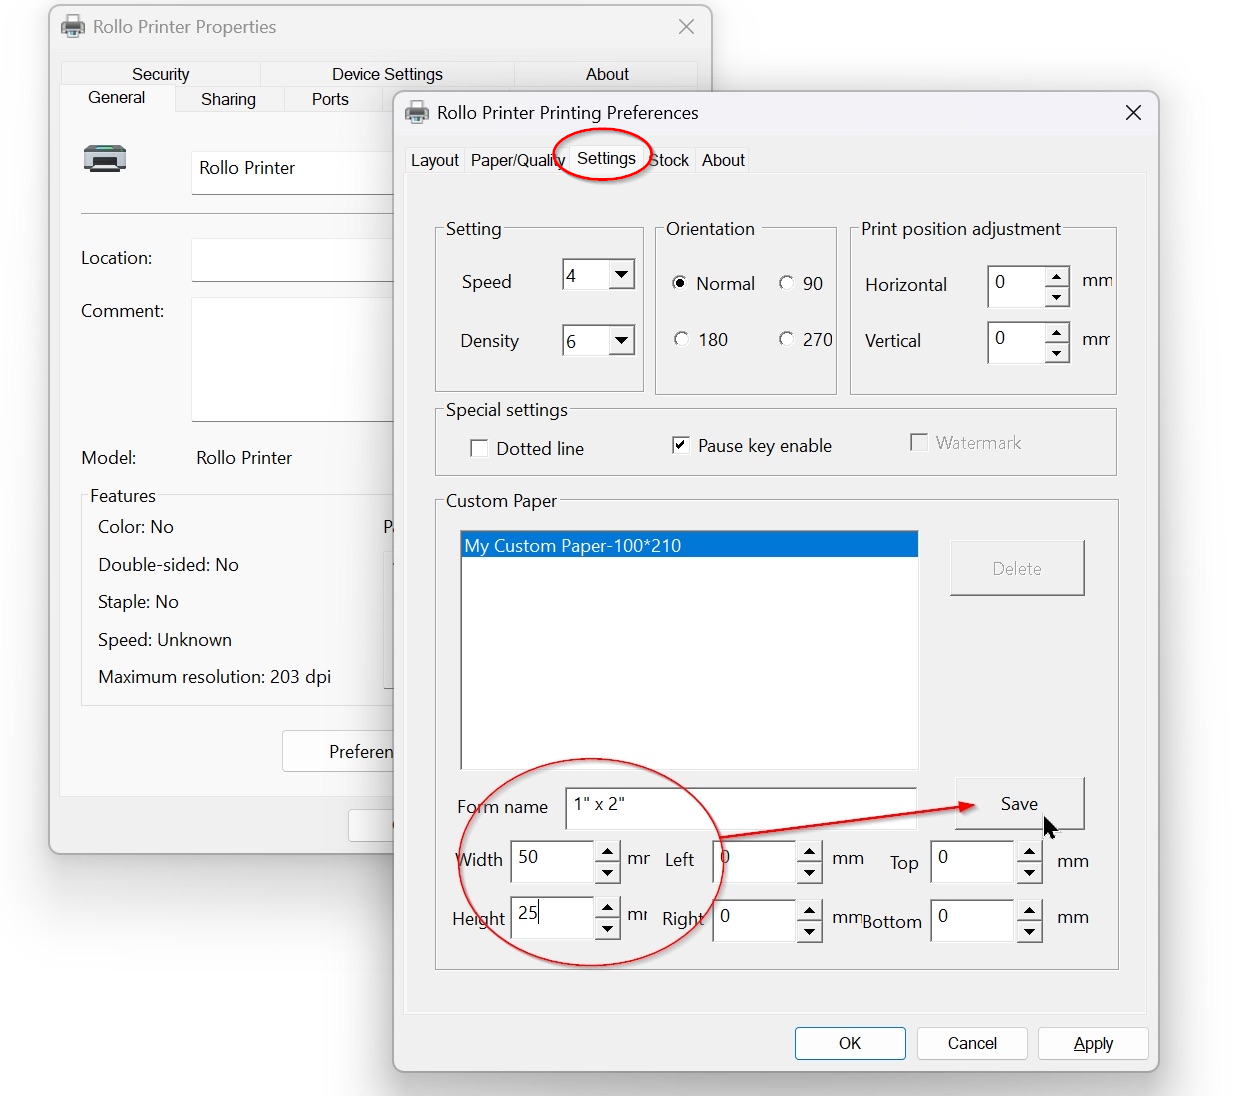
2) Click the 'Settings' tab
3) Configure the label size (in millimeters) and name the template
3) Click 'Save'
4) Click 'Apply' to set the template for the label printer
Hint: If you can, delete the other Custom Papers from the list that you won't be using.
 Note:
Note:
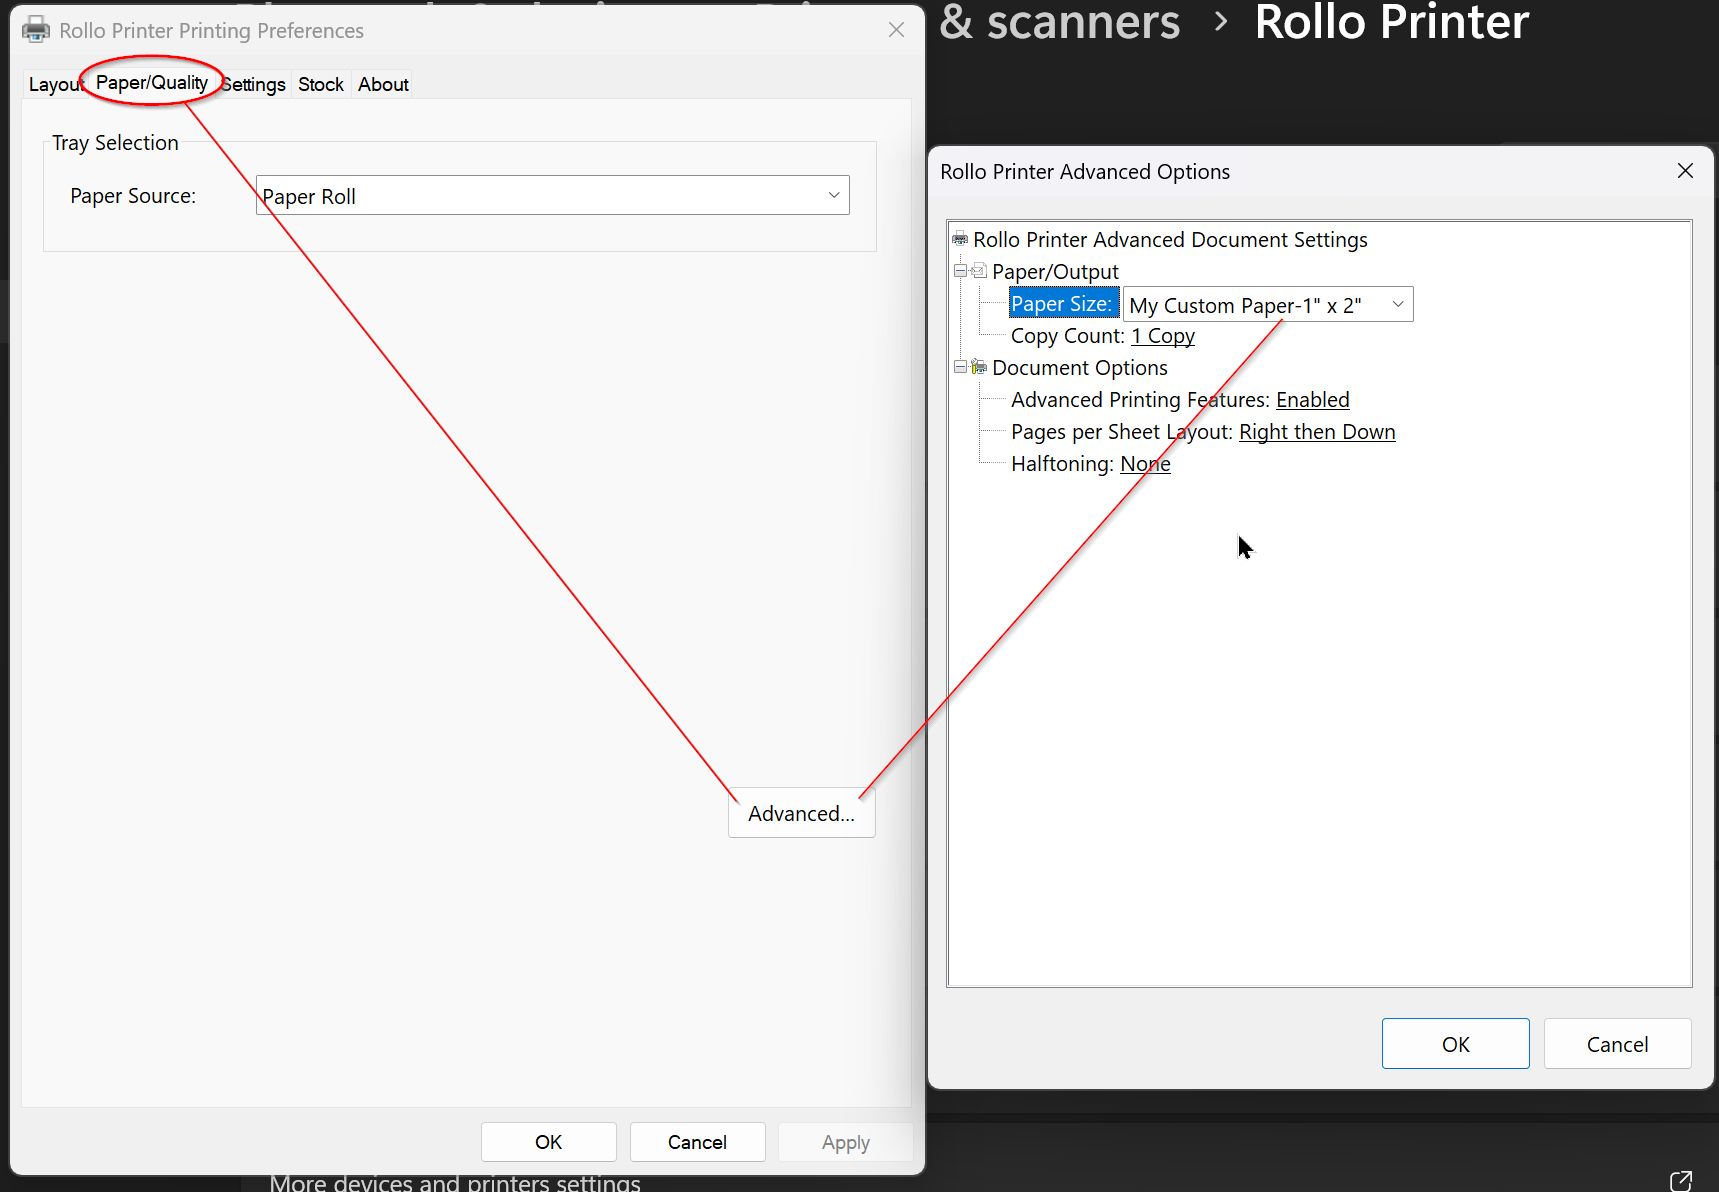
Sometimes Windows seems inconsistent and you'll notice the wrong paper selected in Paper/Quality tab of 'Printing Preferences', but selected properly in 'Advanced Settings'.
Check here!
Your label printer is ready for ShadowPOS!
Printing product labels:
Labels can be printed conveniently from a few different locations:
in Products > Transfers
From a Transfers' page (whether manually created or buylist generated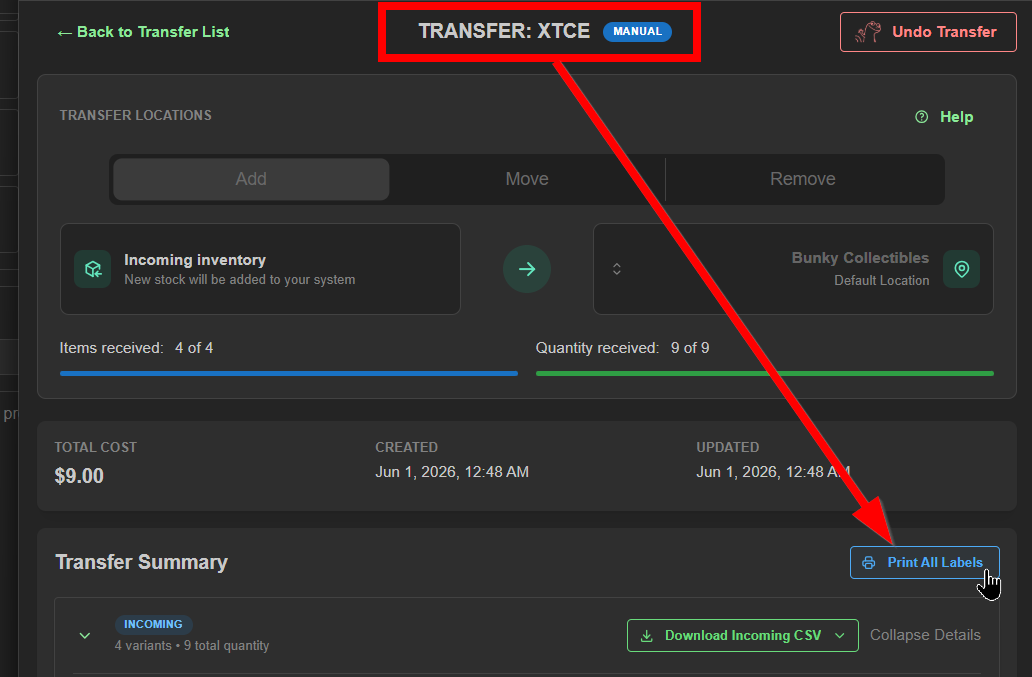
in Products > Purchase Orders
While constructing a Purchase Order
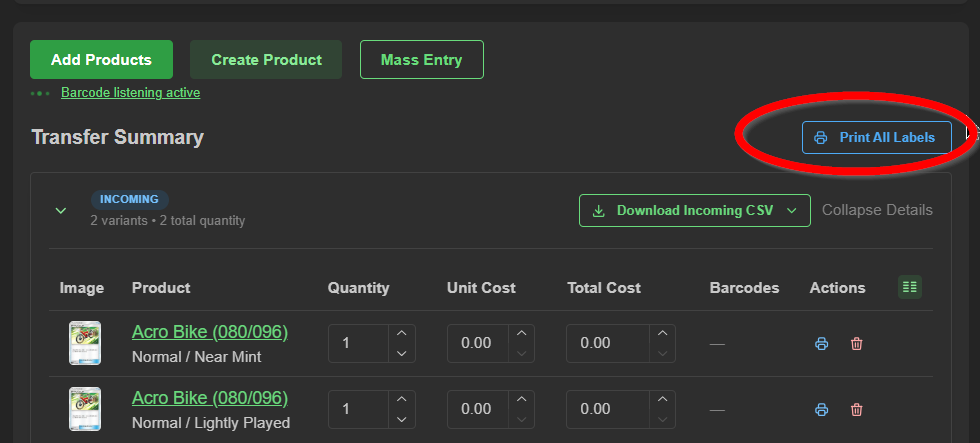
and here, in Products > Label Printer via the following steps:
- Select a label template for this print session
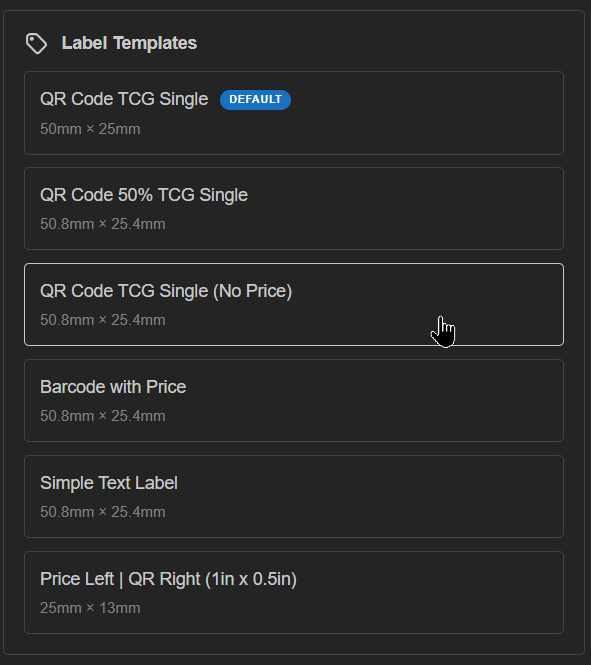
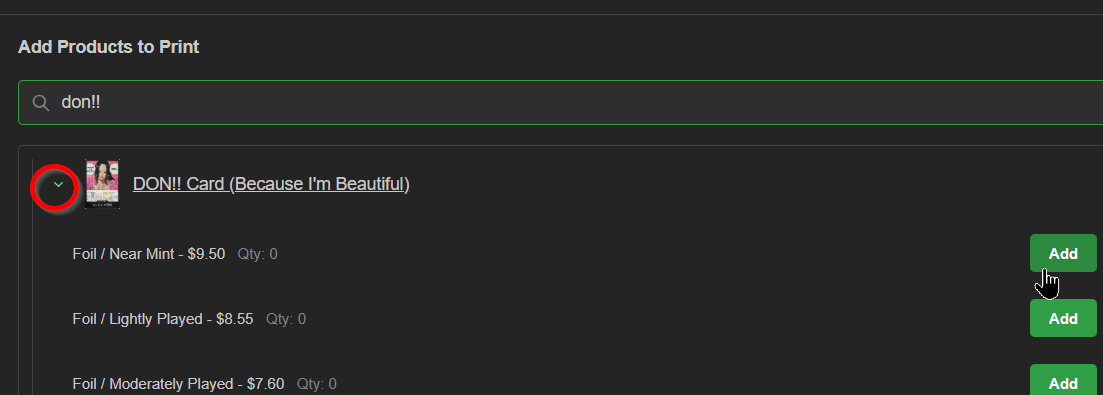
- Use the search field in the 'Add Products to Print' section below to find desired items for labelling
- Click the green dropdown arrow to the left of an item to expand and choose a variant by clicking its 'Add' button to the right. This variant has now been added to the 'Products' section below.
- Adjust quantities of labels to be printed in the 'Products' section below
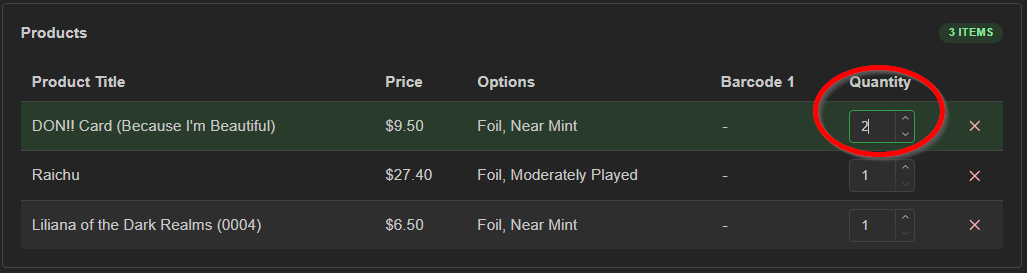 Hint: clicking any of the products in this field will update the preview window above
 - (optional) Repeat steps 1-4 until your print list is achieved

- Click the 'Print All Labels' button above to open the Print Preview window.
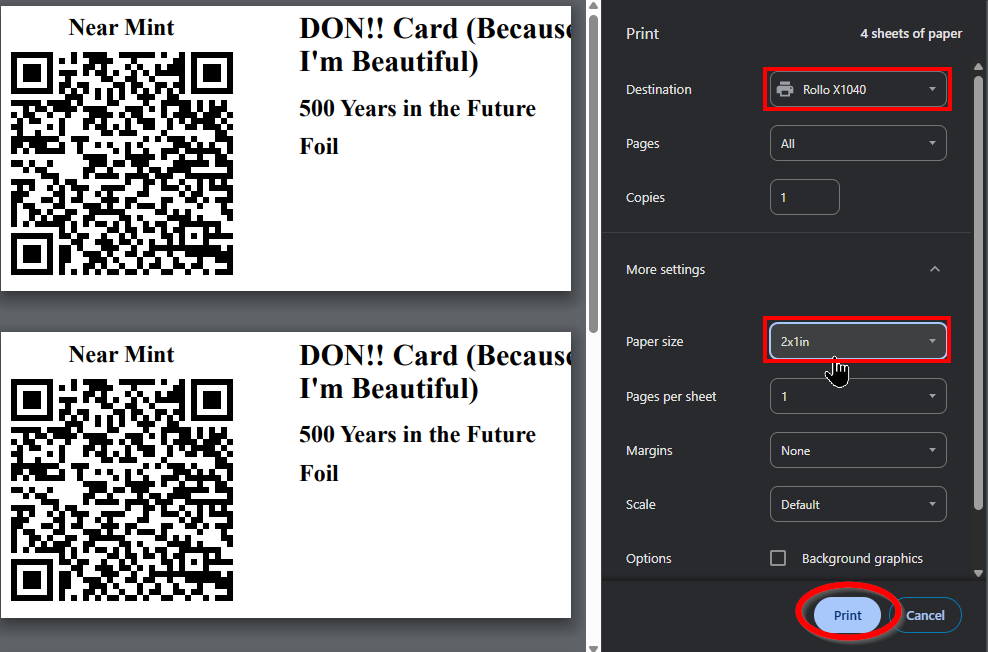
- Verify your printer settings, and click Print.
Advanced: Editing/creating/importing a label template:
- Click 'Edit Templates' at the top of the page to open the 'Label Template Editor' page
- Choose a template to edit from the dropdown in the top left, or click the '+ New Template' button in the top right
Hint: For new templates, copying the full code from an existing template over that closely matches the intended parameters of your new template could set you up with a good starting outline. - Modify the template, using 'Template Help' if necessary (top right) to copy/paste proper code syntax to the 'Template Code' field, tracking the changes in the Live Preview to the right.
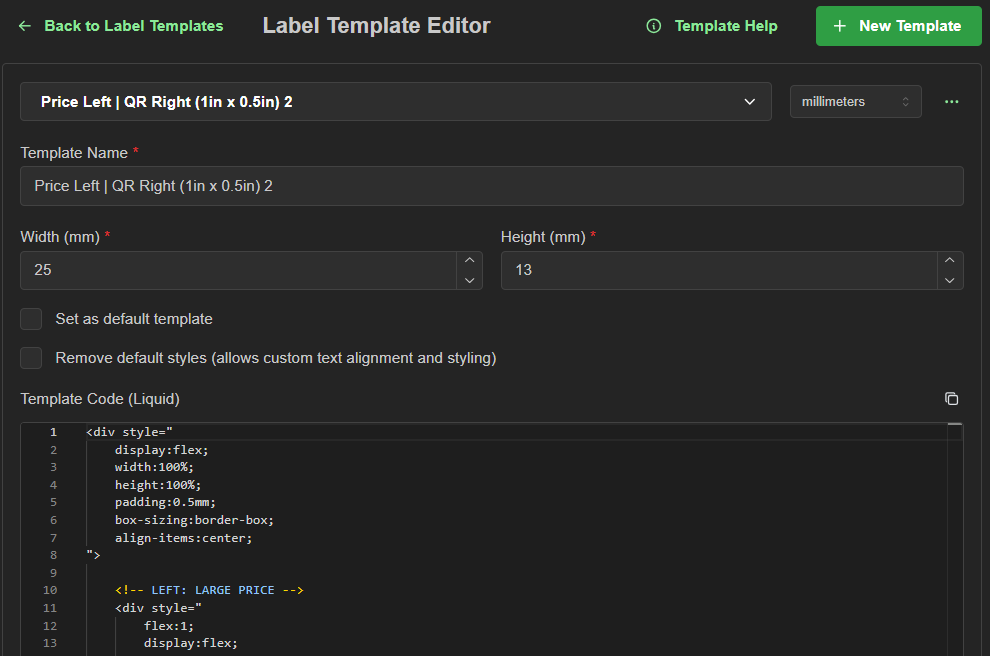
- When everything looks good, save changes or click 'Create Template' below before exiting the page.
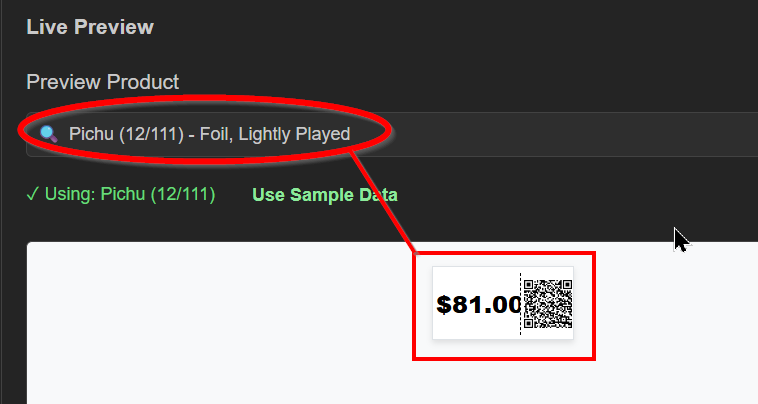
You're all set!
Basic Troubleshooting:
-Printer isn't showing up at all in Windows:
Some label printers may require a driver installation. You may need to visit the manufacturer's website to download it. After installation, restart your computer.
-Labels are printing sideways: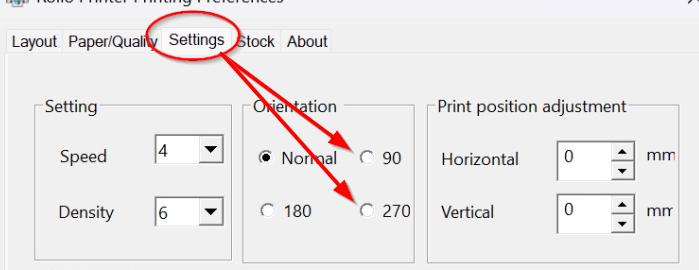
Visit your printer's 'Printing Preferences' section of 'Settings' (in Windows). Click the 'Settings' tab in the pop-up window, and find the 'Orientation' section near the top. Switching this to either 90 or 270 degrees should fix it.
-Barcode label isn't working in the point of sale:
Barcodes are generally for your simple custom catalog items. QR codes are preferred for singles' catalogs as they provide more data needed to be recognized in the system when scanned.
-QR code / won't register a scan:
If you're printing onto labels smaller than 2 x 1in. (50mm x 25mm), your printer may not have the ability to print at a resolution high enough to preserve the integrity of visual information a QR code provides. Labels 2in. tall and 1in. wide or larger are recommended.
Was this article helpful?
That’s Great!
Thank you for your feedback
Sorry! We couldn't be helpful
Thank you for your feedback
Feedback sent
We appreciate your effort and will try to fix the article