ShadowPOS provides a variety of solutions to meet your store's needs and keep your accounting transparent. Add integrated options such as USAePay or PayPal, manual cash-alternatives like peer-to-peer pay links, or even unique tender types exclusive to designated tills. All tenders types are created and managed here
Visit Settings > Tenders
at a glance
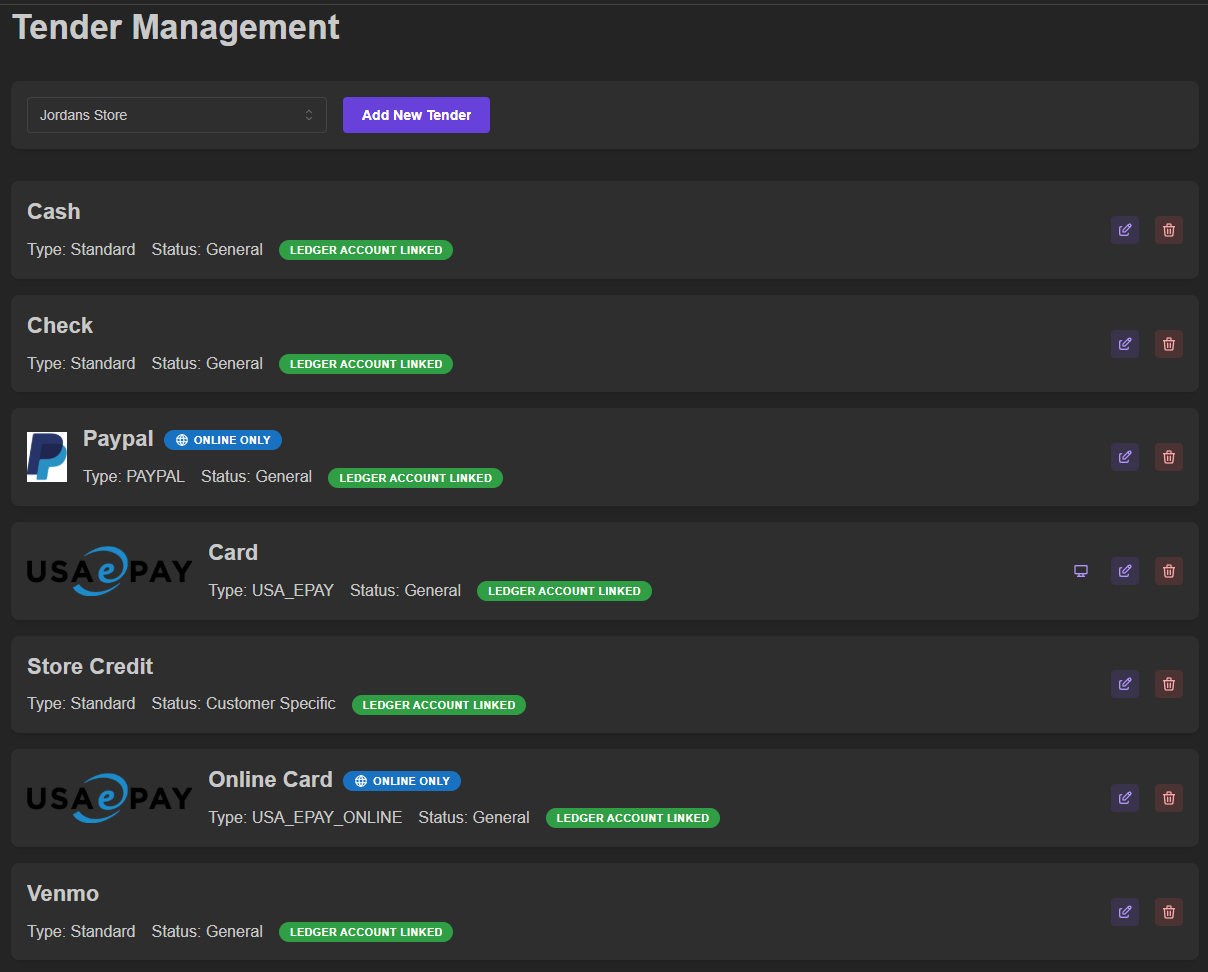
A tender must be established in order to accept payment for goods sold and to pay out customers for buys. Once created, new tenders are included in sales reports and ledger summaries for easy tracking.
We'll cover the following:
- Manual tenders (cash, check, etc)
- P2P tenders (CashApp, Venmo, etc)
- Integrated tenders (USAePay, PayPal)
- Obtaining API keys (USAePay, PayPal)
Adding a manual tender (cash alternative, check, vouchers, etc):
- Confirm your store is selected from the dropdown at the top (if you own multiple stores)
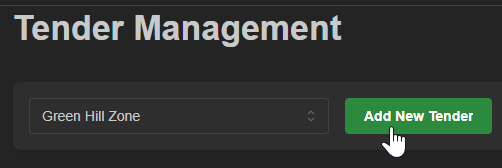
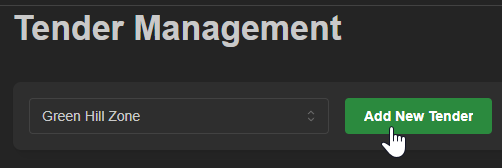
- Click Add New Tender
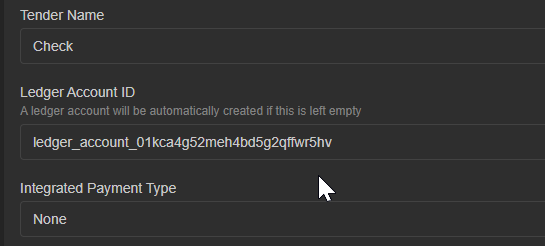
- Enter a tender name, and associate a Ledger Account ID if desired, or leave blank (standard)
- Verify your store's preferred toggles are on or off
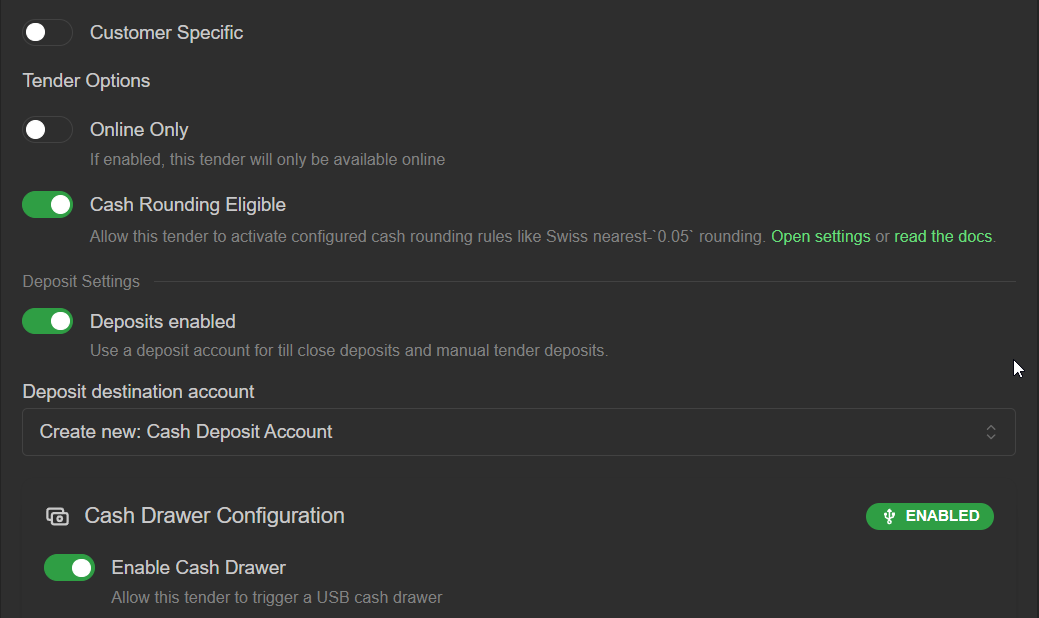 (optional) If cash drawer is enabled, configure when drawer will be triggered to open
 - Click Create Tender at the bottom to establish this tender type.
 That's all there is to it!
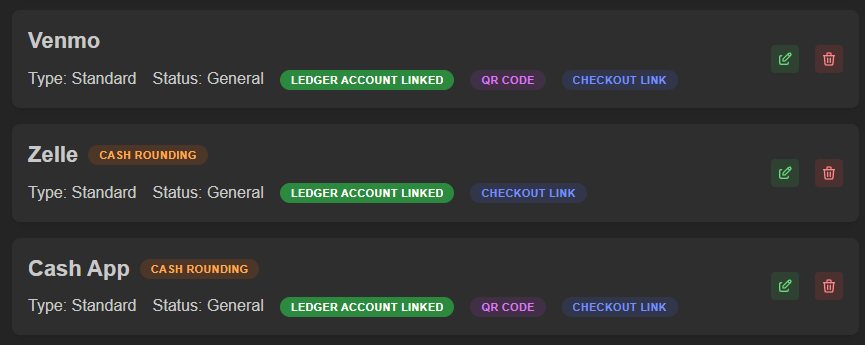
Adding a peer-to-peer [P2P] tender (Cash App, Venmo, Zelle, etc):
- Confirm your store is selected from the dropdown at the top (if you own multiple stores)
- Click Add New Tender
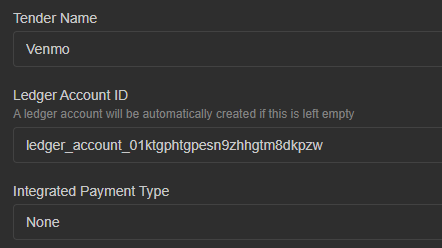
- Enter a tender name, and associate a Ledger Account ID if desired, or leave blank (standard)
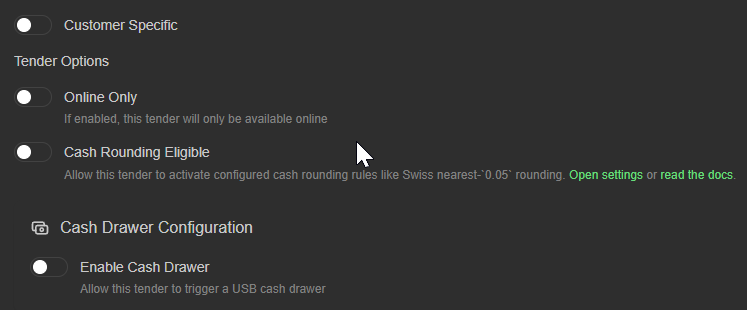
- Verify toggle options
- Configure QR code and/or pay link for the checkout display
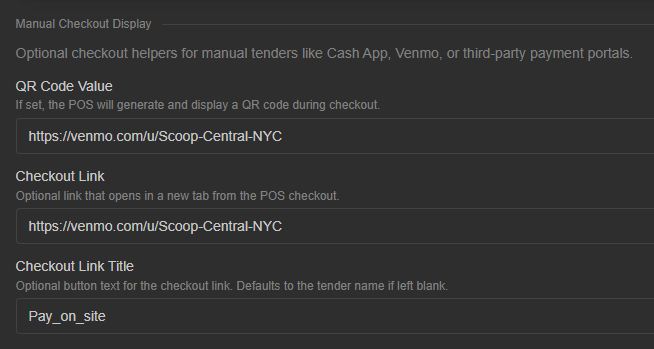 Links configured for the checkout display will conveniently appear in the point of sale during checkout
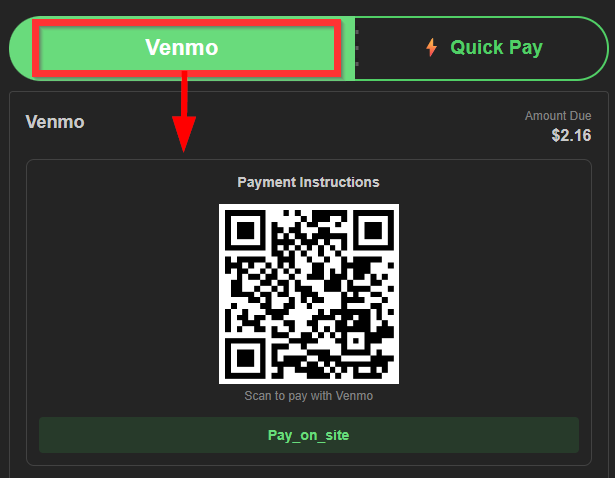 example: Point of sale Venmo checkout payment option selected
 - Click Create Tender at the bottom to establish this tender type.Your accountant will thank you!
Adding an integrated tender (USAePay in-store):
- Confirm your store is selected from the dropdown at the top (if you own multiple stores)
- Click Add New Tender
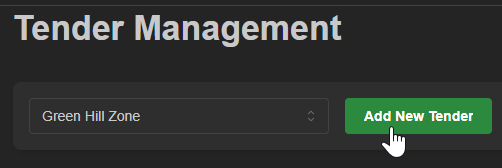
- Enter a tender name, and associate a Ledger Account ID if desired, or leave blank (standard)
- Select 'USA ePay' from the Integrated Payment Type dropdown
Hint: See API walkthroughs section below for obtaining applicable API information
Note: for online credit card, see next section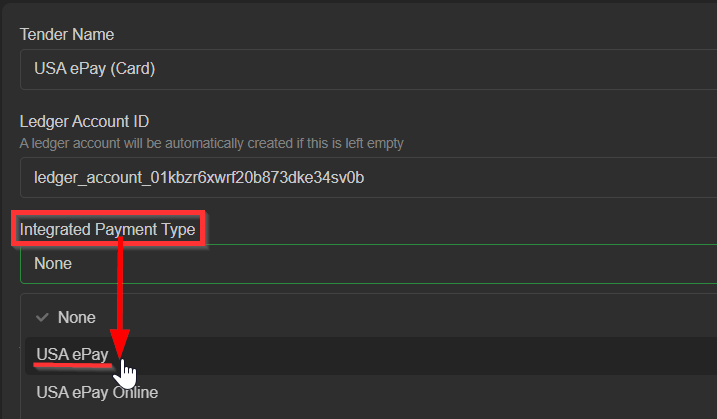
- (optional) Enable delayed capture, or keep disabled (default)

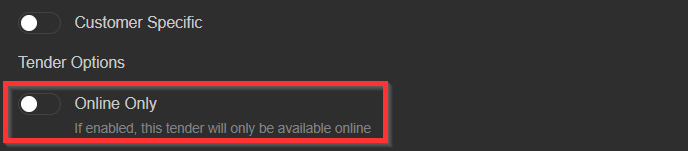
- Leave 'Online Only' toggle off for instore card payments
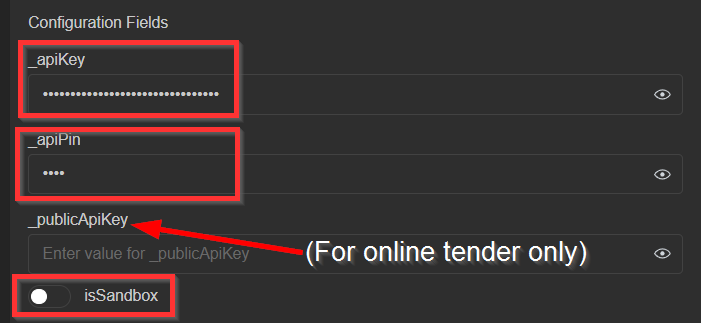
- Fill out the configuration fields for '_apiKey' , 'apiPin' , and ensure the 'isSandbox' toggle is off
- Click Create Tender at the bottom to establish this tender type.

Adding an integrated tender (USAePay online):
- Confirm your store is selected from the dropdown at the top (if you own multiple stores)
- Click Add New Tender
- Enter a tender name, and associate a Ledger Account ID if desired, or leave blank (standard)
- Select 'USA ePay Online' from the Integrated Payment Type dropdown
Hint: See API walkthroughs section below for obtaining applicable API information
Note: for instore credit card, see above section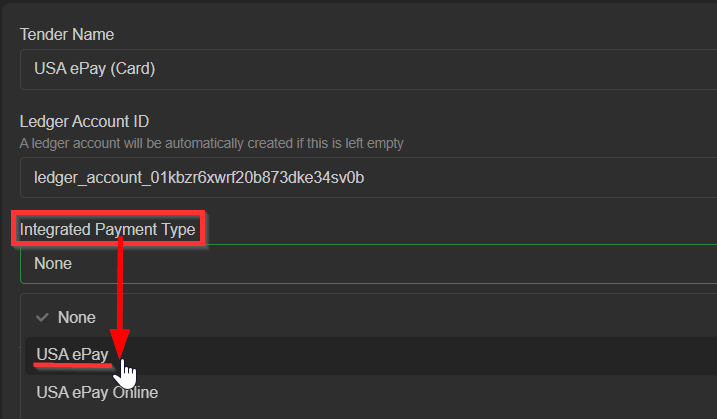
- (optional) Enable delayed capture, or keep disabled (default)

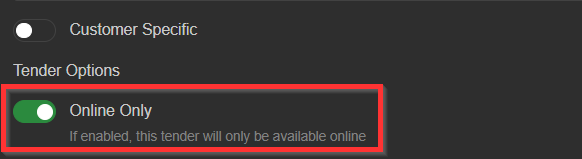
- Toggle 'Online Only' on
- Fill out each configuration field for '_apiKey' , 'apiPin' , '_apiKey', and ensure the 'isSandbox' toggle is off
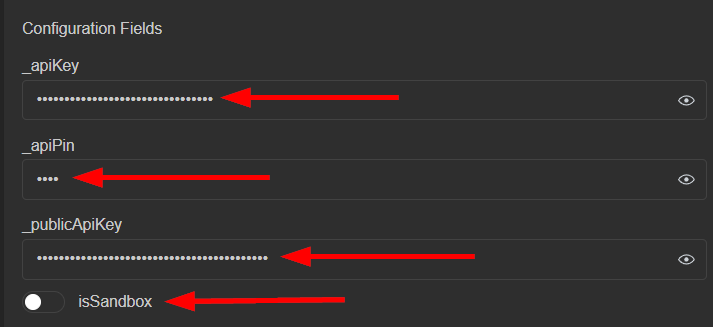 Hint: You can use a new set of API info, or reuse the private API key and pin from your instore credit tender; you'll just need to add a public key (through the USAePay portal)
 - Click Create Tender at the bottom to establish this tender type.

Adding an integrated tender (PayPal online):
- Confirm your store is selected from the dropdown at the top (if you own multiple stores)
- Click Add New Tender
- Enter a tender name, and associate a Ledger Account ID if desired, or leave blank (standard)
- Select 'PayPal' from the Integrated Payment Type dropdown
Hint: See API walkthroughs section below for obtaining applicable API info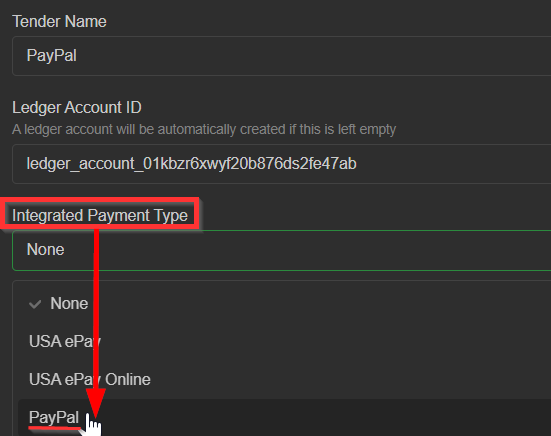
- (1) Toggle 'Online Only' on
(2) provide your PayPal API credentials in the configuration fields below
(3) Ensure 'isSandbox' toggle is off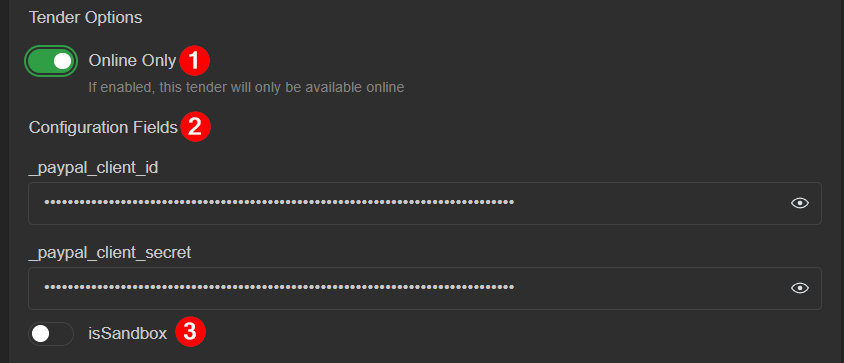
- Verify your 'client_id' and 'client_secret' with the button above.

Result will be clearly indicated as either rejected or verified

- Click Create Tender at the bottom to establish this tender type.

Note: To attach tenders to tills, visit Menu > Settings > Tills
Note: Toggle Enable Cash Drawer for cash or check tenders only for compatible tills instore (leave off for online tills)
API walkthroughs
Credit card processing and other API-based payment platforms require additional configuration of API Keys for payment authentication/authorization.
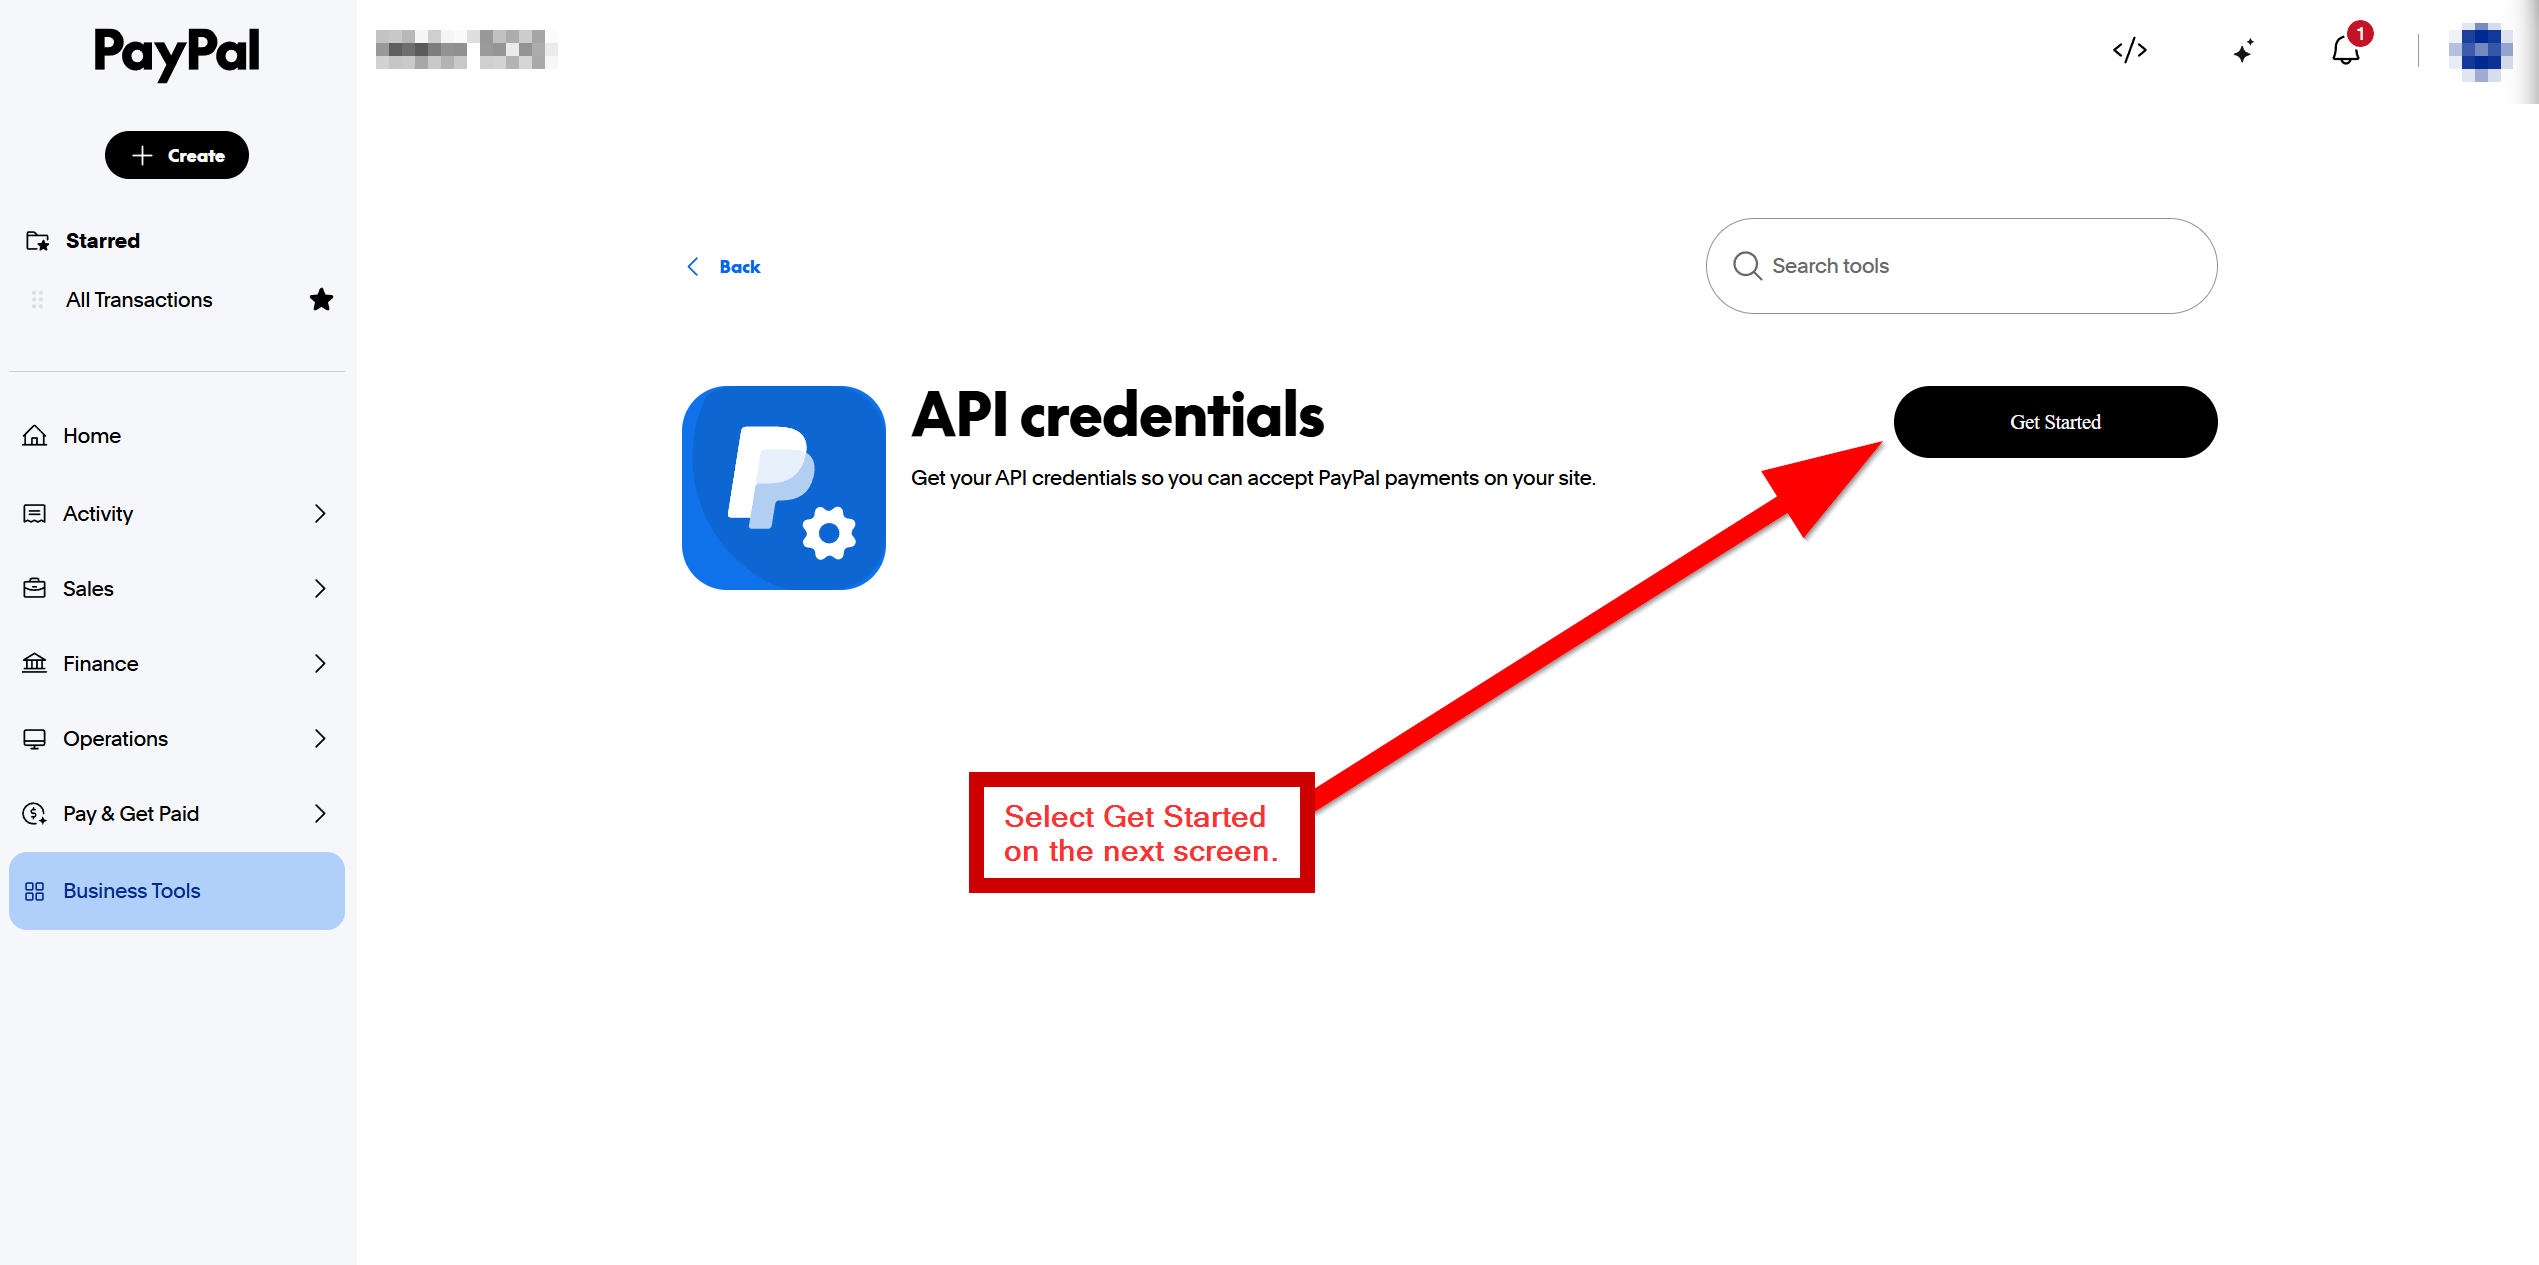
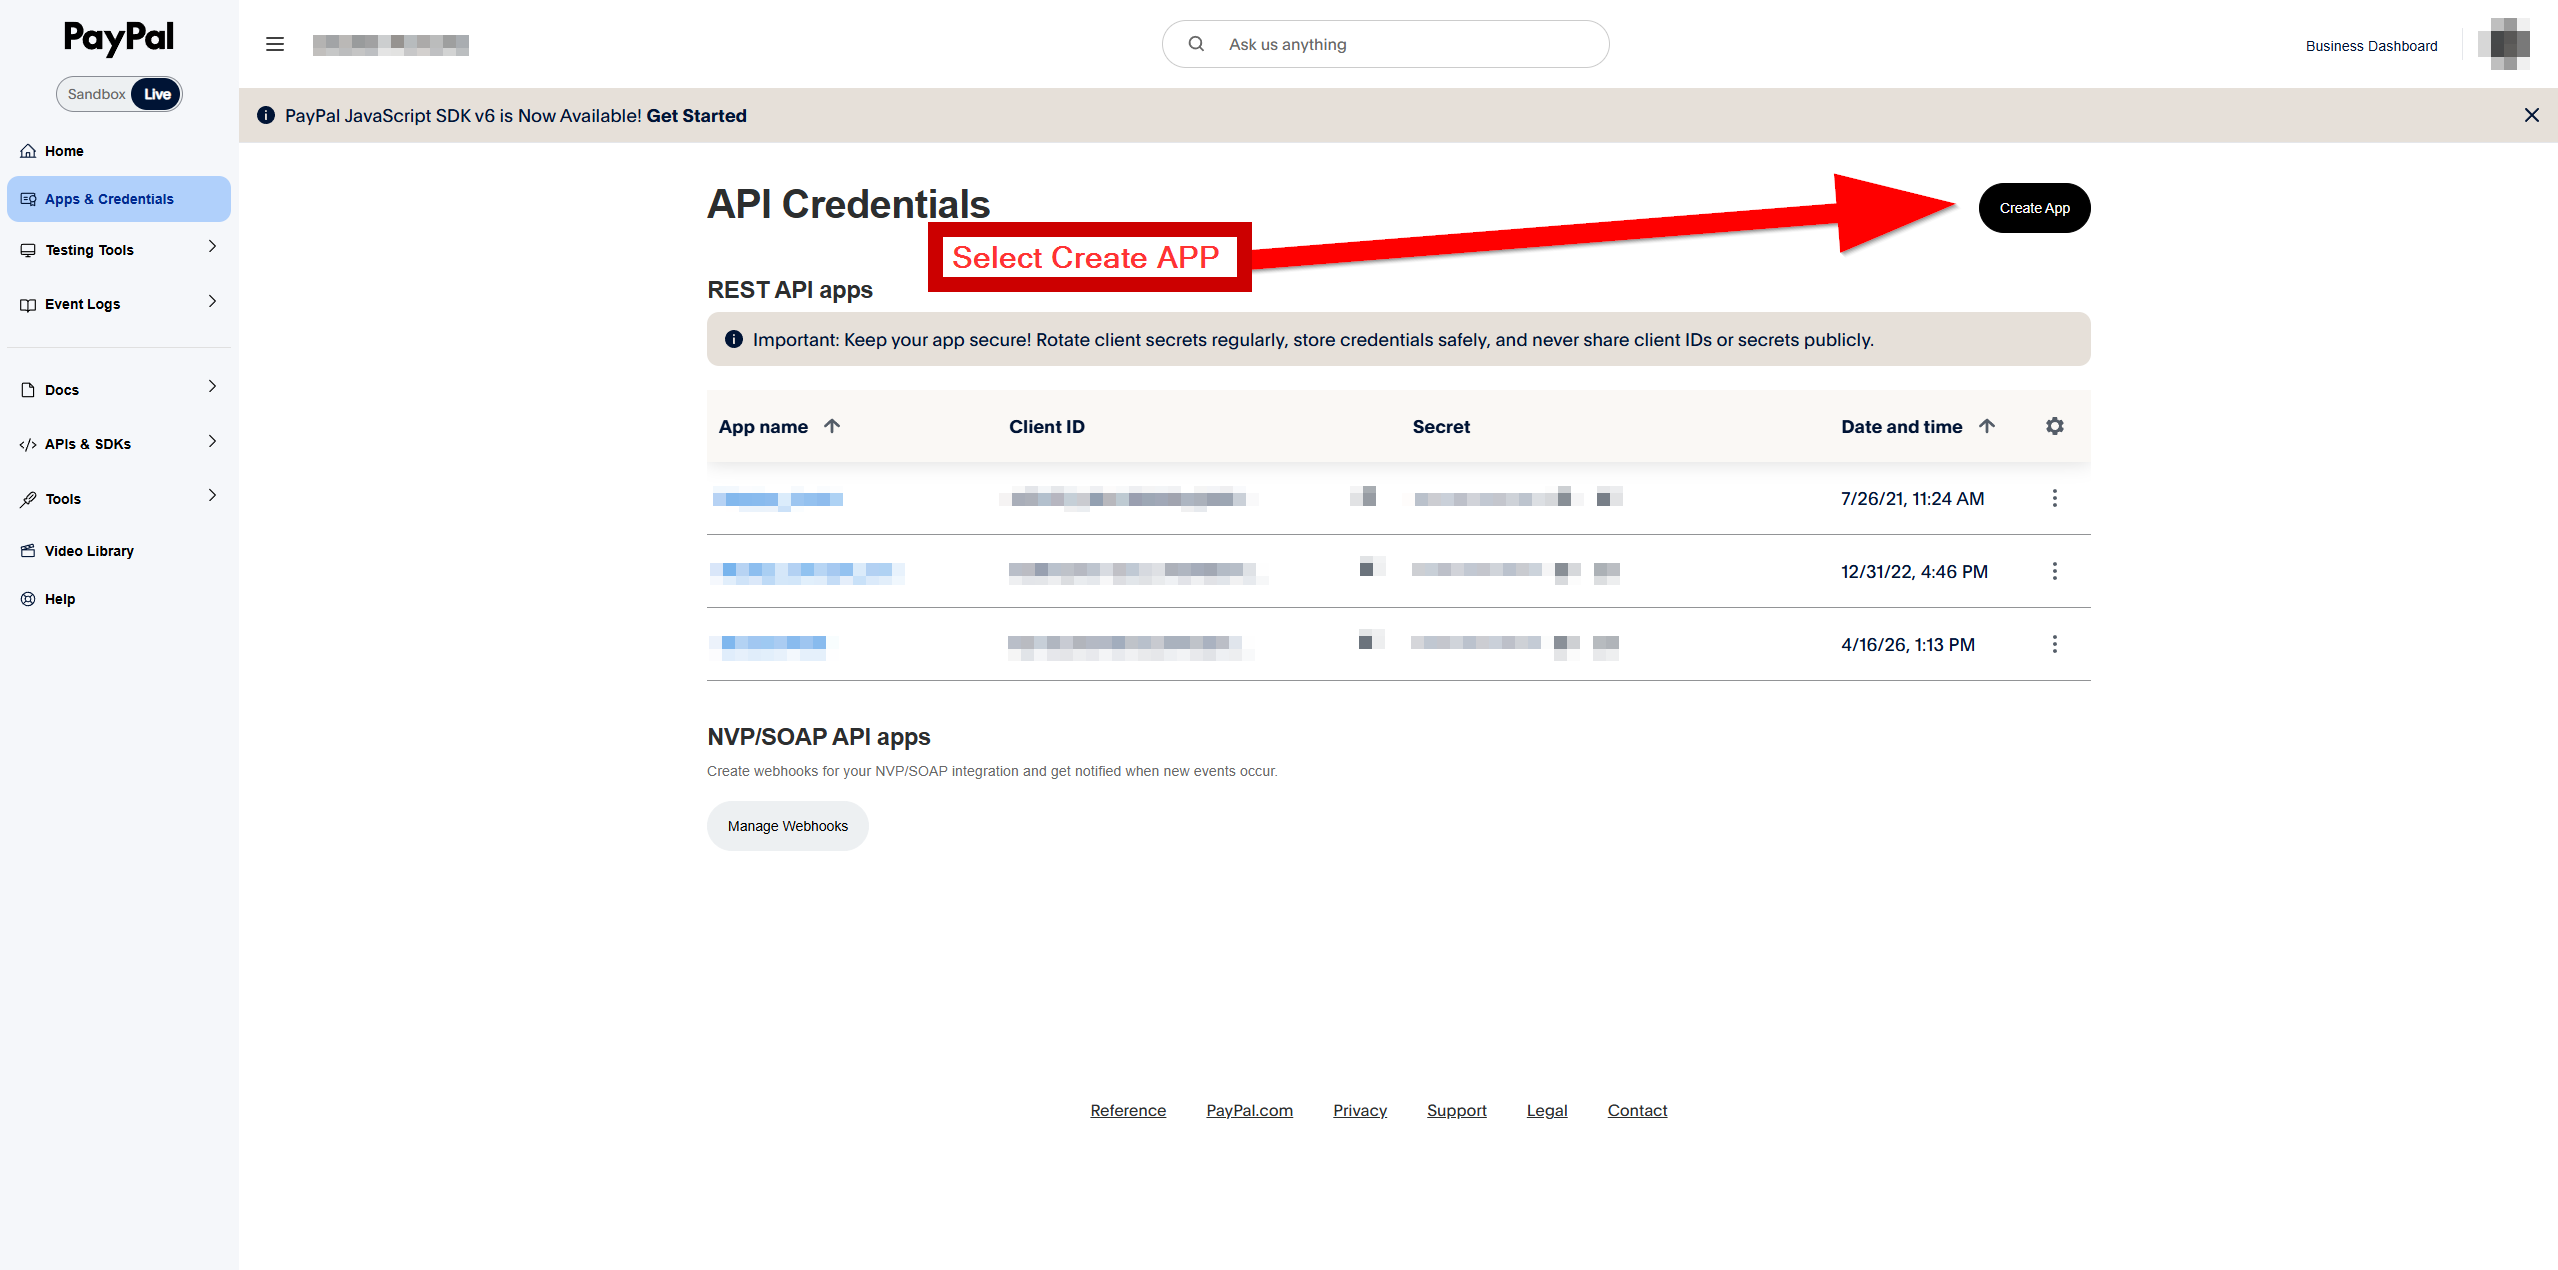
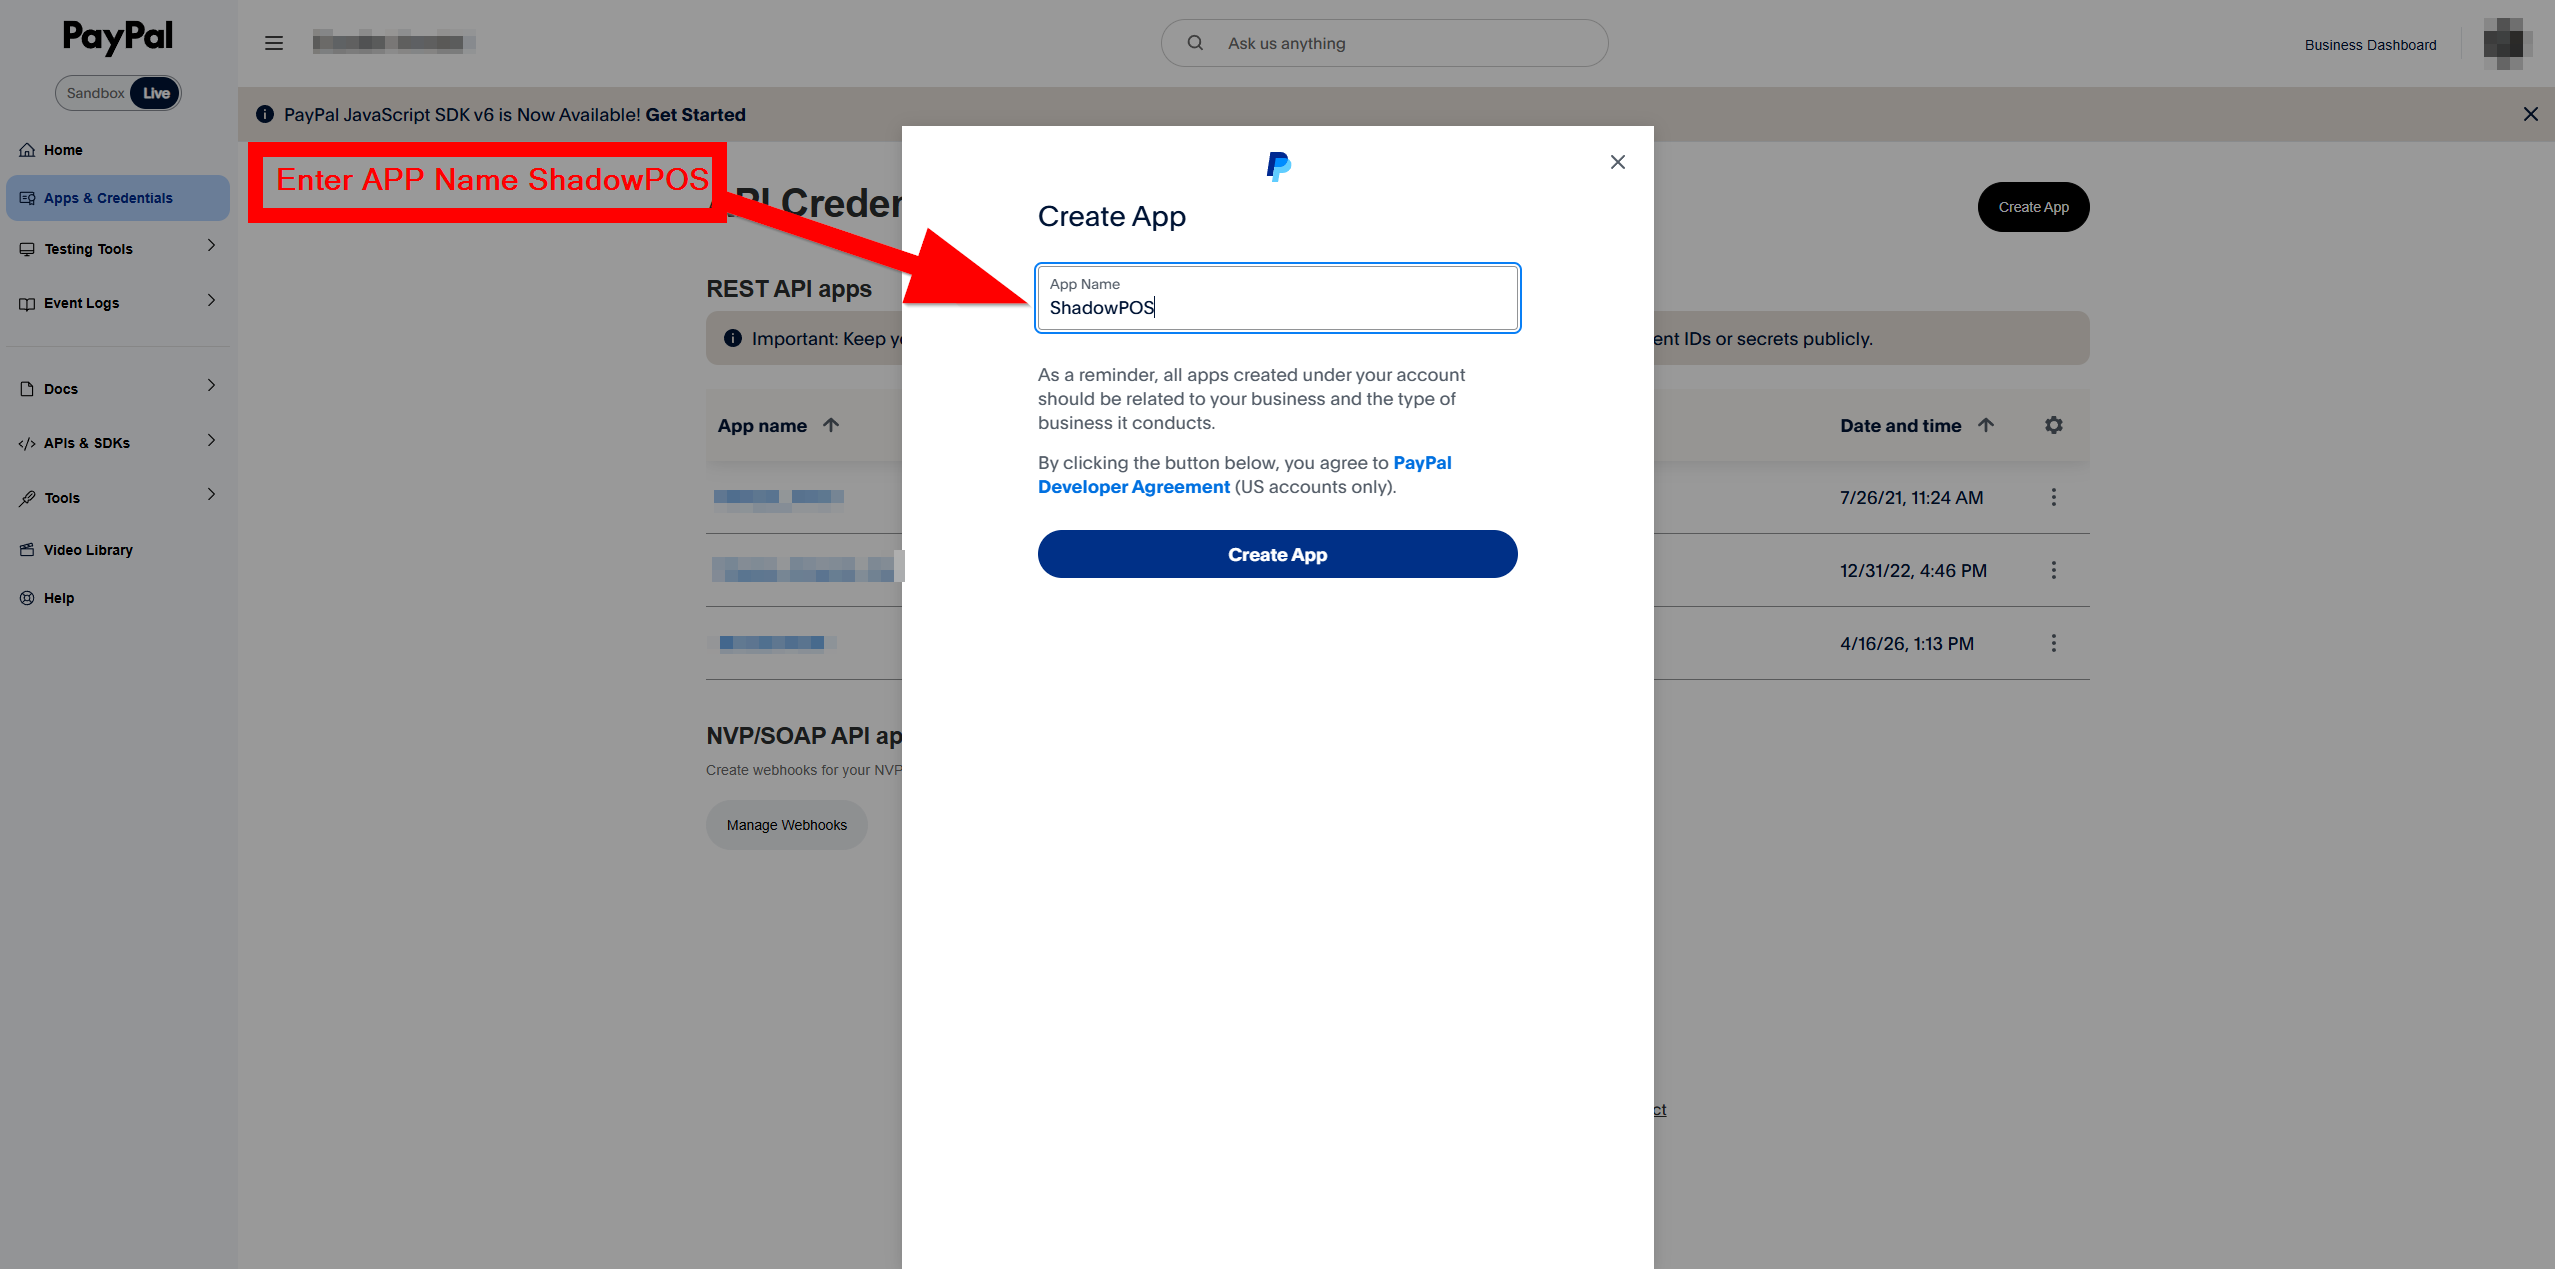
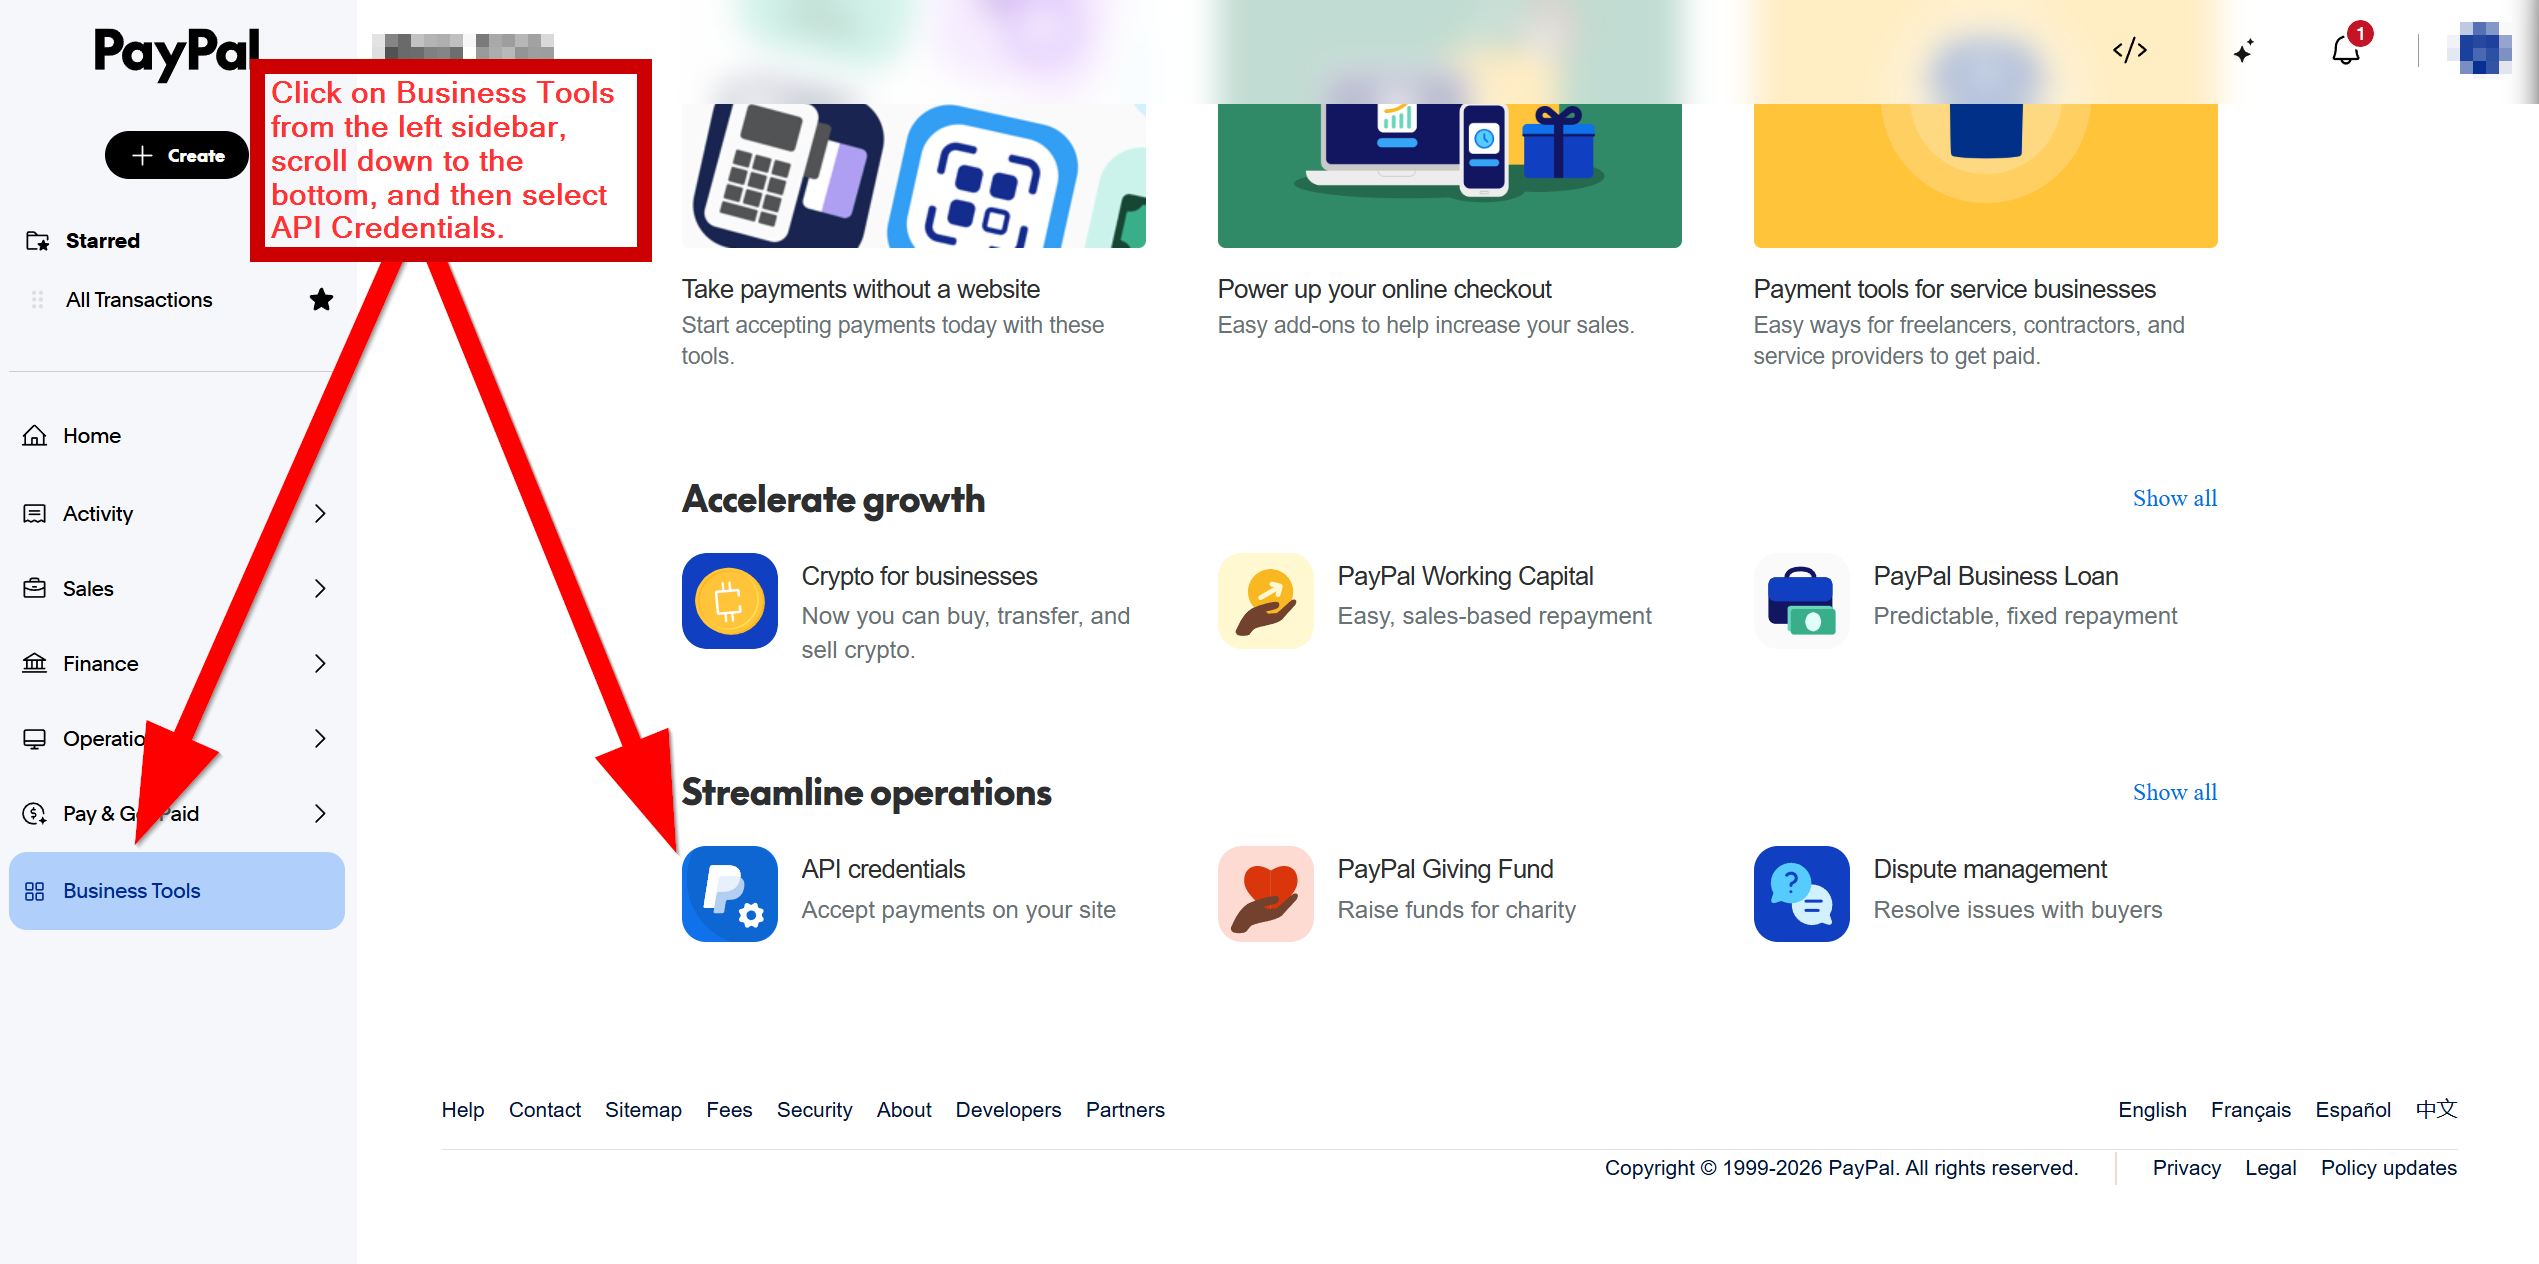
Obtaining API keys (PayPal):
To obtain your PayPal API, you'll need to log in to your PayPal account externally: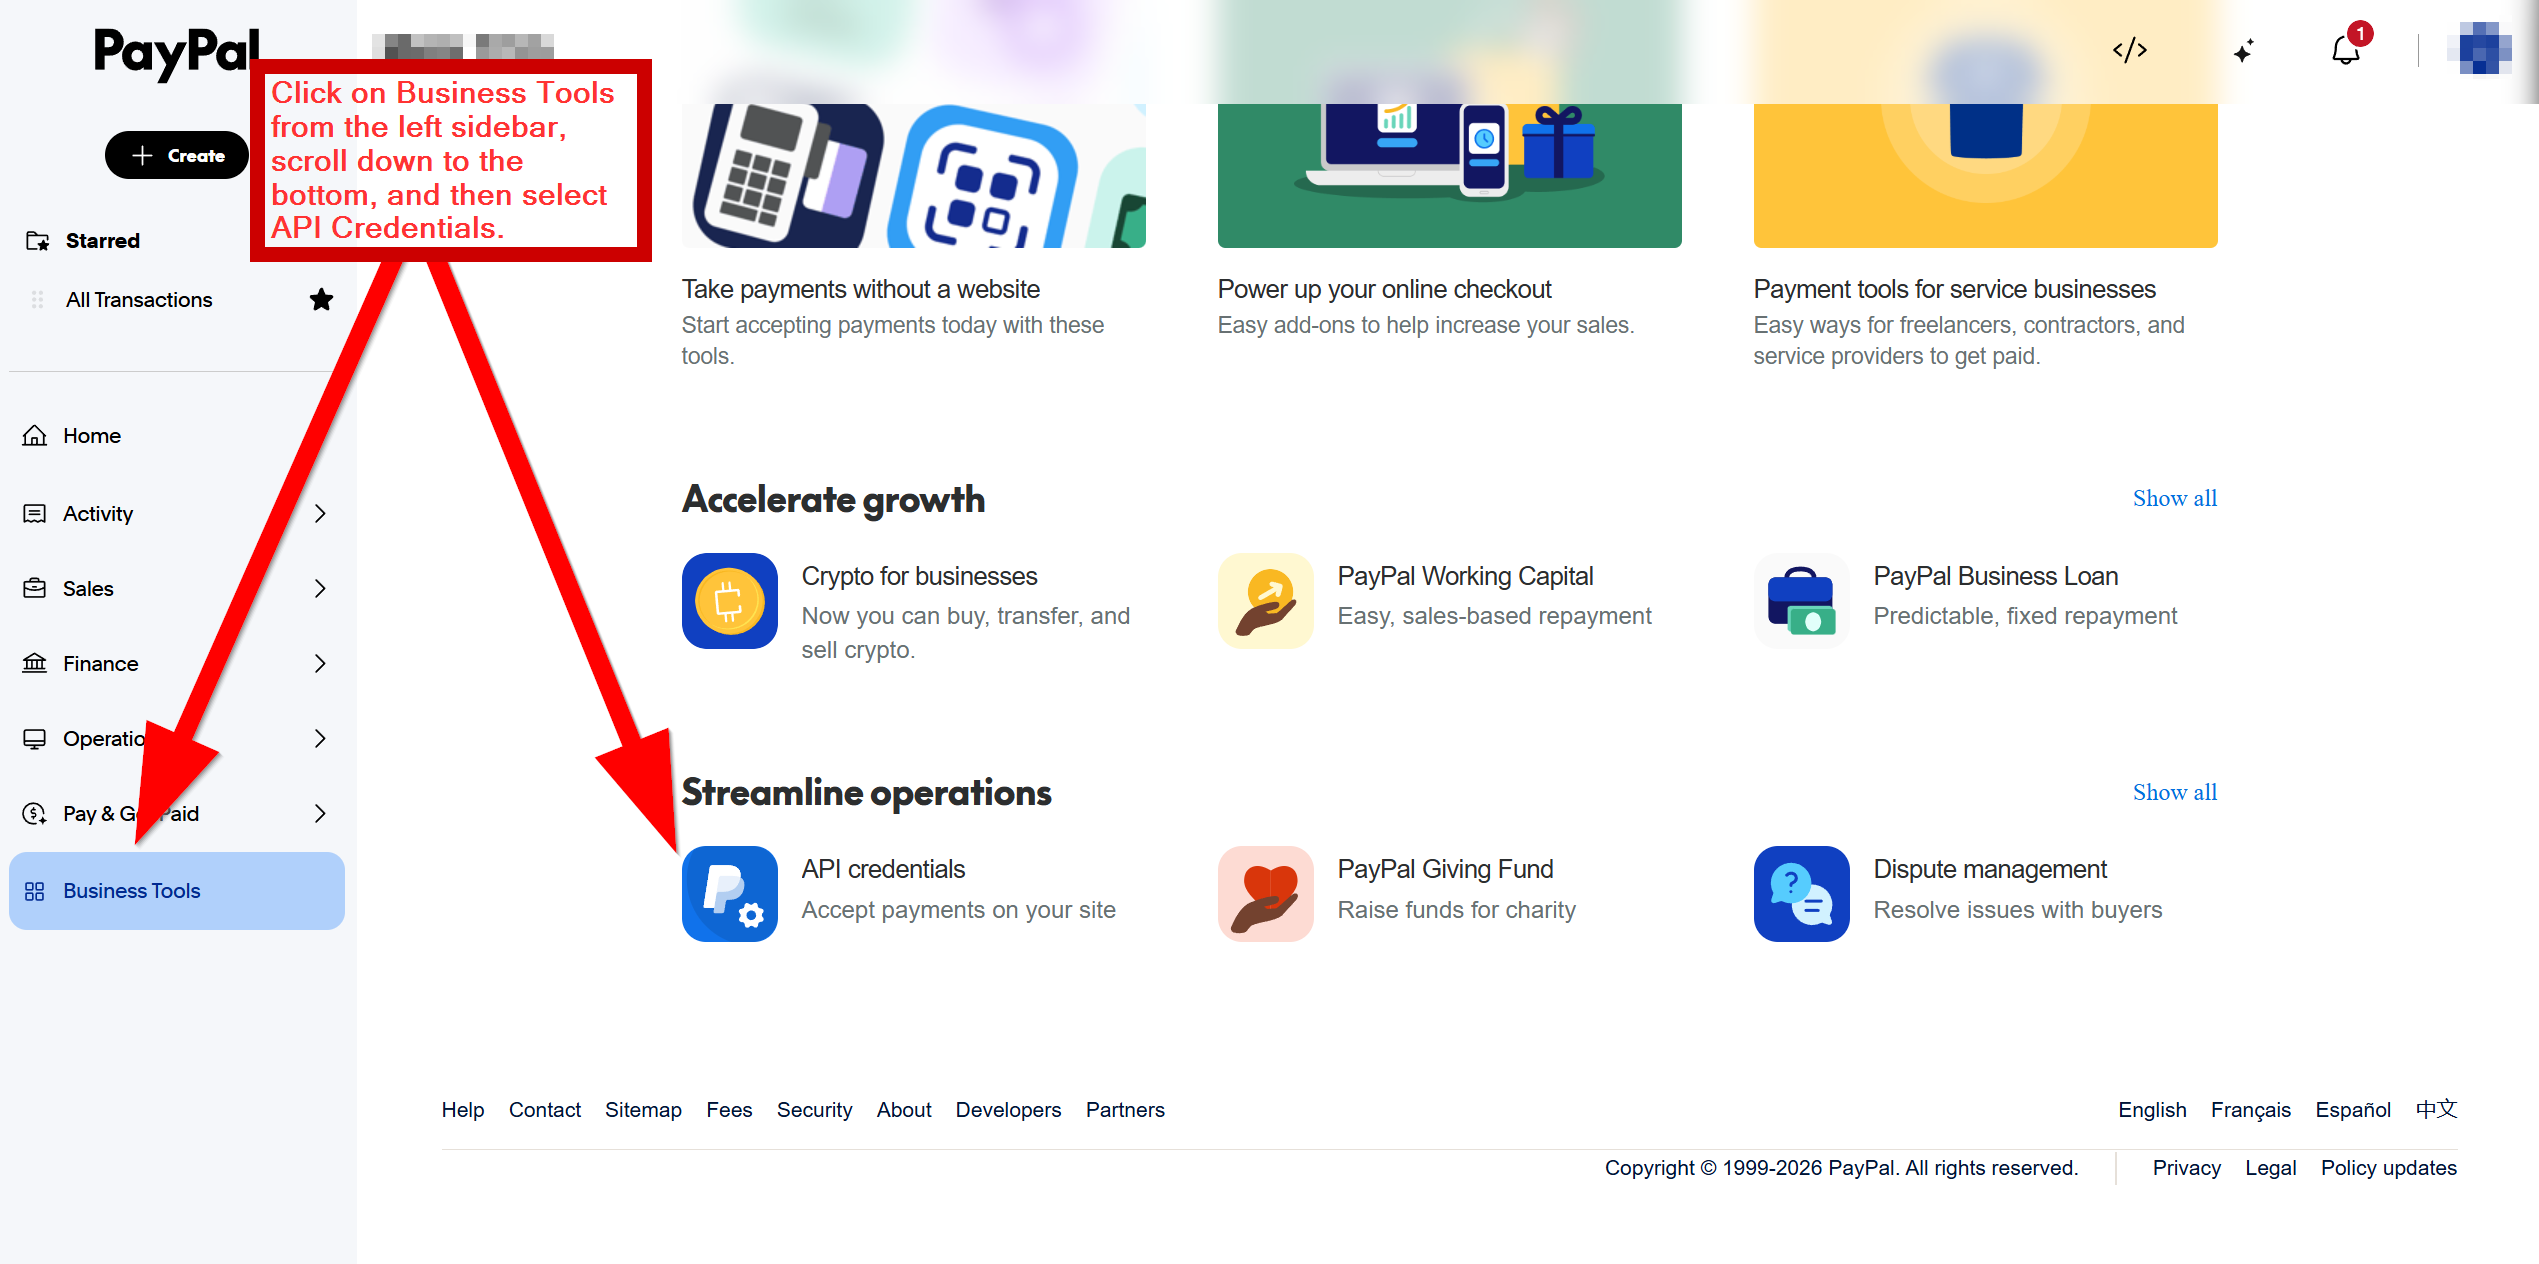
Obtaining API keys (USA ePay)
- Log in through your USA ePay portal (http://secure.usaepay.com/login)
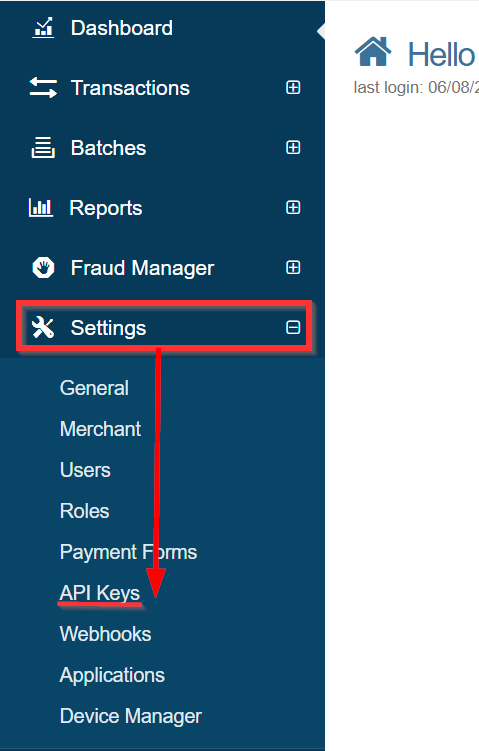
- Click 'Settings' in the navigation pane to the left, then click 'API Keys' in the dropdown menu
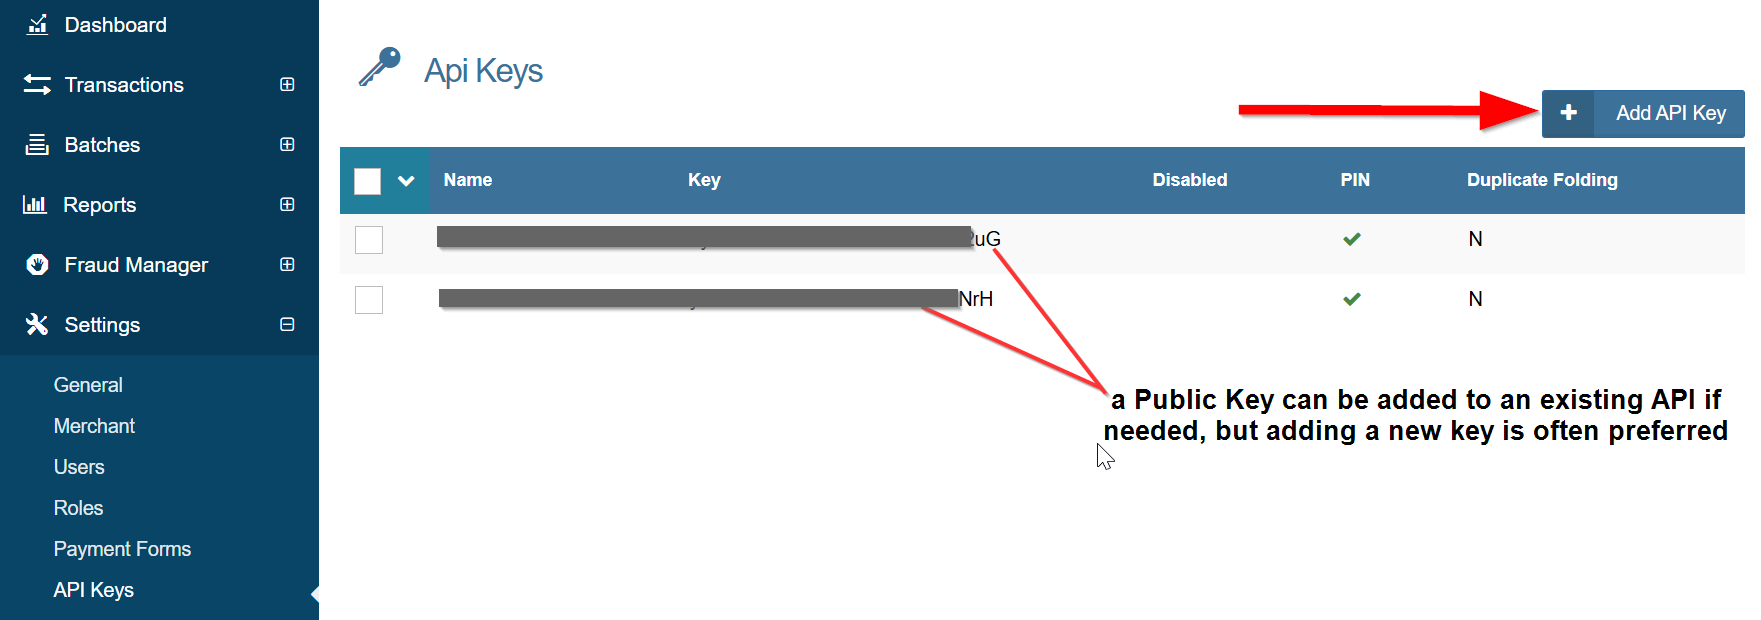
- Select an API Key to view or generate a new key
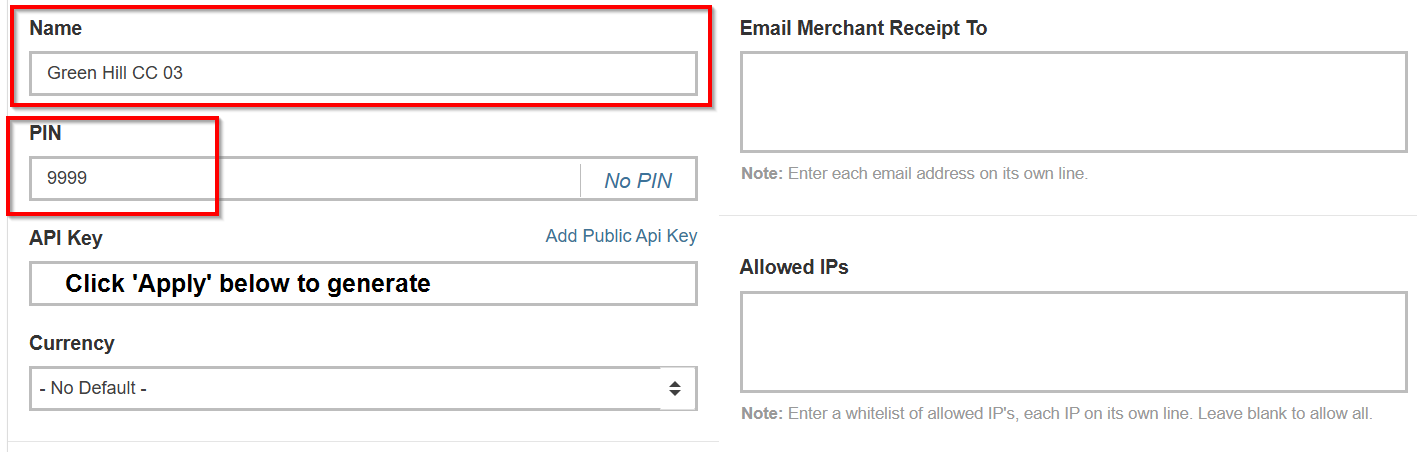
- On the new API Key generation page, enter a name for the new key
- Enter a desired pin number
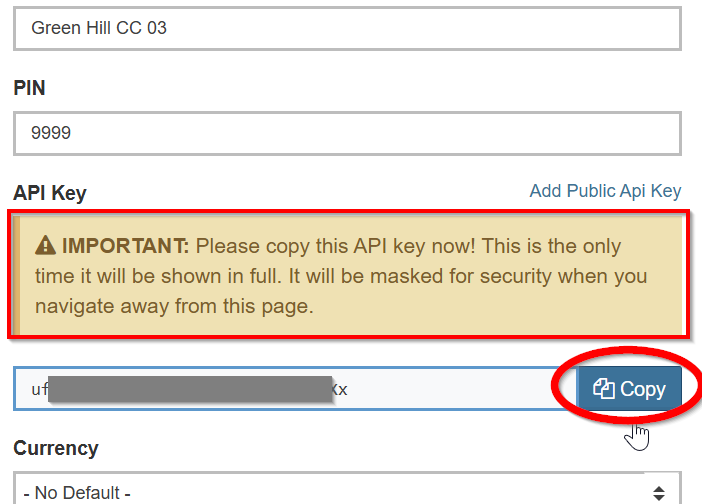
- Click the 'Apply' button in the bottom right and your key will now be generated in the field on the left
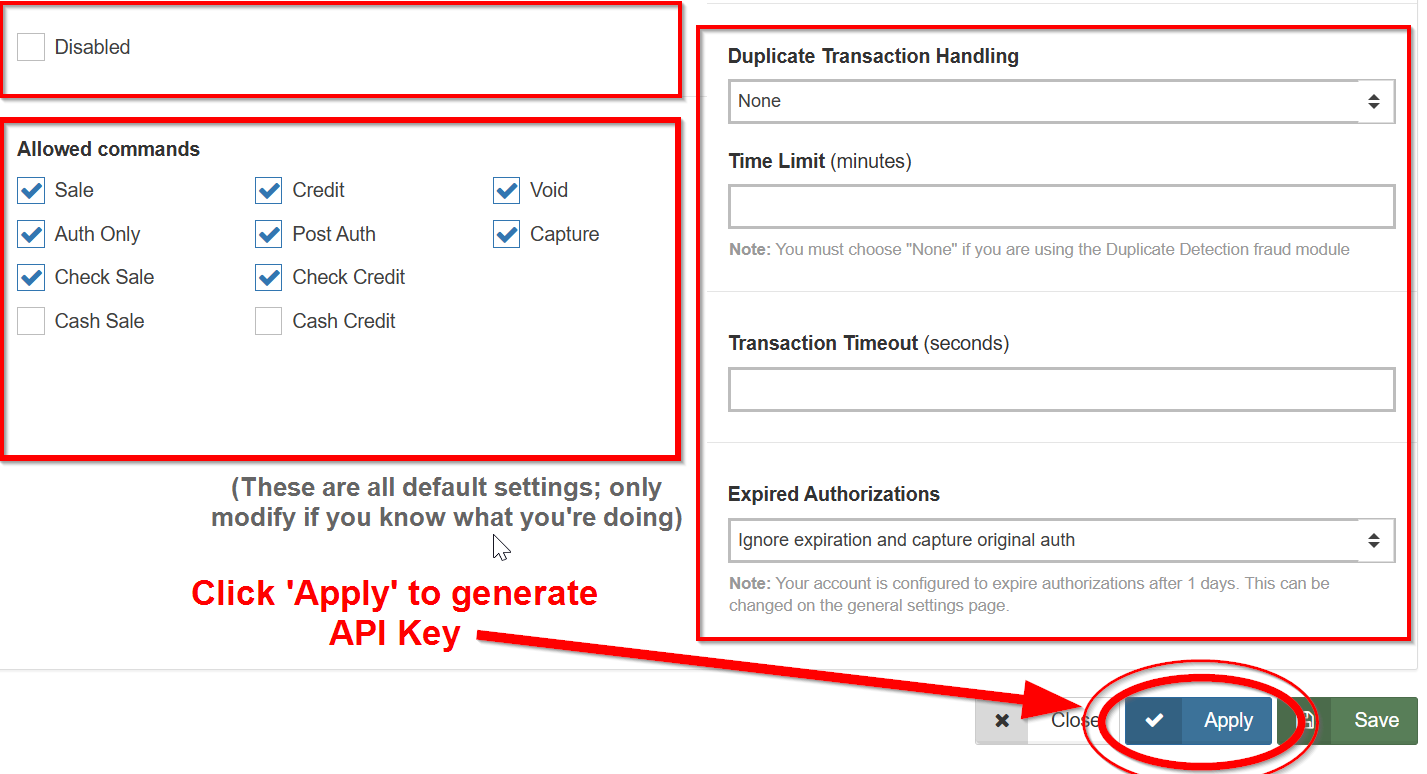
- Copy the key and paste into ShadowPOS now. For security reasons, you won't be able to view it again if you exit and return.
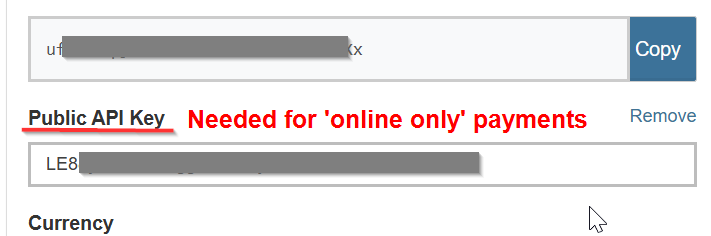
(For 'online only' payment): You'll also need a paired 'Public' key. Click 'Add Public API Key' to generate.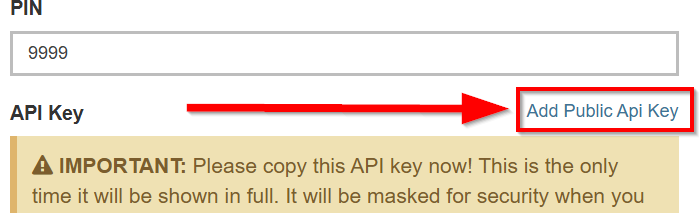
(For 'online only' payment): Copy and paste this into ShadowPOS. This key can be retrieved again later if needed
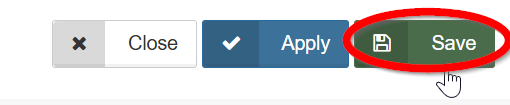
- Save before exiting
Note: The 'Public API Key' is used only for ePay Online configurations, not instore card terminals
Was this article helpful?
That’s Great!
Thank you for your feedback
Sorry! We couldn't be helpful
Thank you for your feedback
Feedback sent
We appreciate your effort and will try to fix the article